16 BAS-SVX40A-EN
Mounting and Wiring the WCI
Repeater Applications
Note: For more information about the use of repeaters with Wireless Comm, see the Wireless
Comm Network Design Best Practices (BAS-SVX55).
To install a WCI to function as a repeater:
1. Remove power from the controller that is to have the WCI wired to it.
2. Remove the WCI cover by firmly pressing the thumb tab at the bottom of the cover and pulling
the cover away from the back plate (Figure 3, p. 12).
Note: If present, remove the security screw before removing the cover.
3. Secure the backplate to the mounting surface using appropriate hardware. (M3.5 x 20 mm self-
drilling screws are provided.)
4. Attach the 4-connector screw terminal block on the wiring harness to the receptacle on the WCI
(Figure 4).
5. Remove the blue (IMC+) and gray (IMC-) wires from the wiring harness.
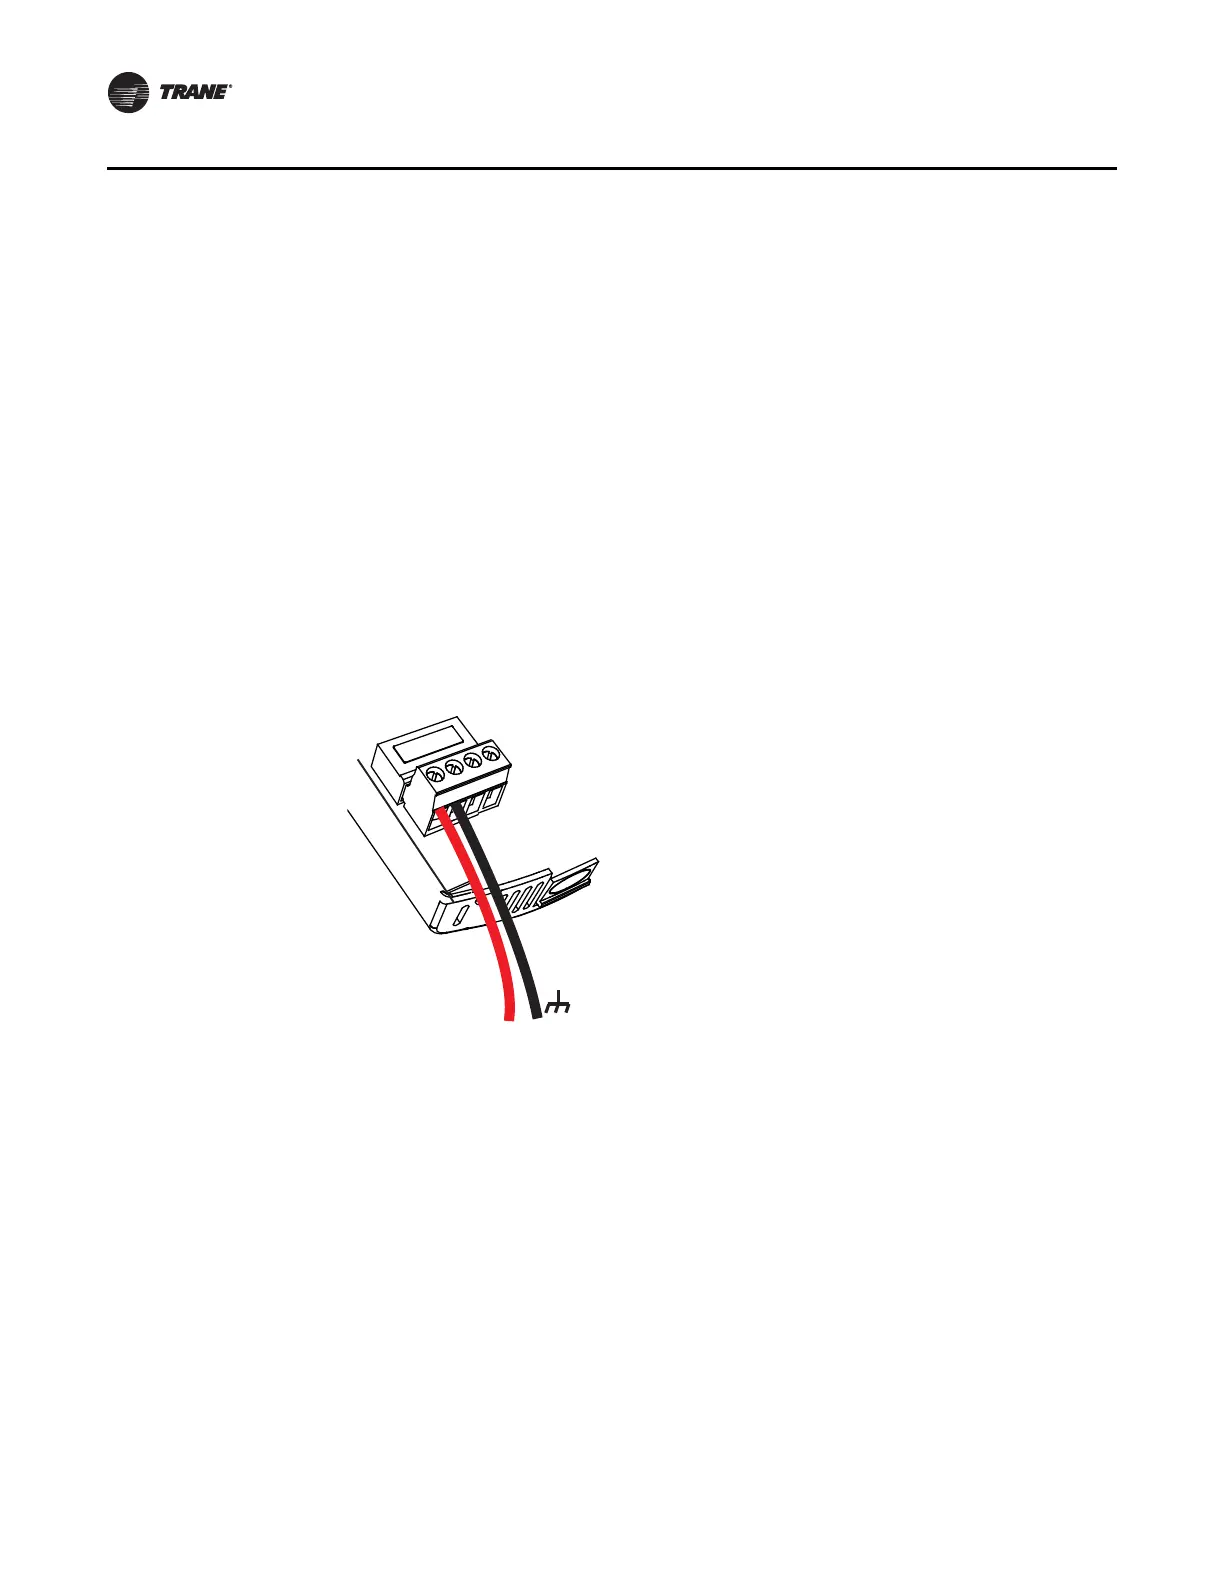
6. Connect the red (24 Vdc/Vac) wire and black (ground) wire through the opening in the backplate
(Figure 5a) or the bottom exit port (Figure 5b) to a 24 V power source.
Figure 11. Wiring a WCI as a repeater
7. Restore power to the controller.
8. If the WCI communication wire was previously connected to a unit controller, return the WCI
to its default configuration as follows:
a. Set its rotary address switch to 0,0 (the WCI must be powered).
b. Observe its LEDs blink On briefly (<1 second).
c. Reset its rotary address switches to the correct network address.
You are now ready to add the repeater to an existing network (refer to “Adding Additional WCIs
to an Existing Network,” p. 22) or to proceed with establishing a new network (refer to
“Establishing the Network,” p. 17).
+24 VDC/VAC
 Loading...