Interconnections
Installation Notes
• Apollo may get hot during normal operation if it doesn’t receive adequate airflow circulation around its
chassis vents. For optimum results when mounting Apollo in a rack, we recommend leaving at least
one empty rack space above the unit to allow adequate airflow for cooling.
• As with any sound system, to avoid audio spikes in your speakers, the following steps are
recommended:
1. Apply power to the speakers last, after all other devices (including Apollo) are powered on.
2. Turn off the speakers first, before all other devices (including Apollo) are powered off.
Basic Setup
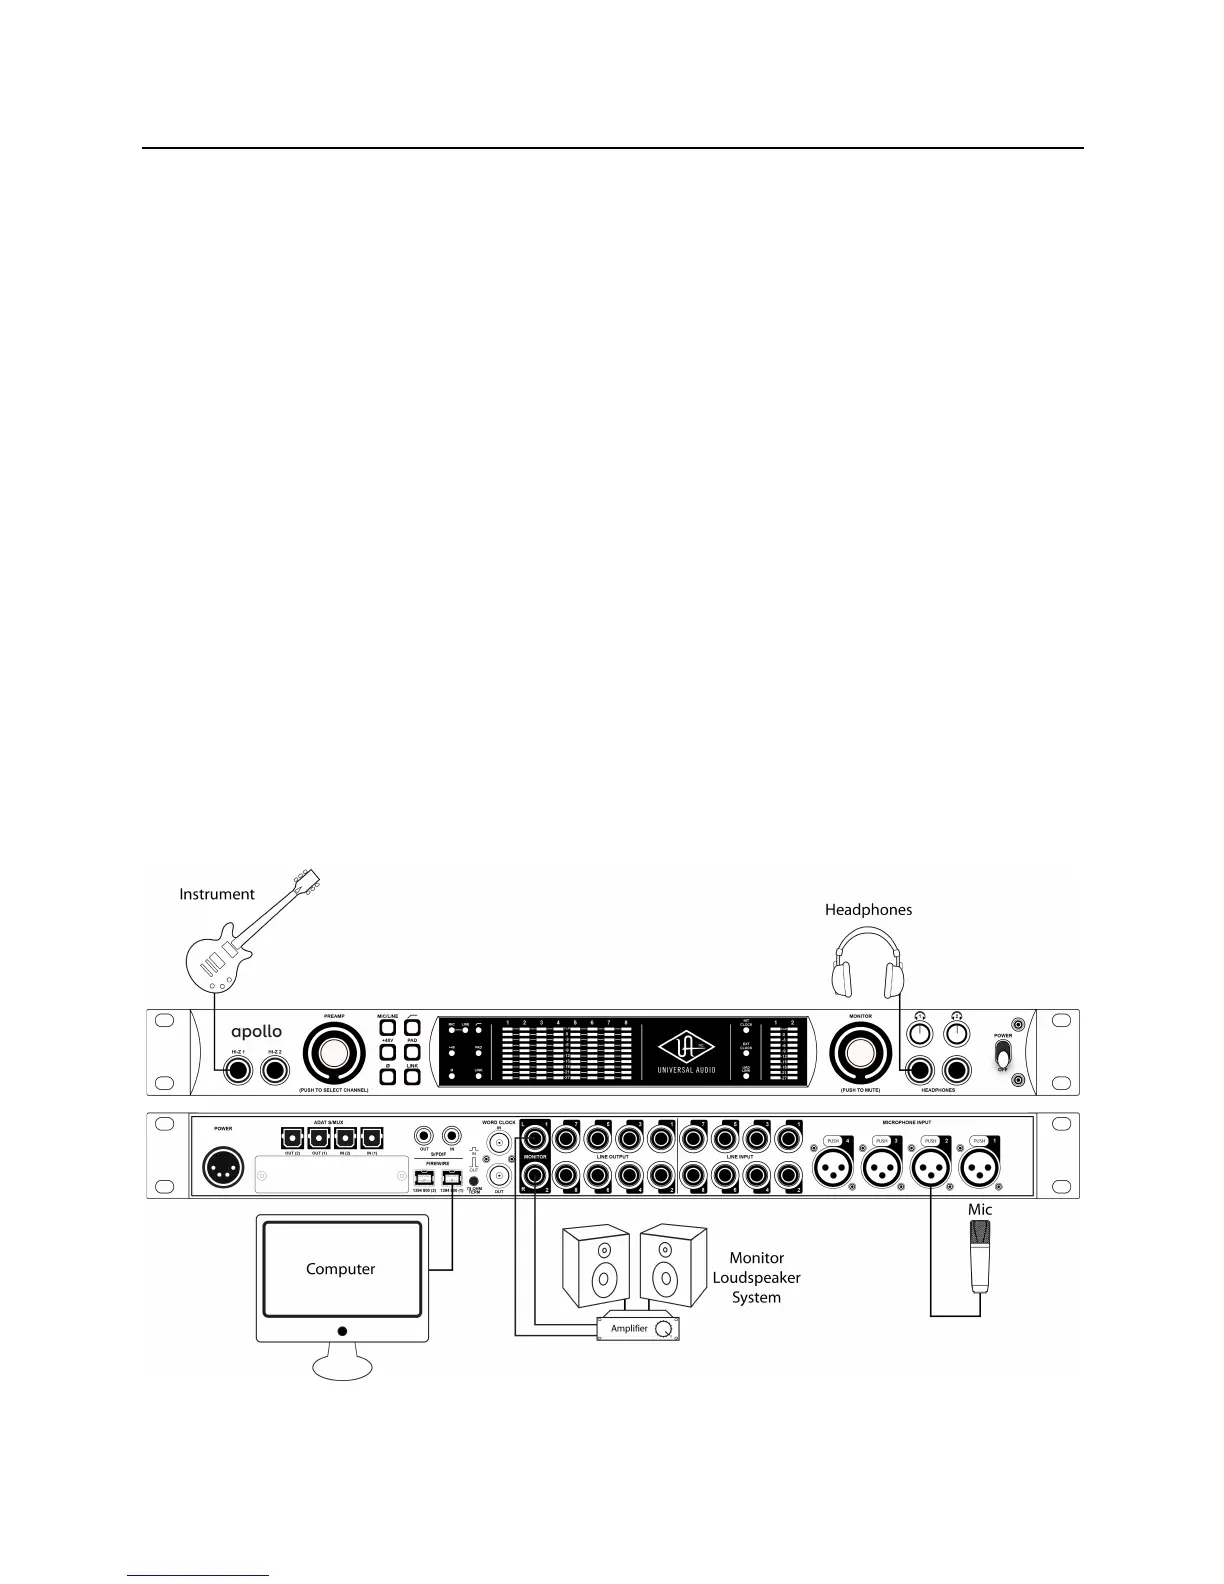
This diagram illustrates a simple Apollo setup that might be used by an individual musician/engineer for
recording and mixing.
The example shows an electric guitar connected to the Hi-Z input of channel 1 and a microphone connected to
the XLR input of channel 2 so they can both be recorded simultaneously. Headphones are used during tracking
to avoid track bleed from the monitor speakers (Monitor Mute is enabled during tracking). The left and right
monitor outputs are connected to a loudspeaker system for use during mixdown.
Key points for this example:
• Two preamp channels are used (electric guitar and microphone)
• Mic/Line switch for channel 2 is set to “Mic”
• Monitor outputs are connected to powered monitors (or an amp+speaker system)
 Loading...