7
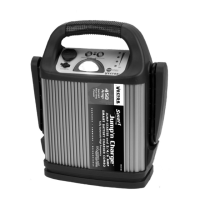
2. FRONT PANEL
Indicators
Each indicator has a distinctive meaning. For instance the;
FAULT LED indicates the clamp/cable connection is reversed. REVERSE
CABLES will appear on the LCD display. Once the clamps/cables are
connected correctly, READY TO START will appear on the LCD display.
ALARM sounds to indicate there is a low battery function. The LCD display
will show a blinking BATTERY LOW RECHARGE SOON. The ALARM will
also sound when the clamp/cable connection is reversed.
ON/OFF button turns the LCD display on and off. Be sure to turn off the
display to save unit’s battery when unit is not in use.
GREEN LED lights to indicate the unit is ON when the ON/OFF button is
pressed.
Function Modes
Each of the function buttons perform a different task. You must leave a
function mode (by pressing the function button a second time) before
entering another function mode.
Press the unit’s ON/OFF display button before pressing any function button
will light the LCD display.
Pressing;
ON/OFF - will turn the unit’s display on and off.
LIGHT - turns the area light ON and OFF.
CHARGE LEVEL - displays the internal battery percentage of the jumpstarter.
(This button will not be active if you are in the ALTERNATOR CHECK mode.)
ALTERNATOR CHECK - CONNECT CABLES TO VEHICLE will show on the
LCD display, unless clamps are connected to the vehicle properly, Once the
jumpstarter clamps are connected to the vehicle, the LCD display will show
TESTING and after 5 seconds, ALTERNATOR GOOD or ALTERNATOR
BAD will appear on the LCD display.
NOTE: Clamps must remain connected to jumpstart the vehicle.
SYSTEM CHECK - pressing this function button will cause the unit to do a self
test, i.e., the area light will flash, the compressor will turn on and the unit
will do an internal battery check.
INFLATOR - SET 0 PSI ACTUAL 0 PSI appears on the LCD display.
DN (down)arrow - to set lower pressure (PSI).
UP arrow - to set a higher pressure (PSI).
Press the INFLATOR button a second time to begin inflating, PUMPING will
appear on the LCD display. The compressor will stop automatically when
the desired pressure is reached.
 Loading...