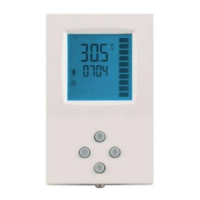
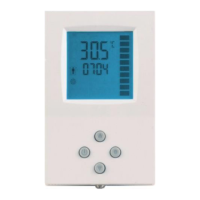
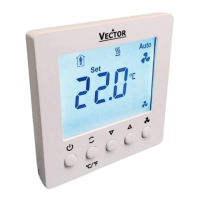
TCI-W11-U, TCI-W22-U Universal Controller
DISPLAY AND OPERATION
Doc: 70-00-0140C, V2.0-20220523 © Vector Controls LLC, USA Page 8-24
Subject to alteration
Clock operation
TCI-W22-U contains a quartz clock with battery back-up (not available in TCI-W11-U). Up to 8 mode changes based on time
and day of the week may be programmed. Also position an output or select a set point directly with a time schedule. A
blinking clock indicates that the time has not been set or that the unit has been without power for longer than 48 hours. The
time needs to be set to allow time schedules to operate.
Clock setup
Press OPTION > 2 sec. SEL and current time displayed
Press RIGHT < 2 sec. to change time,
Minutes blink: UP/DOWN to change, RIGHT to save minutes,
Hours blink: UP/DOWN to change, RIGHT to save hour,
Press RIGHT to save time,
DAY1 blinks: UP/DOWN to change, RIGHT to save day (day of the week: DAY1 =
Monday)
Enable/disable time schedules
Press OPTION > 2 sec. SEL and current time displayed
Press UP:
SEL and PRO displayed, clock symbol blinks
Press RIGHT:
Time schedule status displayed OFF or ON:
Press RIGHT
OFF/ ON blinks, UP/DOWN to change, RIGHT to save
Creating time schedules
Step 1: Select a switching time (Up to 8, Pr01–Pr08)
Press UP while PRO-ON displayed:
Large digits display Pr01, small digits display 00:00
Press RIGHT: 00:00 blinks
Press UP/DOWN to select Pr01switching time from 00:00–23:45 (15 minutes steps)
Press RIGHT to save switching time (bar appears indicating step 1 complete):
DAY 1 blinks
Step 2: Apply selected switching time (Pr01) to DAY1 (Mon) – DAY 7 (Sun)
While Pr01 is displayed and DAY1 is blinking:
Press UP:
Activate Pr01 switching time for DAY1 (triangle appears on 1),
Press DOWN:
Deactivate Pr01 switching time for DAY1(triangle disappears)
Press RIGHT to save Pr01 DAY1 (2
nd
bar indicates step 2 complete):
Repeat for DAY2 – DAY7
Pr01
DAY1
1 2 3 4 5 6 7
Step 3: Select action for switching time (Pr01+Days)
After Pro1, DAY1–DAY7 is completed (Pro1 switching time activate or deactivate on desired days), press RIGHT
again to come to desired action for Pro1. The following options appear in order:
No = switching time not active
OP = operation mode (select ON (Comfort/Occupied), ECO (Economy/Unoccupied), OFF)
L1 = set point of loop 1 (select set point)
L2 = set point of loop 2 (select set point)
d1 = ON/OFF status of do1 (output must be in manual mode)
d2 = ON/OFF status of do2 (output must be in manual mode)
A1 = set point (0-100%) of ao1 (output must be in manual mode)
Press UP/DOWN to scroll through the 7 possible actions (3
rd
bar indicates step 3 complete)
Press RIGHT to select one
Step 4: Complete switching event (e.g. Pro1 = 08:00, DAY 1, Occupied mode)
After switching type is set, select characteristic of the action as listed in table above. Available actions blink as
you scroll through them:
Characteristics of action (e.g. 0–100% for A1) appear (4
th
bar indicates step 4 complete)
Press UP/DOWN to select characteristic of action, RIGHT to complete
Repeat for Pr02 - Pr08
 Loading...