EasyManua.ls Logo

VERITAS Elastica User Manual

VERITAS Elastica
32 pages
To Next Page IconTo Next Page
To Previous Page IconTo Previous Page
Page #2 background image
We congratulate you on your purchase of your sewing machine.
You have bought a quality product which has been made with great care and, if
serviced right, will serve you well for many years.
Before using it for the first time, we ask you to read the manual at hand carefully,
paying special attention to the safety instructions.
Persons who are not familiar with this manual must not use the appliance.
In this manual, you will find everything there is to know about possible
applications of your sewing machine. Should any questions remain unanswered,
we kindly ask you to turn to your dealer.
We wish you much pleasure and great sewing successes!
Questions concerning machine, service and customer care
DEAR CUSTOMER
Service address: Veritas Service Center
c/o Teknihall GmbH
Breitefeld 15
DE-64839 Münster
GERMANY
Toll-free
customer service number: 00800 333 00 777
service-uk@veritas-sewing.com
Question and Answer IconNeed help?

Do you have a question about the VERITAS Elastica and is the answer not in the manual?
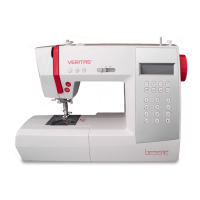
VERITAS Elastica Specifications

General IconGeneral
Maximum Stitch Width7 mm
DisplayLCD
Start/Stop ButtonYes
Speed ControlYes
Voltage220-240V
Power70W
TypeElectronic
Speed850 stitches/minute
Stitch Optionsdecorative
BobbinTop-loading
Needle ThreaderAutomatic

Summary

Intended Use

Electric Shock Due to Humidity

Warning about storing and using the machine only in dry environments to prevent electric shock.

Eye Injuries Due to Broken Needle

Caution against sewing hard materials or forcing fabric, which can cause needle breakage and injury.

Needle-Prick Injuries from Accidental Operation

Emphasizes adult supervision and safety measures to prevent accidental needle pricks.

Injury Risk from Defects or Modifications

Warns against modifying the machine or using non-original parts, which can lead to injuries.

Accidents from Unsuitable Installation Sites

Advises operating the machine on a stable surface to prevent falls or injuries.

Needle-Prick Injuries from Lack of Attention

Highlights the importance of focus and a tidy workspace to avoid needle-related injuries.

Important Safety Instructions

General Safety Precautions (1-17)

Comprehensive safety guidelines to prevent electric shock, injuries, and misuse of the sewing machine.

Accessories

Setting Up Your Machine

Preparation for Threading

Changing Presser Feet

Changing Needle

2. Starting to Sew

Threading Your Machine

General advice and the required sequence for threading the overlock machine correctly.

Step 1: Threading Lower Looper

Detailed steps for threading the lower looper of the sewing machine.

Step 2: Threading Upper Looper

STEP 3 and 4 Threading Needles

Testing Stitch Overlock Stitches

Setting Chart

Three-Thread Overlock with One Needle

Converting to Two-Thread Use

Adjusting Thread Tensions

Adjusting Stitch Length

Adjusting Overedge Cutting Width

Differential Feed

Setting Differential Feed

Foot Pressure Regulator

Sewing with Extra Heavyweight Fabric or Multiple Layers of Fabric

3. Caring for Your Machine

Cleaning and Oiling

4. Checking Performance Problems

Differential Feed Applications

Related product manuals