NUT (K)
CONSOLE BASE
CONSOLE
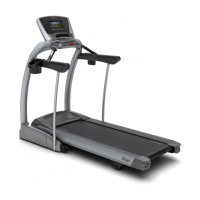
HARDWARE FOR STEP 5 :
A Open hardware for step 5.
B Remove 2 pre-installed screws to
remove console rear cover from the
console.
C Attach the console to the console base
using 2 bolts (i) and 2 flat washers
(h) from above and 2 flat washers (h) 2
spring washers (J) and 2 nuts (k) from
below.
D Connect the console cables to the
console.
E Re-attach the console rear cover to
the console using 2 pre-installed
screws.
F T40 ONLY: Insert support bar caps into
bottom of support bars.
BOLT (I)
45 mm
Qty: 2
NUT (K)
Qty: 2
SPRI NG
WASHER (J)
8 mm
Qty: 2
FLAT
WASHER (H)
8 mm
Qty: 4
NOTE: Be careful not to pinch the console
cables while attaching the console.
T40 ONLY:
TF20
ONLY
BOLT (A)
20 mm
Qty: 6
SCREW (M)
20 mm
Qty: 4
SPRI NG
WASHER (B)
8.2 mm
Qty: 6
ARC
WASHER (E)
8.4 mm
Qty: 6
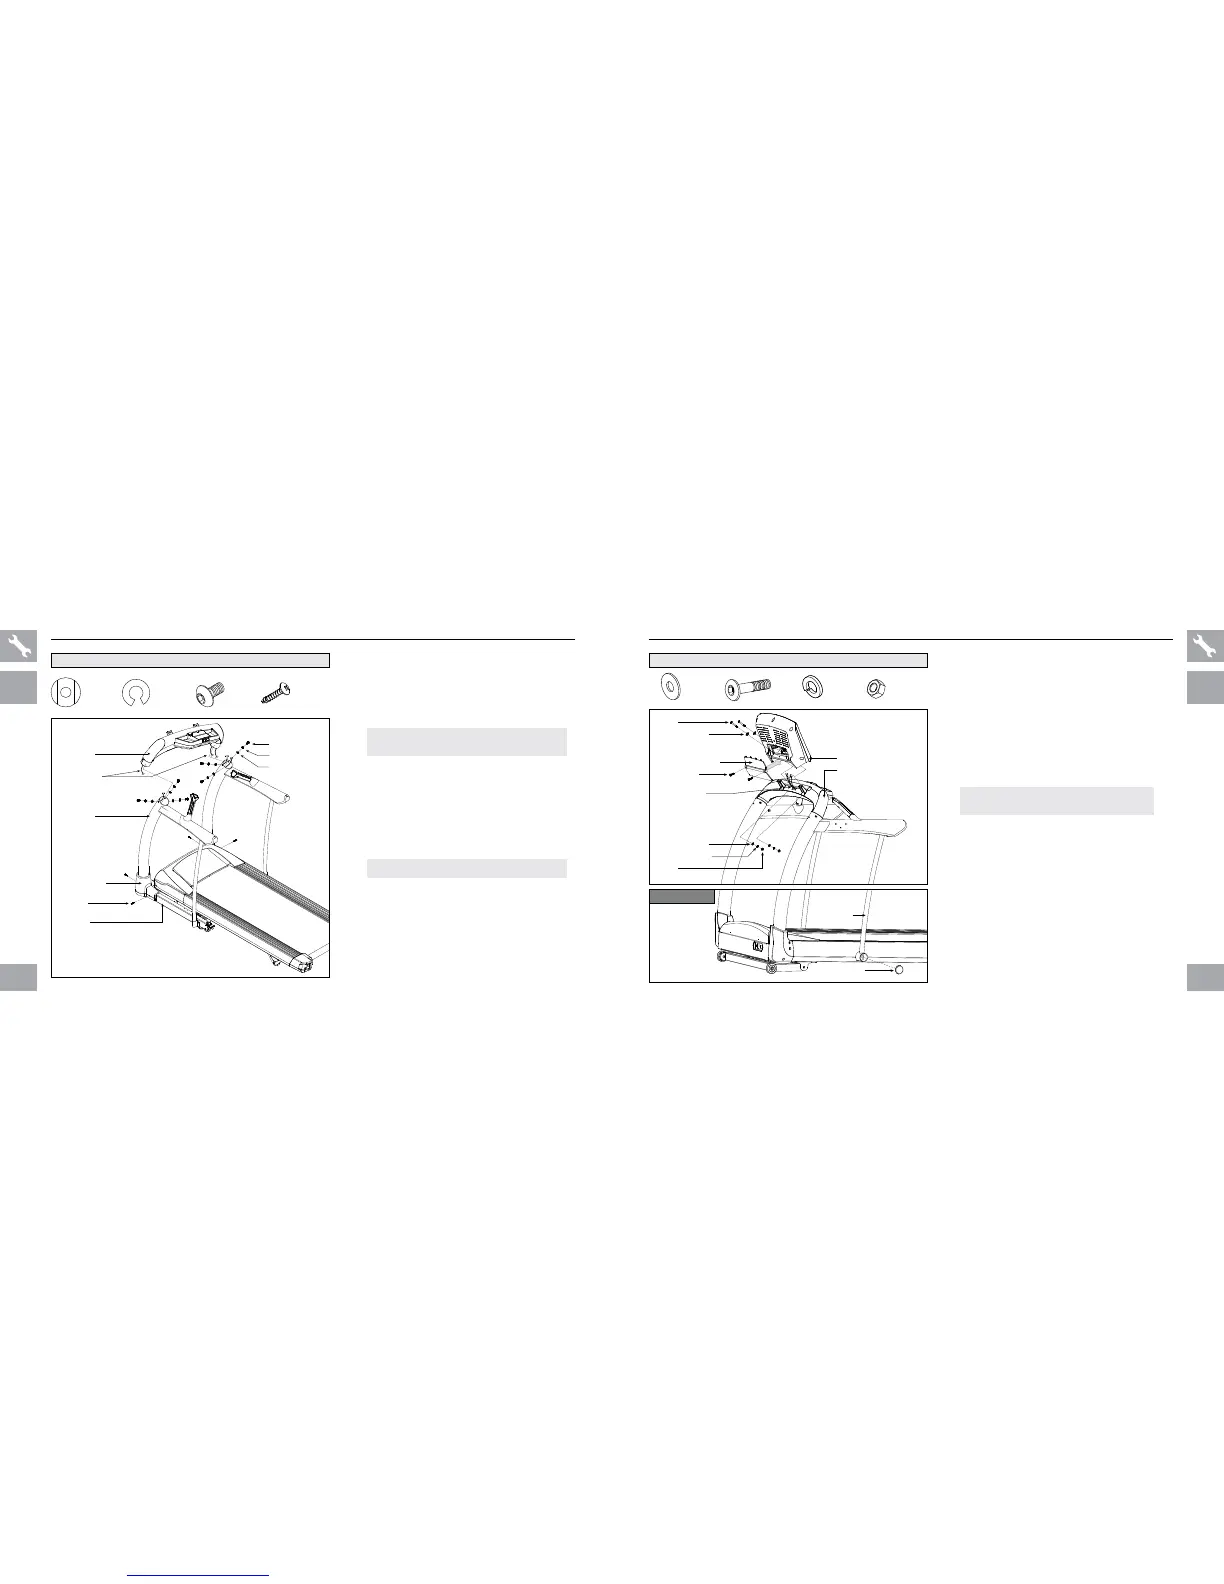
TF20 ASSEMBLY STEP 4
HARDWARE FOR STEP 4 :
BASE FRAME
SCREWS (M)
BASE FRAME COVER
ARC WASHER S (D)
SPRI NG WASHER S (B)
BOLTS (A)
CONSOLE BASE
CONSOLE CABLES
CONSOLE MAST
NOTE: This step is for TF20 models only.
A Open hardware for step 4.
B Gently place console base on top of
console masts.
NOTE: Be careful not to pinch the console
cables while attaching the console base.
C
Connect the console cables and tuck
them inside the console masts and slide
console base into console masts.
D Connect the console base to console
masts using 6 arc washers (e), 6
spring washers (b) and 6 bolts (a).
NOTE: Tighten all bolts from STEPS 1–3.
E
Attach base frame covers to base
frame using 4 screws (m).
TF20 ONLY
 Loading...