10 11
TOOLS INCLUDED:
F 5 mm T-Wrench
F 13 mm Hex Wrench
F 4 mm L-Wrench
F 5 mm L-Wrench
F 6 mm T-Wrench
F 8 mm T Wrench
F Screwdriver
PARTS INCLUDED:
F 2 Console Masts
F 2 Handlebars
F 2 Support Bars
F 2 Support Bar Caps (T40)
F 2 Sets Base Frame Covers
F 1 Console Base
F 1 Console Base Cover
F 1 Water Bottle Holder
F 1 Accessory Holder
F 1 Hardware Kit
F 1 Safety Key
F 1 Power Cord
DO NOT ATTEMPT TO LIFT THE TREADMILL! Do not move or lift treadmill
from packaging until specified to do so in the assembly instructions. You may
remove the plastic wrap from console masts.
WARNING
UNPACKING
Place the treadmill carton on a level flat surface. It is recommended that you place a
protective covering on your floor. Take CAUTION when handling and transporting this
unit. Once the banding straps have been removed, do not transport this unit unless it is
fully assembled. Unpack and assemble the unit where it will be used. Never grab hold of
any portion of the incline frame and attempt to lift or move the treadmill. Lift the treadmill
from the roller end caps area while a second person removes the parts packed under
the treadmill.
FAILURE TO FOLLOW THESE INSTRUCTIONS COULD RESULT IN INJURY!
WARNING
NOTE: During each assembly step, ensure that ALL nuts and bolts are in place and
partially threaded in before completely tightening any ONE bolt.
NOTE: A light application of grease may aid in the installation of hardware. Any grease,
such as lithium bike grease, is recommended.
PRE-ASSEMBLY
ALL
MODELS
If you have questions or if there
are any missing parts, contact
your authorized Vision Fitness
retailer.
NEED HELP?
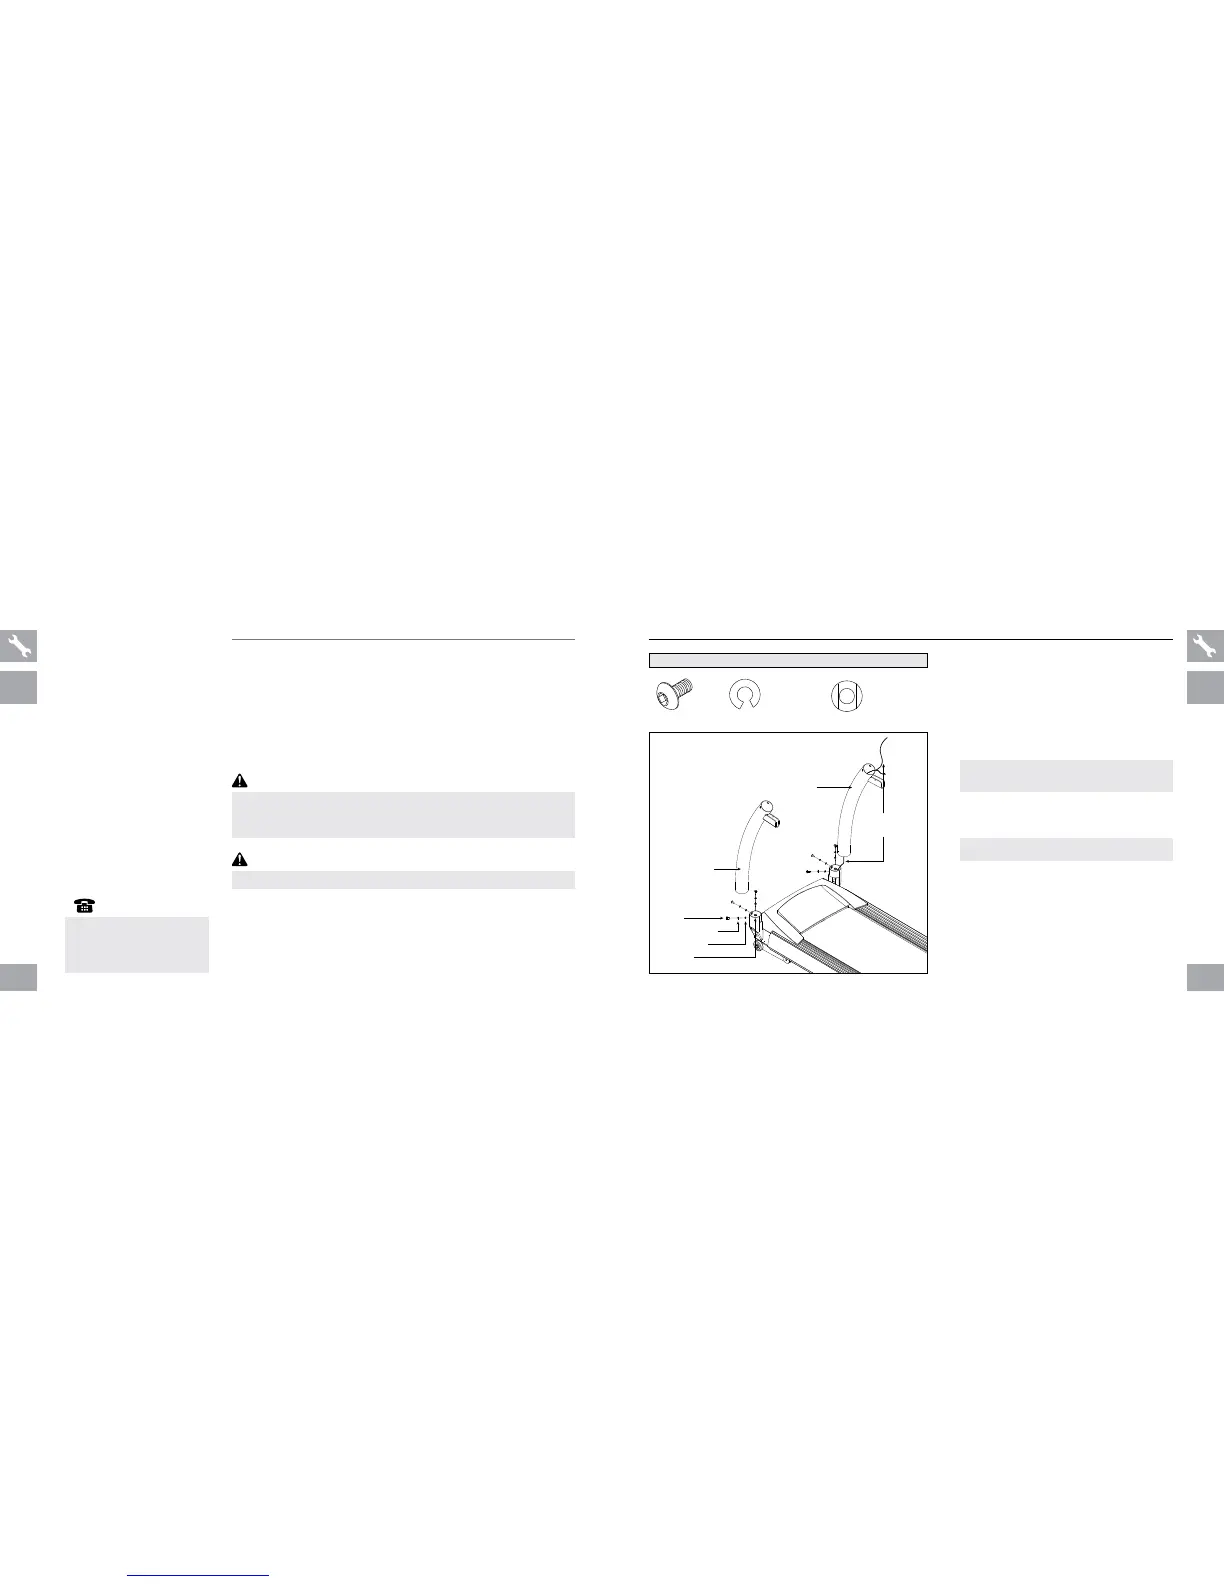
BOLT (A)
20 mm
Qty: 6
SPRI NG WASHE R (B)
8.2 mm
Qty: 6
ARC WASHER (C)
8.4 mm
Qty: 6
T40 HARDWARE FOR STEP 1 :
BOLTS (A)
SPRI NG WASHERS (B)
LEFT CONSOLE MAST
LEAD WIRE
CONSOLE CABLE
ARC WASHERS (C)
BASE FRAME
RIGHT CONSOLE MAST
T40 ASSEMBLY STEP 1
NOTE: This step is for T40 models only.
A Open hardware for step 1.
B Attach lead wire to console cable and pull
lead wire through right console mast. After
pulling the lead wire through the mast, the top of
the console cable should be located at the top
of the mast. Detach and discard lead wire.
N
C Attach console mast to base frame using 3
bolts (a), 3 spring washers (b) and 3 arc
washers (c).
D Repeat step C on other side.
NOTE: Do not tighten bolts until step 4 is complete.
NOTE: Do not pinch console cable when placing
the mast onto the base frame.
T40
ONLY
T40 ONLY
 Loading...