Positioning the baby monitor
Caution
• Keep the baby unit out of the reach of your baby. Never place or mount the baby unit inside the baby’s crib or playpen.
Note
• To avoid interference from other electronic devices, place your baby monitor far away from devices such as
wireless routers, microwaves, cell phones and computers.
1. Place the baby units more than 3 feet (1 meter) away from
your baby.
2. Place the parent unit more than 6.5 feet (2 meters) away
from the baby unit to avoid screeching noise.
Caution
• The default volume of your parent unit is Level 3, and the
maximum volume is level 5. If you experience high-pitched
screeching noise
from your baby monitor while positioning:
- Make sure your baby units and parent unit are more than
6.5 feet (2 meter) apart, OR
- Turn down the volume of your parent unit.
Operating range
The operating range of the baby monitor is up to 1,500 feet
(450 meters) outdoors or 160 feet (50 meters) indoors. The actual
operating range may vary depending on the environmental
conditions and other interferences such as walls, doors and other
obstructions.
Note
• This baby monitor is intended as an aid. It is not a substitute for proper adult supervision, and should not be used as such.
Test your baby monitor
You may test the baby monitor before initial use, and at regular times thereafter.
Caution
• For hearing protection, make sure the parent
unit is more than 6.5 feet (2 meters) away from
the baby unit. If you hear any high-pitched
noise, move the parent unit further until the
noise stops. You can also press on the parent
unit to lower or mute the noise.
1. Make sure your baby unit and parent unit are on.
2. Speak towards the microphone of the baby unit. You
will hear the sound at the parent unit, and see the
visual sound indicators light up.
Note
• When the POWER/LINK LED light flashes, move the parent unit closer to the baby unit (observe the
minimum distance of 6.5 feet / 2 meters). You can also check if the baby monitor is connected to a live power
socket and switched on.
Tip
• Increase the speaker volume of the parent unit if you cannot hear the sounds transmitted from the baby units.
This is an AC powered baby monitor. If you want to move around the house with the parent unit
for a few minutes, you can install two AAA alkaline batteries for backup use. Re-connect the baby
monitor to a non-switched electric outlet once you are settled down.
Notes
• Use 2 x AAA batteries (not included). Alkaline batteries are recommended. If you use other kind of batteries,
the performance of the baby monitor varies.
• NO BATTERY RECHARGING from the parent unit.
• Do not mix old and new batteries. Do not mix alkaline, standard (Carbon-Zinc) or rechargeable (Ni-Cad,
Ni-Mh, etc) batteries.
• While you insert the batteries, make sure the polarities are correct.
• When the batteries are installed, the parent unit turns on.
• Replace the batteries when the light flashes on the parent unit, or you hear two beeps every 10 minutes.
Install the batteries as shown below.
1. Press down on the battery compartment cover to slide it out.
2. Insert two AAA alkaline batteries into the battery compartment, according to the polarity
indications (+) and (-).
3. Slidethe battery compartment cover until it clicks into place.
Replace the battery
To replace the batteries, slide open the battery compartment cover, and then take out the batteries.
Follow the previous steps to install the new batteries.
4
Install batteries for backup use (Optional)
Frequency control Crystal controlled PLL synthesizer
Transmit frequency Baby unit: 1921.536 - 1928.448 MHz
Parent unit: 1921.536 - 1928.448 MHz
Channels 5
Nominal effective range Maximum power allowed by FCC and IC. Actual operating range may vary
according to environmental conditions at the time of use.
Power requirements Baby unit adapter: Input: 100-120V AC 60Hz; Output: 6V DC @ 400mA
Parent unit adapter: Input: 100-120V AC 60Hz; Output: 6V DC @ 400mA
Parent unit battery: 2 X AAA alkaline batteries
Technical specifications
Specifications are subject to change without notice.
© 2018 VTech Communications, Inc.
All rights reserved. 11/18. DM1111-X_CIB_V4.0
Document order number: 91-010894-030-100
User’s manual
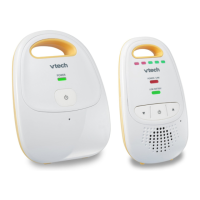
DM1111
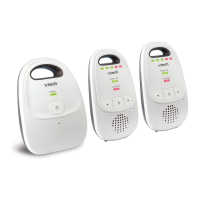
DM1111-2
Enhanced Range
Digital Audio Monitor
Go to www.vtechphones.com
to register your product for enhanced
warranty support and the latest VTech
product news.
Congratulations
on purchasing your new VTech product. Before using this product, please read Important safety
instructions.
This manual has all the feature operations and troubleshooting necessary to install and operate
your new VTech product. Please review this manual thoroughly to ensure proper installation and
operation of this innovative and feature-rich VTech product.
For support, shopping, and everything new at VTech, visit our website at www.vtechphones.com.
What’s in the box
Stra
n
gulation
Hazard
K
e
e
p
this
cor
d
o
ut
of
r
e
ach
o
f
ch
il
dren.
T
h
e
cord
n
e
eds
t
o
be
at
l
eas
t
t
h
ree fee
t
a
w
a
y
fr
om
t
h
e
chil
d
at
a
l
l
t
im
e
s
.
Do
n
ot
use
w
i
t
h
an
e
xten
s
io
n
co
r
d
.
Do
n
o
t
r
e
mo
ve
this
t
a
g.
É
l
o
ig
ne
z
ce
c
ord
o
n
d
e
s
e
nf
a
nt
s
. Le
cordon d
o
i
t se t
r
ou
v
e
r à
a
u m
o
i
n
s tr
oi
s
p
ie
d
s
d’u
n e
nf
a
nt
e
t ce, en to
ut
t
emps
.
N’
ut
i
li
s
ez p
as
d
e
ra
l
lon
ge.
N
e
r
et
i
r
e
z
pa
s
c
e
t
te
é
t
i
quet
te
.
M
an
t
en
ga est
e
c
able f
ue
ra de la al
c
a
n
ce
de
l
o
s
ni
ños
.
E
s
t
e cable d
e
b
e es
tar p
or
lo
men
o
s t
r
es
pi
es
f
uera de la alcanc
e
del n
i
ñ
o
en
t
o
do
m
omento
. N
o lo
u
s
e
con
u
n
a ext
en
s
i
ó
n
i
n
alámbri
c
a.
N
o
qui
t
e
es
t
a eti
quet
a.
Risq
u
e
d’
ét
r
anglem
ent
Ries
go de
e
strang
ula
ción
Stra
n
gulat
ion
Hazard
K
e
e
p
this
cor
d
o
ut
of
r
e
ach
o
f
ch
il
d
re
n.
T
h
e
co
rd
n
e
eds
t
o
be
at
l
eas
t
t
h
ree
fee
t
a
w
a
y
fr
om
t
h
e
child
at
a
l
l
t
im
e
s
.
Do
n
ot
use
w
i
t
h
an
e
xten
s
io
n
cor
d
.
Do
n
o
t
r
e
mo
ve
this
t
a
g.
É
l
o
ig
ne
z
ce
c
ord
o
n
d
e
s
e
nf
a
nt
s
. Le
cordon d
o
i
t se t
r
ou
v
e
r à
a
u m
o
i
n
s tr
oi
s
p
ie
d
s
d’u
n e
nfa
nt
e
t ce, en to
ut
t
emps
.
N’
u
t
i
li
s
ez
p
as
d
e
ral
lon
ge.
N
e
r
e
t
i
r
e
z
pa
s
c
e
t
te
é
t
i
q
u
et
te.
M
an
t
en
ga est
e
c
able f
ue
ra de la al
c
a
n
ce
de
l
o
s
ni
ñ
o
s
. E
s
t
e cable d
e
b
e es
tar p
or
lo
men
o
s t
r
es
pi
es
f
uera de la alcanc
e
del n
i
ñ
o
en
t
o
do
m
omento
. N
o lo
u
s
e
co
n
u
n
a ext
en
s
i
ó
n
i
n
alámbri
c
a.
N
o
qui
t
e
es
t
a eti
quet
a.
Risq
u
e
d’
ét
r
anglem
ent
Riesgo de
e
s
trang
ula
ción
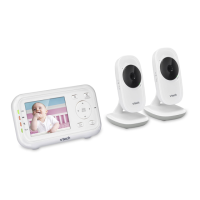
1 set for DM1111
2 sets for DM1111-2
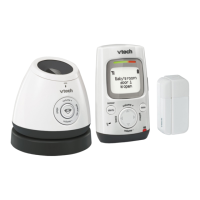
This is an AC powered audio baby monitor. Connect the baby monitor to a non-switched electric
outlet to power on.
Connect the baby monitor
When you have connected and turned on the baby unit and all the parent units, they will enter
pairing mode automatically. It takes around 10 minutes for the pairing process to complete. When
the parent unit and baby unit are successfully paired, both their power LEDs are on steadily. The
baby monitor is ready to use.
• Use only the power adapters supplied with this product.
• Make sure the baby monitor is not connected to a switch controlled electric outlet.
• Connect the power adapters in a vertical or floor mount position only. The adapters’ prongs are not
designed to hold the weight of baby monitor, so do not connect them to any ceiling, under the table, or
cabinet outlets. Otherwise, the adapters may not properly connect to the outlets.
• Make sure the parent unit, the baby unit and the power adapter cords are out of reach of children.
• Make sure the POWER light is on after the power plug is fully inserted into the power jack of the baby unit.
• With audio reminder feature preset to on, the parent unit plays an audio reminder when it is connected to a
baby unit.
1
Connect
2
Before use
Power on or off the baby unit
• Press and hold until the POWER light turns
on.
• Press and hold until the POWER light turns
off.
Power on or off the parent unit
• Press and hold until the POWER / LINK light
turns on.
• Press and hold until the POWER / LINK light
turns off.
Adjust parent unit speaker volume
The speaker volume is preset to Level 3 on the parent unit. You can adjust to your preferred sound level.
• Press to decrease the volume, and to increase the volume.
Note
• If you continue to press or when the volume reaches the minimum or maximum setting, the parent
unit will beep twice.
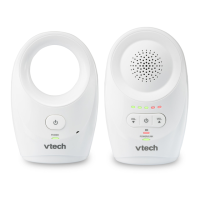
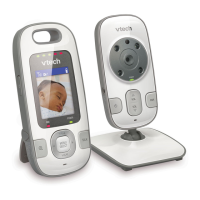
Using the baby monitor
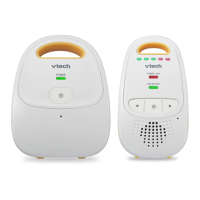
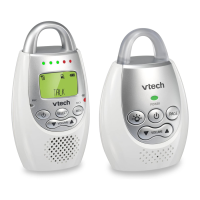
Baby unit overview
1
(On/off)
Press and hold to turn on or off the baby unit.
2 Microphone
3 POWER light
4 Power jack
Parent unit overview
1 Speaker
2
(On/off)
Press and hold to turn on or off the parent unit.
3
(Volume up)
Press to increase the speaker volume.
4 POWER / LINK light
5 Power jack
6 Visual sound indicator
Indicate the sound level detected by the baby unit or show the volume level during
speaker volume setting.
7
(Volume down)
• Press to decrease the speaker volume.
• Press repeatedly until the volume reaches the minimum to mute the parent unit.
8
(Low battery light)
9 Belt clip
10 Battery compartment cover
Before use (Con’t)
Using the baby monitor (Con’t)
To mute the speaker volume
• Press repeatedly until the volume reaches the
minimum.
Notes
• When the parent unit is in mute, the visual sound indicator
will still indicate the sound detected from the baby unit.
• To unmute, press repeatedly until it reaches your desired
volume.
Turn on or off the audio reminder
With audio reminder feature preset to on, the parent unit plays an audio reminder when it is
connected to a baby unit. It reminds you to place the baby unit at least 3 feet (1 meter) away from
your baby, and keep the cords out of the reach of children.
• Press and hold for 8 seconds when the parent unit is not in use. The visual sound indicators
flashes for 3 times. The audio reminder is disabled.
• Press and hold for 8 seconds when the parent unit is not in use. The visual sound indicators
flashes for 3 times. The audio reminder is enabled.
Notes
• You can press or to adjust or mute the volume when the parent unit is playing the reminder.
• If the speaker volume of the parent unit is turned off, it will resume to the default volume level when the
parent unit plays the reminder.
NOTE: Before calling for service, please review the user’s manual - a check of the Product’s controls and features may save
you a service call.
Except as provided by applicable law, you assume the risk of loss or damage during transit and transportation and are
responsible for delivery or handling charges incurred in the transport of the Product(s) to the service location. VTech will
return repaired or replaced Product under this limited warranty. Transportation, delivery or handling charges are prepaid.
VTech assumes no risk for damage or loss of the Product in transit. If the Product failure is not covered by this limited warranty,
or proof of purchase does not meet the terms of this limited warranty, VTech will notify you and will request that you
authorize the cost of repair prior to any further repair activity. You must pay for the cost of repair and return shipping costs for
the repair of Products that are not covered by this limited warranty.
What must you return with the Product to get warranty service?
1. Return the entire original package and contents including the Product to the VTech service location along with a
description of the malfunction or difficulty; and
2. Include a “valid proof of purchase” (sales receipt) identifying the Product purchased (Product model) and the date of
purchase or receipt; and
3. Provide your name, complete and correct mailing address, and telephone number.
Other limitations
This warranty is the complete and exclusive agreement between you and VTech. It supersedes all other written or oral
communications related to this Product. VTech provides no other warranties for this Product. The warranty exclusively
describes all of VTech’s responsibilities regarding the Product. There are no other express warranties. No one is authorized
to make modifications to this limited warranty and you should not rely on any such modification. State/Provincial Law Rights:
This warranty gives you specific legal rights, and you may also have other rights, which vary from state to state or province to
province.
Limitations: Implied warranties, including those of fitness for a particular purpose and merchantability (an unwritten warranty
that the Product is fit for ordinary use) are limited to one year from the date of purchase. Some states/provinces do not
allow limitations on how long an implied warranty lasts, so the above limitation may not apply to you. In no event shall
VTech be liable for any indirect, special, incidental, consequential, or similar damages (including, but not limited to lost
profits or revenue, inability to use the Product or other associated equipment, the cost of substitute equipment, and claims
by third parties) resulting from the use of this Product. Some states/provinces do not allow the exclusion or limitation of
incidental or consequential damages, so the above limitation or exclusion may not apply to you.
Please retain your original sales receipt as proof of purchase.