2 Component Removal and Installation
16
Meritor WABCO Maintenance Manual 34 (Revised 03-16)
NOTE: If seats are damaged so badly that a tight seal cannot
be maintained, replace the air dryer.
4. Inspect and clean seal seat. Repair any minor damage.
5. Lubricate and install new O-ring on stem.
6. Lubricate cartridge seal.
7. Thread replacement cartridge onto the base until the seal
touches the base. Then, tighten the cartridge ONE additional
turn. DO NOT OVERTIGHTEN. Figure 2.2.
Figure 2.2
Outlet Check Valve Assembly
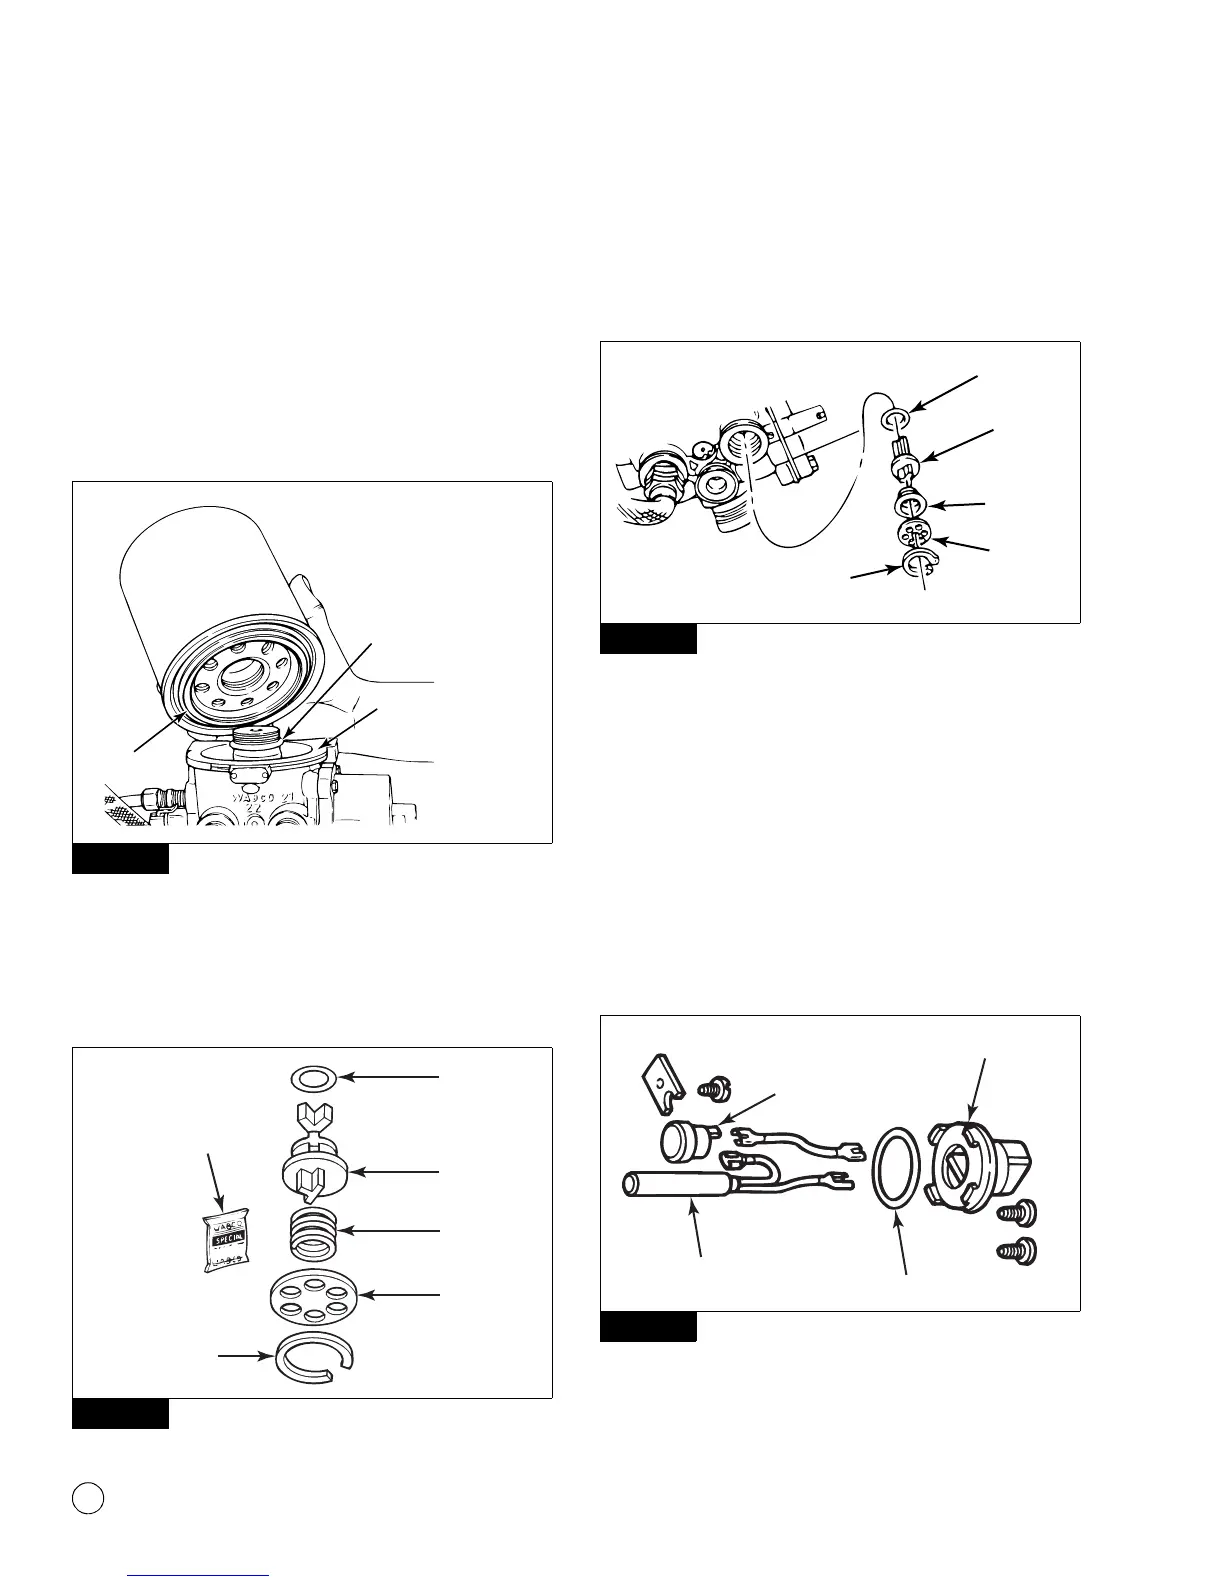
1. Review Figure 2.3 to ensure you have all of the parts required
to replace the outlet check valve. Use the grease included with
the replacement kit to lubricate the O-ring seal.
Figure 2.3
2. Remove the snap ring, washer, spring, valve body and O-ring.
3. Clean and inspect the valve bore. If the bore is damaged so
that a tight seal cannot be maintained, replace the air dryer.
4. Install the new O-ring on the valve body. Figure 2.4.
Figure 2.4
5. Apply a thin layer of grease to the valve bore and the O-ring.
6. Install the new valve body with its long end in the bore.
7. Install the new spring with its small end around the “Y”-shaped
fins on the valve body.
8. Install the new washer and the new snap ring to hold the
components in place.
Heater Assembly
1. Review Figure 2.5 to ensure you have all of the parts required
to replace the heater assembly.
Figure 2.5
2. Disconnect the plug.
Figure 2.2
Figure 2.3
1002164a
SEAL
SEAL SEAT
O-RING
1002165a
O-RING
SPRING
GREASE
WASHER
SNAP
RING
VALVE
BODY
Figure 2.4
Figure 2.5
1002166a
SNAP RING
WASHER
SPRING
O-RING
VALVE
BODY
1002167a
THERMOSTAT
RECEPTACLE
O-RING
HEATER
ELEMENT
 Loading...