1
2
3
4
5
EN
21
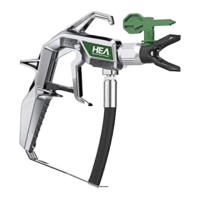
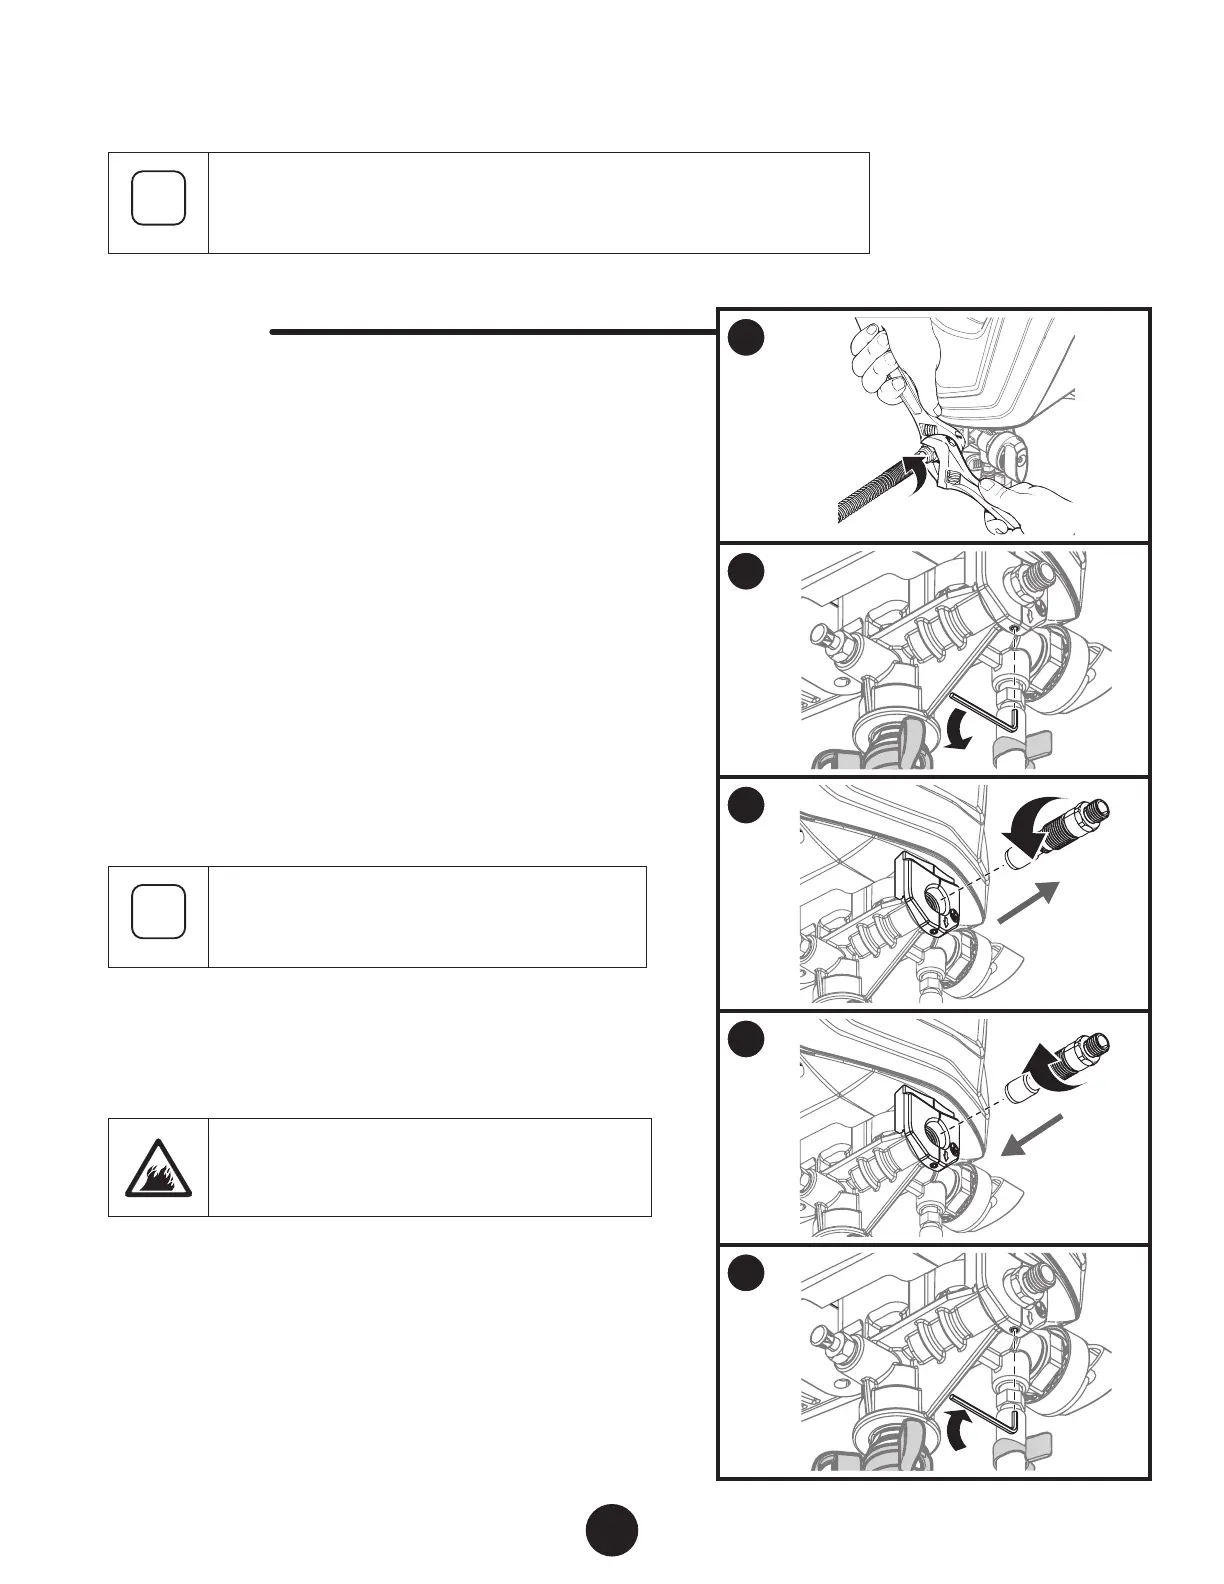
CLEANING THE OUTLET VALVE
Cleaning or servicing the outlet valve may be necessary if spray performance
remains poor after following the steps in the Troubleshooting section. Call
Technical Service (1-800-328-8251) to order a new outlet valve assembly.
YOU WILL NEED
• Two 6” adjustable wrenches
• 2.5 mm allen wrench
• Warm, soapy water if using latex material
• Mineral spirits for oil based material
1. Place a wrench on the outlet valve to secure it. Using the
second wrench, remove the spray hose.
2. Loosen (but do not remove) the set screw just underneath
the outlet valve with a 2.5 mm allen wrench.
3. Unscrew outlet valve from outlet valve housing using wrench.
Remove any accumulated material inside outlet valve housing
using appropriate solution for material being used.
Pay particular attention to the ball and seat area at the end
of the outlet valve (opposite the hose end). Remove any
accumulated material.
Recommendation: If used with latex-based paints,
ush out the outlet valve with water from a faucet.
4. Replace with new or cleaned outlet valve and tighten with
wrench. Do not over tighten. Torque to 90-110 in-lbs.
5. Tighten the set screw to secure the outet valve. Do not over
tighten. Torque to 20-25 in-lbs.
It is very important to tighten the set screw to
ensure proper grounding of the hose and gun
 Loading...