18
Wagner Project 115 - 0418A
Figure20-CleaningtheInletValve(Kitpartnumber
0418714)
Cleaning or servicing the inlet valve may be required if
the unit has priming problems. Priming problems may
be prevented by properly cleaning the sprayer and
following the long-term storage steps.
Perform the Pressure Relief Procedure (see gure 7) and
unplug the sprayer.
1. Removethehopper.Loosenthelocknutbyturning
anticlockwise.
2. Remove the inlet sleeve (1) with a suitable tool (e.g. socket SW
11).
3. Inspect the threads on the inlet sleeve and the inlet sleeve
O-ring(2).Removeanyaccumulatedpaint.
4. Toremovetheinletvalve,placetheassemblyaid(8)ona
socket (6) with a 5/8” insert (7). Insert the inlet valve tool into
theinletvalve(a).Removetheinletvalvescrewconnectionby
unscrewing anticlockwise from the housing.
5. Retrievetheinletvalve(9)andtheinletvalveO-ring(10)from
the inlet valve housing. Clean or replace and lubricate the
O-ringwithalighthouseholdoil.
6. SettheinletvalveO-ring(10)backintothehousing,andset
the inlet valve (9) on top of it.
7. Replace inlet tting (8) into the housing. Tighten with the
inlet valve tool (7) and ratchet (4, 5, 6).
8. Replacetheseal(3).PlacetheinletsleeveO-ring(2)onto
theinletvalvetting(9),andreplacetheinletsleeve(1)by
twisting it clockwise.
9. Replace the hopper.
Figure21-CleaningtheOutletValve
Cleaning or replacing the outlet valve may be necessary if your
spray performance remains poor after having performed all the
steps contained in the Troubleshooting section of this manual.
Perform the Pressure Relief Procedure (see gure 7) and
unplug the sprayer.
1. Unscrew the outlet valve from the outlet valve housing using
an adjustable wrench.
2. Inspecttheinsideoftheoutletvalvehousing(a).Cleanany
accumulated paint.
3. Replace with a new outlet valve. Tighten into outlet valve
housing with an adjustable wrench.
Parts Lists
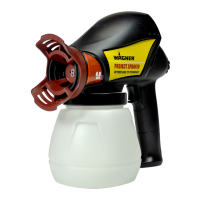
Figure22-SprayGun/SprayHose
Item Part # Description Quantity
1 0418717 Gunassembly(withoutnozzle) ....................1
2 0418705 Tip, XS ......................................................................1
2 0418707 Tip, M .......................................................................1
3 0418711 Filter, XS-S (red) ...................................................2
3 0418712 Filter,M(yellow) ..................................................2
4 0418718 Sprayhose,7.5m,red ........................................1
Part # Description
0418705 Spraytip,XS .....................Water-soluble and solvent
based enamels and paints, oils
and release agents
0418706 Spraytip,S .......................Syntheticresin-basedpaints,
PVC paints
0418707 Spraytip,M ......................Enamel paints, undercoats,
primers, llers, indoor latex
paints and indoor emulsions
0418708 Spraytip,L .......................Enamel paints, undercoats,
primers, llers, indoor latex
paints and indoor emulsions,
anti-corrosive paints
0418711 Filter, XS - S (red, 2 pack)
0418712 Filter,M(yellow,2pack)
0418713 Filter,L-XXL+(white,2pack)
0418714 Valve set (inlet and outlet valve)
All spare parts listed above are wear parts, and are not covered
by warranty!
 Loading...