EasyManua.ls Logo

Wayne-Dalton 8700 User Manual

Wayne-Dalton 8700
18 pages
To Next Page IconTo Next Page
To Previous Page IconTo Previous Page
Page #15 background imageLoading...
Page #15 background image
Trolley Arm Hookup
NOTE: If a Wayne Dalton operator / trolley bracket was installed, follow these directions.
Align hole in the door arm with holes in operator bracket tabs, as shown. Attach with 5/16” x
1-3/4” cotter pin and cotter ring.
Drawbar operator
bracket tabs
Cotter
ring
5/16” x 1-3/4”
Clevis pin
Door arm
Cotter ring
5/16” x 1-3/4”
Clevis pin
Inside Lock
Install the inside lock on the second section of the door. Secure the lock to the section with
(4) 1/4” - 20 x 11/16” self drilling screws. Square the lock assembly with the door section,
and align with the square hole in the vertical track. The inside lock should be spaced ap-
proximately 1/8” away from the section edge.
IMPORTANT: INSIDE LOCK(S) MUST BE REMOVED OR MADE INOPERATIVE IN THE UN-
LOCKED POSITION IF AN OPERATOR IS INSTALLED ON THIS DOOR.
(4) 1/4”-20 x 11/16”
Self drilling screws
Square hole in vertical track
Second section
Side lock
End stile
1/8”
Pull Down Rope
WARNING
DO NOT INSTALL PULL DOWN ROPE ON DOORS WITH OPERATORS.
CHILDREN MAY BECOME ENTANGLED IN THE ROPE CAUSING SEVERE OR
FATAL INJURY.
Measure and mark the jamb approximately 48” to 50” (1220 to 1270 mm) from floor on the
right or left side of jamb. Drill 1/8” pilot hole for no. 6 screw eye. Tie the pull down rope to the
no. 6 screw eye and to the bottom corner bracket, as shown.
Typical bottom
corner bracket
Pull down
rope
No. 6
Screw eye
Pull down
rope
48” to 50”
From floor
15
Optional Installation

Other manuals for Wayne-Dalton 8700

Question and Answer IconNeed help?

Do you have a question about the Wayne-Dalton 8700 and is the answer not in the manual?

Wayne-Dalton 8700 Specifications

General IconGeneral
BrandWayne-Dalton
Model8700
CategoryGarage Door Opener
LanguageEnglish

Summary

Pre-Installation

Important Safety Instructions

Critical safety warnings and precautions for door installation and operation.

Removing an Existing Door and Preparing the Opening

Steps for safely removing old doors and preparing the opening for new installation.

DOOR INSTALLATION INSTRUCTIONS

Attaching Flag Angles and Jamb Brackets To Vertical Tracks

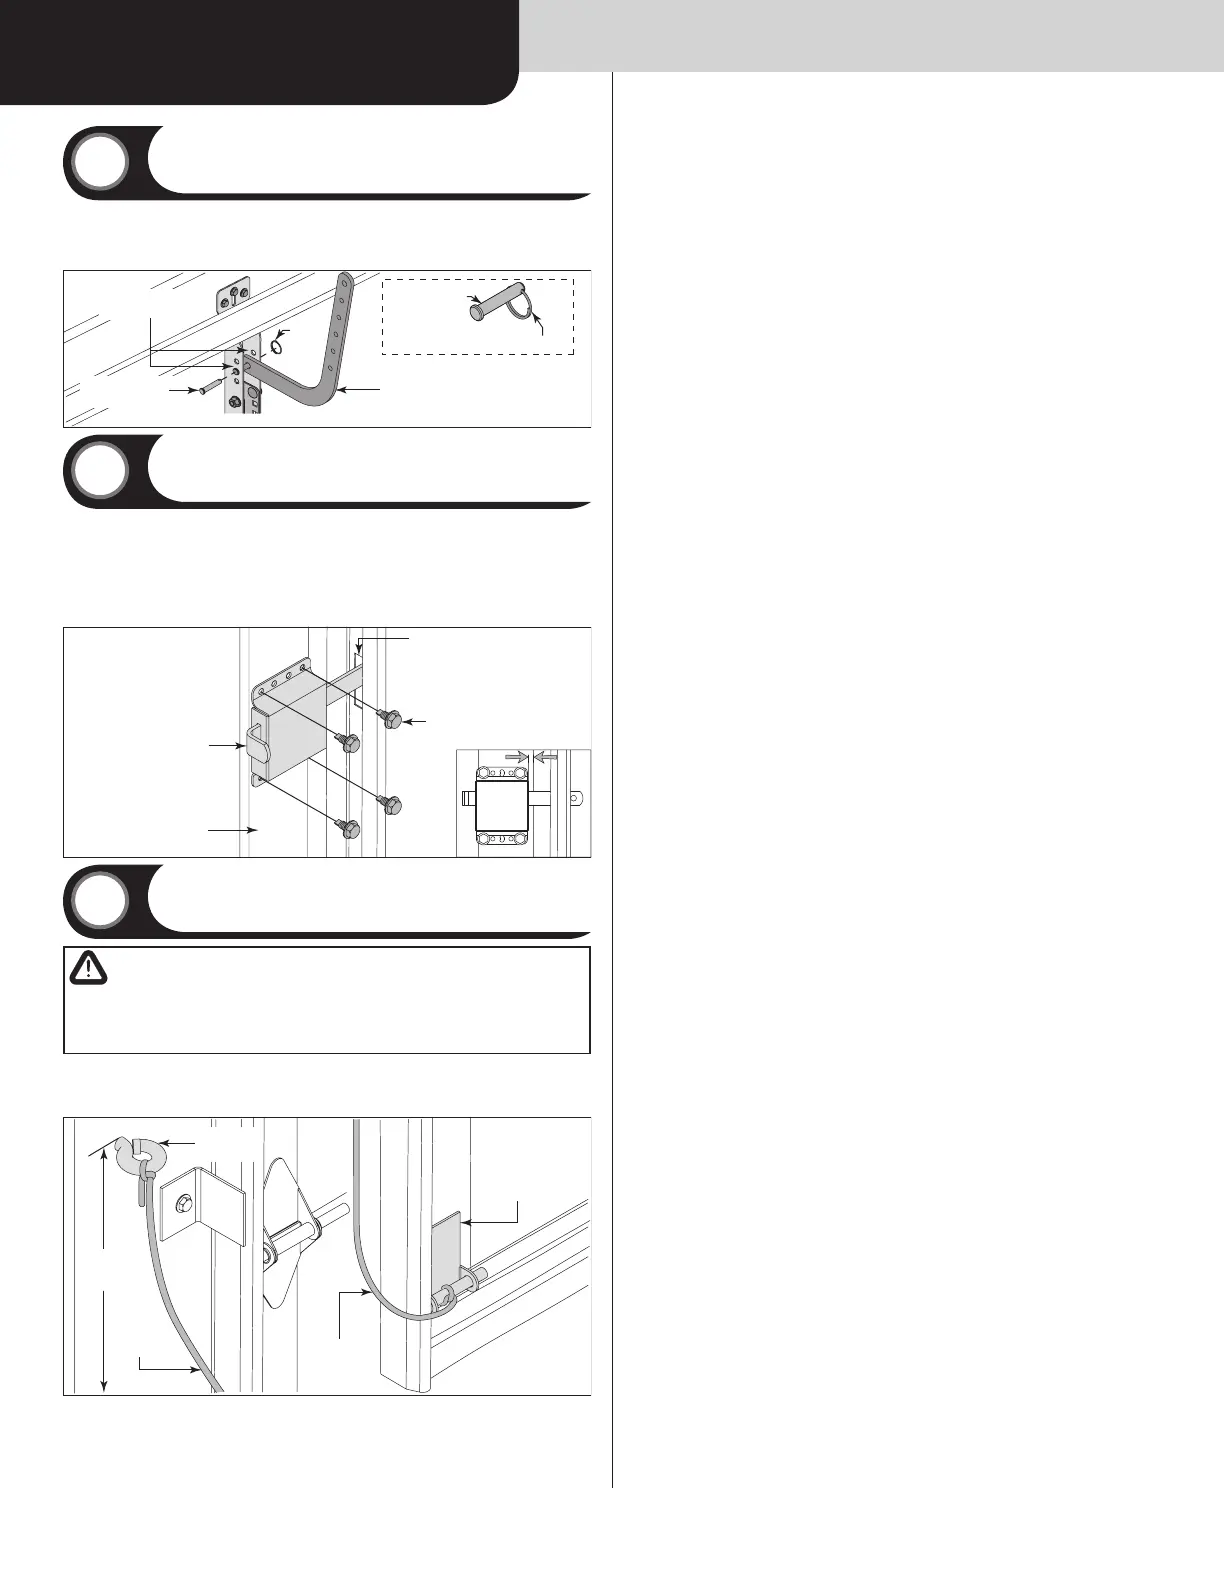
Instructions for attaching flag angles and jamb brackets to the vertical tracks.

Attaching Vertical Tracks To Jambs

Securing the vertical tracks to the door jambs for door guidance.

Stacking Sections

Step-by-step guide to stacking door sections together.

Attaching Horizontal Tracks

Instructions for attaching the horizontal tracks to the opener assembly or wall.

COUNTERBALANCE INSTALLATION INSTRUCTIONS

Attaching Rear Back Hangs

Securing the rear back hangs to support the horizontal tracks.

Attaching Extension Springs

Instructions for attaching extension springs and safety cables.

Counterbalance Lift Cable Adjustments

Adjusting lift cables for proper door balance and spring tension.

Balancing Door

How to test and adjust the door's balance for safe operation.

Maintenance

Warranty

Related product manuals