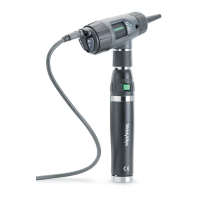
MicroTymp
2
Completing a Test
Printer Function Messages
If tympanometric results are not printed, a message will appear describing
the reason. These messages are listed in Table 2.
Table 2 – Printer Function Messages
Printer Function Possible Cause Possible Solution
Message
No Data The MicroTymp Handle Seat the handle in
Reinsert Handle is not located in the well. the well.
The MicroTymp Handle Insure that the handle
is not seated properly is fully seated in the well
in the well. with the Liquid Crystal
Display (LCD) and
buttons facing you.
The MicroTymp Handle Verify battery is in
has a discharged or place, and charged
missing battery. (LOW BATT message
does not appear).
The MicroTymp Handle Call your nearest
is not functioning Welch Allyn service
properly. location, distributor,
or factory representative.
No Data Both right
R
and Insure that data is
Nothing in Memory left
L
memory loca- being stored correctly.
tions in the MicroTymp See page 7.
Handle are empty.
Computer Interface Switch #4 on Turn switch #4 OFF.
Switch 4 is Set on Printer/Charger is ON. See page 22.
Bottom of Printer
23

 Loading...
