© Copyright 2016 Xilinx
Using Petalinux 2016.X to build Linux Image for ZCU102
In the last section we used the OSL flow to create the Linux image. Here, we shall be using the
Petalinux 2016.X to create the image.
Note: It is assumed that the user has pre-installed the Petalinux tools. There is an installer at the link
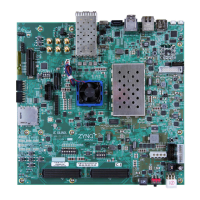
here. Users can use the ZCU102 BSP to create the linux, Image, or they can use the HDF to config the
image. Both flows are discussed here.
First download the ZCU102 BSP from Xilinx.com here, and use the instructions below to build the
Petalinux project:
petalinux-create -t project -s Xilinx-ZCU102-v2016.X-final.bsp
o Where X is either 1 or 2
cd Xilinx-ZCU102-2016.1
cp -r pre-built/linux/images/* images/linux/
o Note: you can also just use petalinux-build here.
More Info: See the Petalinux guide here for more info.
Users can also use a HDF file from the previous section to build the Linux Image (and SD boot
images):
petalinux-create --type project --template zynqMP --name petalinux_2016
petalinux-config --get-hw-description=<path/to/folder/containing/HDF> -p petalinux_2016
o Save, and Exit
cd petalinux_2016
Open the subsystem/linux/configs/device-tree.dts file and add the content below:
&gem3 {
status = "okay";
local-mac-address = [00 0a 35 00 02 90];
phy-mode = "rgmii-id";
phy-handle = <&phy0>;
phy0: phy@c {
reg = <0xc>;
ti,rx-internal-delay = <0x8>;
ti,tx-internal-delay = <0xa>;
ti,fifo-depth = <0x1>;
};
};
petalinux_build
petalinux-package --boot --fsbl images/linux/zynq_fsbl.elf --fpga
images/linux/design_1_wrapper.bit --uboot
o This will create the two files needed on the SD card:
BOOT.BIN
/images/linux/image.ub
 Loading...
