MPX100
II
DISASSEMBLY PROCEDURE
1 Hammer sensor unit
1-1 Open and lock the top board.
1-2 Remove the upper front board.
1-3 Remove the action unit.
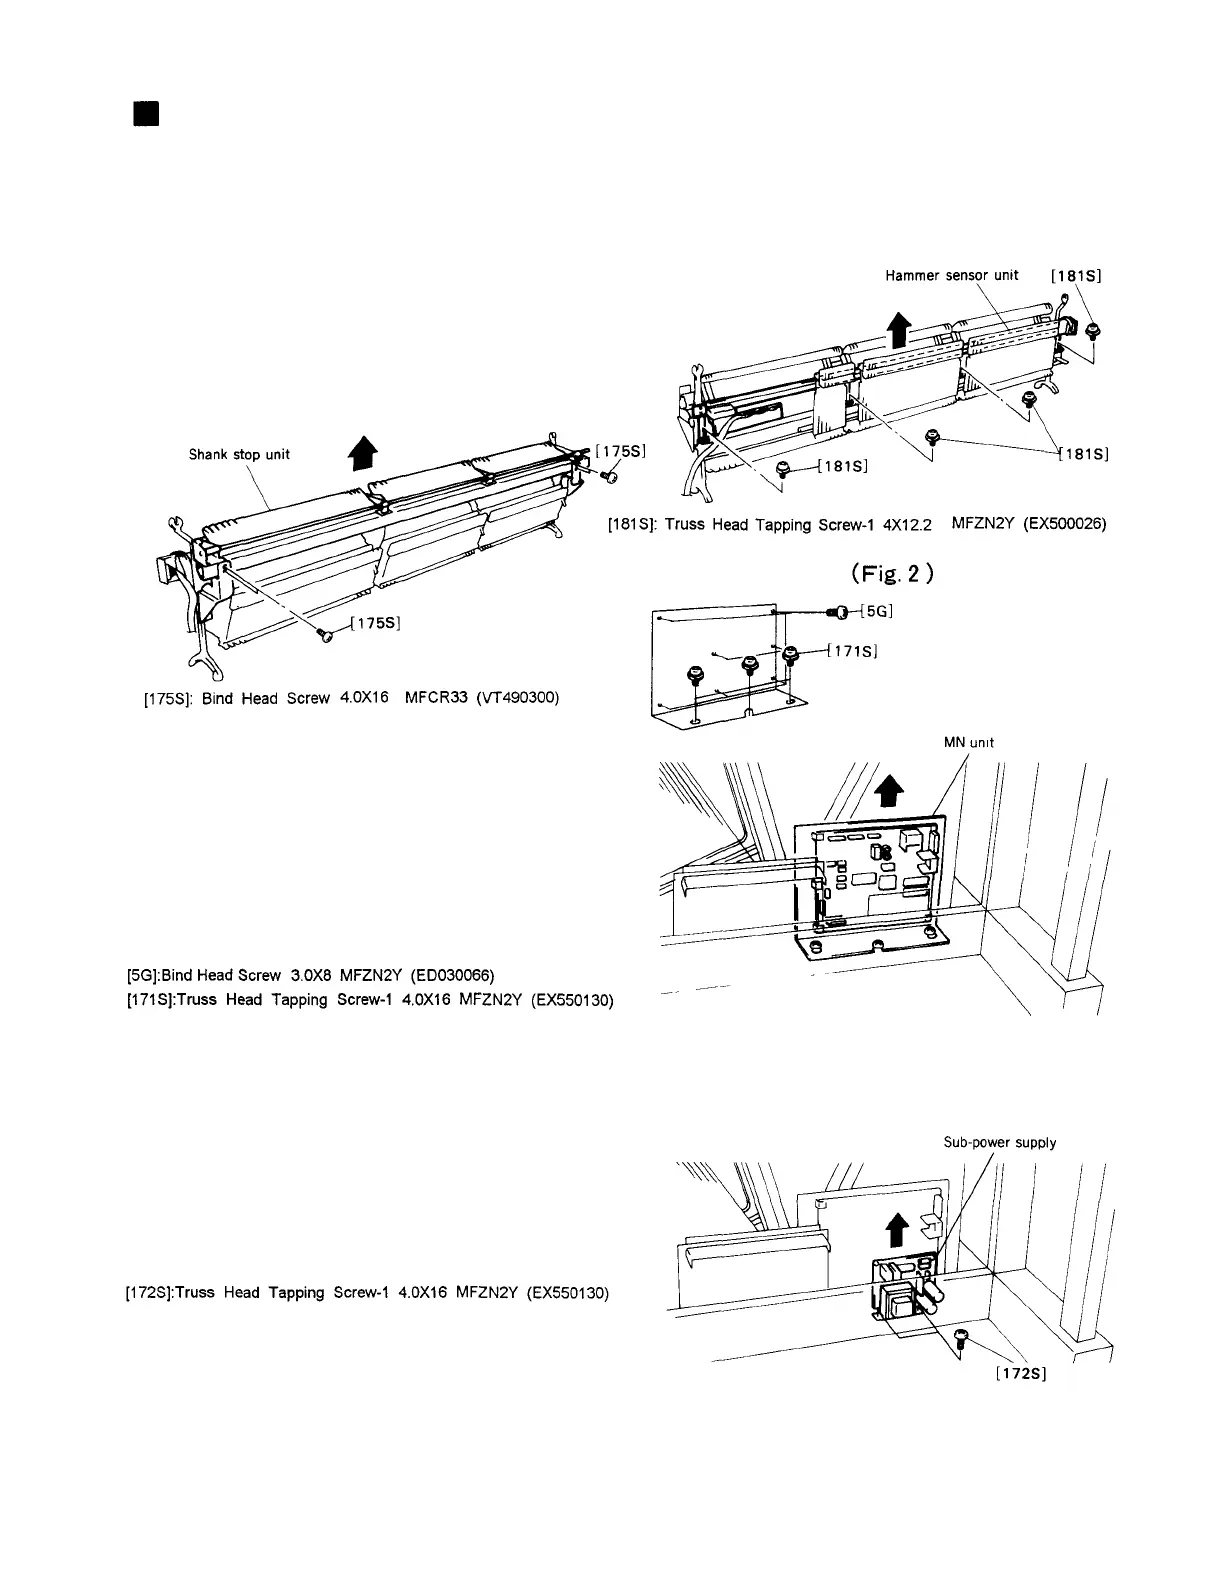
1-4 Remove the four (4) screws marked [175S],
then remove the shank stop unit. (Fig. 1)
1-5 Remove the four (4) screws marked 181S],
then remove the hammer sensor unit. (Fig. 2)
(Fig.
1 )
(Fig. 3)
2 MN unit
2-1 Remove the lower front board.
2-2 Loosen the three (3) screws marked [171S],
then slightly shift the MN unit to the rear and
remove the MN unit. (Fig. 3)
2-3 Remove the seven (7) screws marked [5G],
then remove the MN circuit board from MN
unit. (Fig. 3)
3 Sub-power supply unit
3-1 Remove the lower front board.
3-2 Remove the two (2) screws marked [172S],
then remove the Sub-power supply unit. (Fig. 4)
(Fig. 4)
6
 Loading...