2. Select the desired mode from the Exposure ModeExposure Mode field.
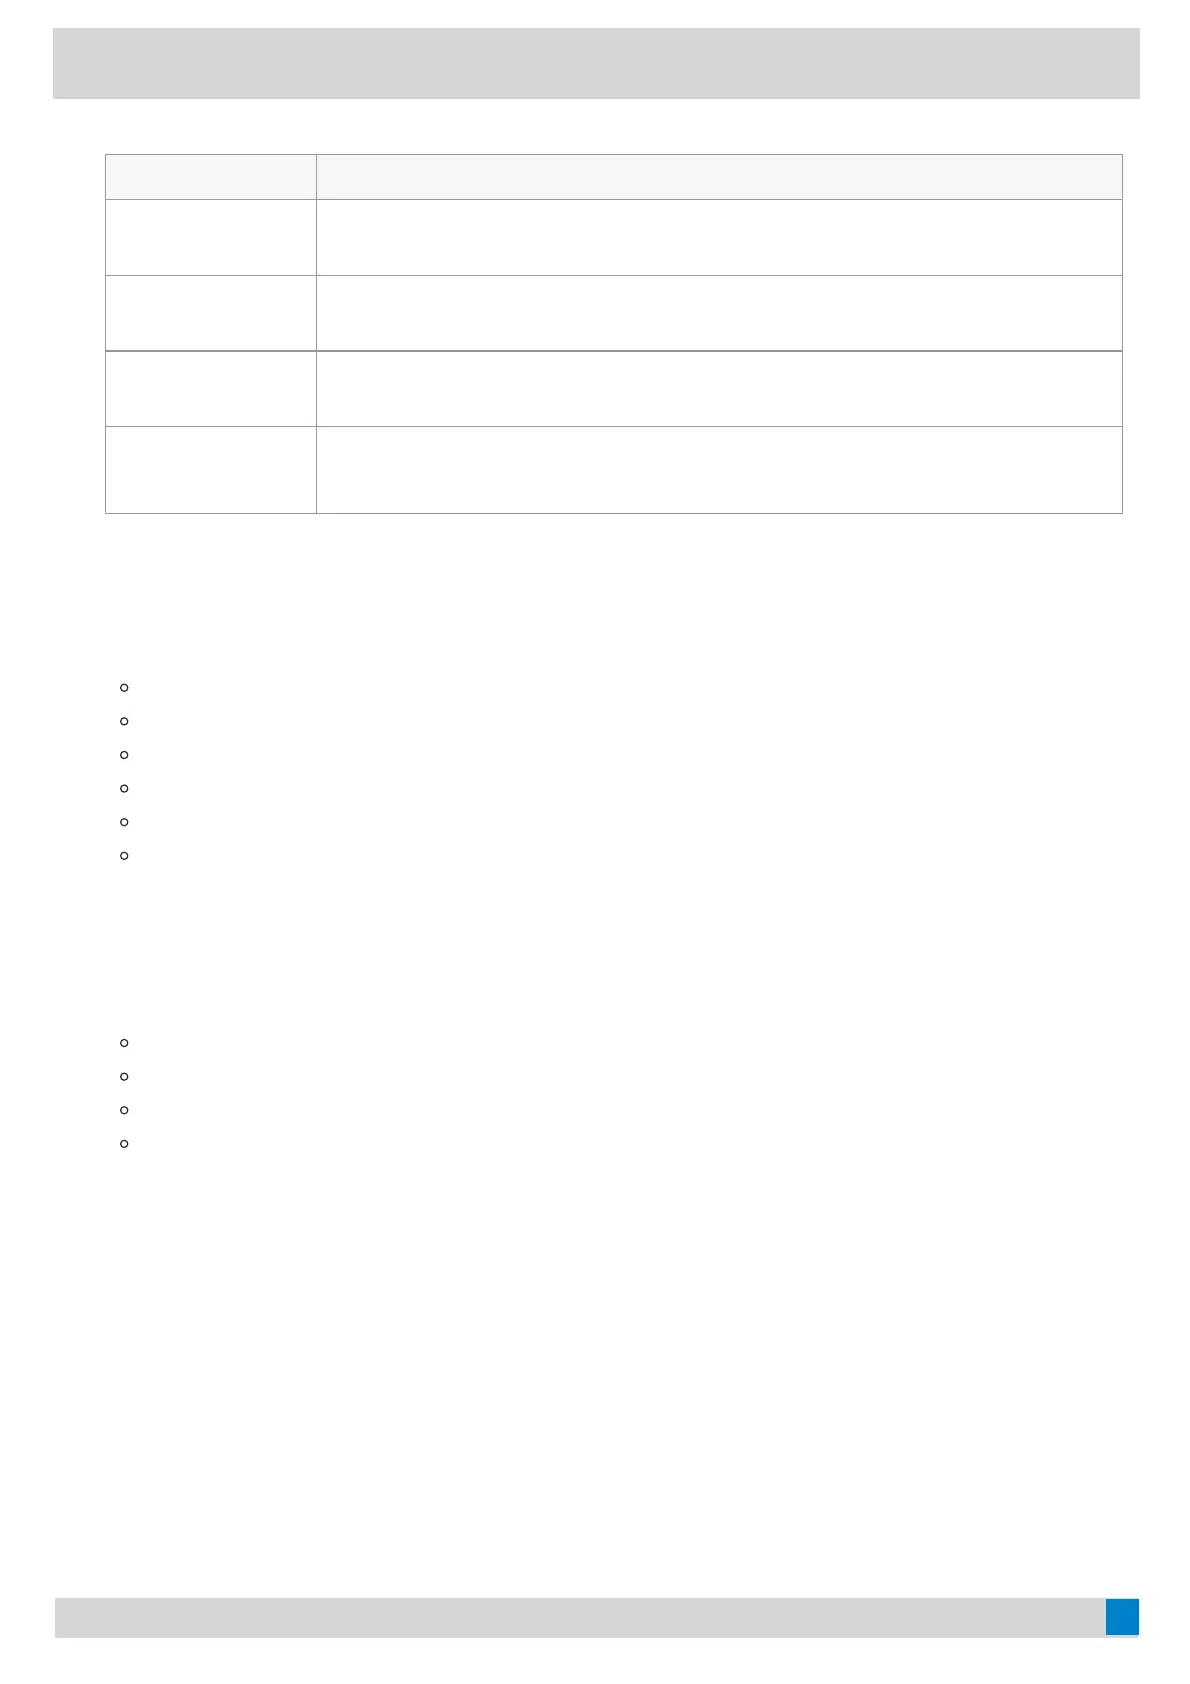
ScenarioScenario What to toWhat to to
If you select AutoAuto
ExposureExposure
Select the desired value from the Exposure CompensationExposure Compensation, FlickerFlicker, Gain LimitGain Limit,
Wide Dynamic RangeWide Dynamic Range, MeteringMetering field respectively.
If you select
Manual ExposureManual Exposure
Select the desired value from the Gain LimitGain Limit, Wide Dynamic RangeWide Dynamic Range, ShutterShutter field
respectively.
If you select
Shutter PriorityShutter Priority
Select the desired value from the Exposure CompensationExposure Compensation, Gain LimitGain Limit, WideWide
Dynamic RangeDynamic Range, MeteringMetering, ShutterShutter field respectively.
If you select
Brightness PriorityBrightness Priority
Select the desired value from the FlickerFlicker, Wide Dynamic RangeWide Dynamic Range, MeteringMetering,
BrightnessBrightness field respectively.
Configure the White Balance SettingConfigure the White Balance Setting
1. Tap the account avatar and go to SettingsSettings > Device SettingsDevice Settings > White Balance SettingWhite Balance Setting.
2. Select the desired value from the White Balance ModeWhite Balance Mode field and selecttap OKOK.
AutoAuto, it calculates the best white balance setting based on lighting conditions in the room.
IndoorIndoor
OutdoorOutdoor
One pushOne push
ATWATW, it automatically adjusts the white balance according to the picture taken by the camera.
Manual SettingManual Setting, you can manually adjust the color temperature in the TemperatureTemperature field.
Adjust Display Image of the CameraAdjust Display Image of the Camera
1. Tap the account avatar and go to SettingsSettings > Device SettingsDevice Settings > GraphicsGraphics.
2. Select the desired mode from the Display ModeDisplay Mode field.
High DefinitionHigh Definition
StandardStandard
MildMild
CustomCustom, you can adjust the SaturationSaturation and SharpnessSharpness respectively, and select the desired mode from the
Noise Reduction(2D)Noise Reduction(2D) field.
Enable Auto-Framing for UVC30 CameraEnable Auto-Framing for UVC30 Camera
Auto-framing is mainly based on face detection, which provides real-time detection and position tracking on all
faces in the meeting room. All participants in the output are covered, and the camera can be automatically
adjusted based on changes in the number and location of participants.
When the auto-framing feature is enabled, you cannot control the UVC30 camera position.
1. Tap the account avatar and go to SettingsSettings > Device SettingsDevice Settings > AdvancedAdvanced.
 Loading...