User Guide for the SIP-T48S IP Phone
48
This field is configurable only if you have uploaded a custom picture via web user interface.
5. Tap the Save soft key to accept the change or to cancel.
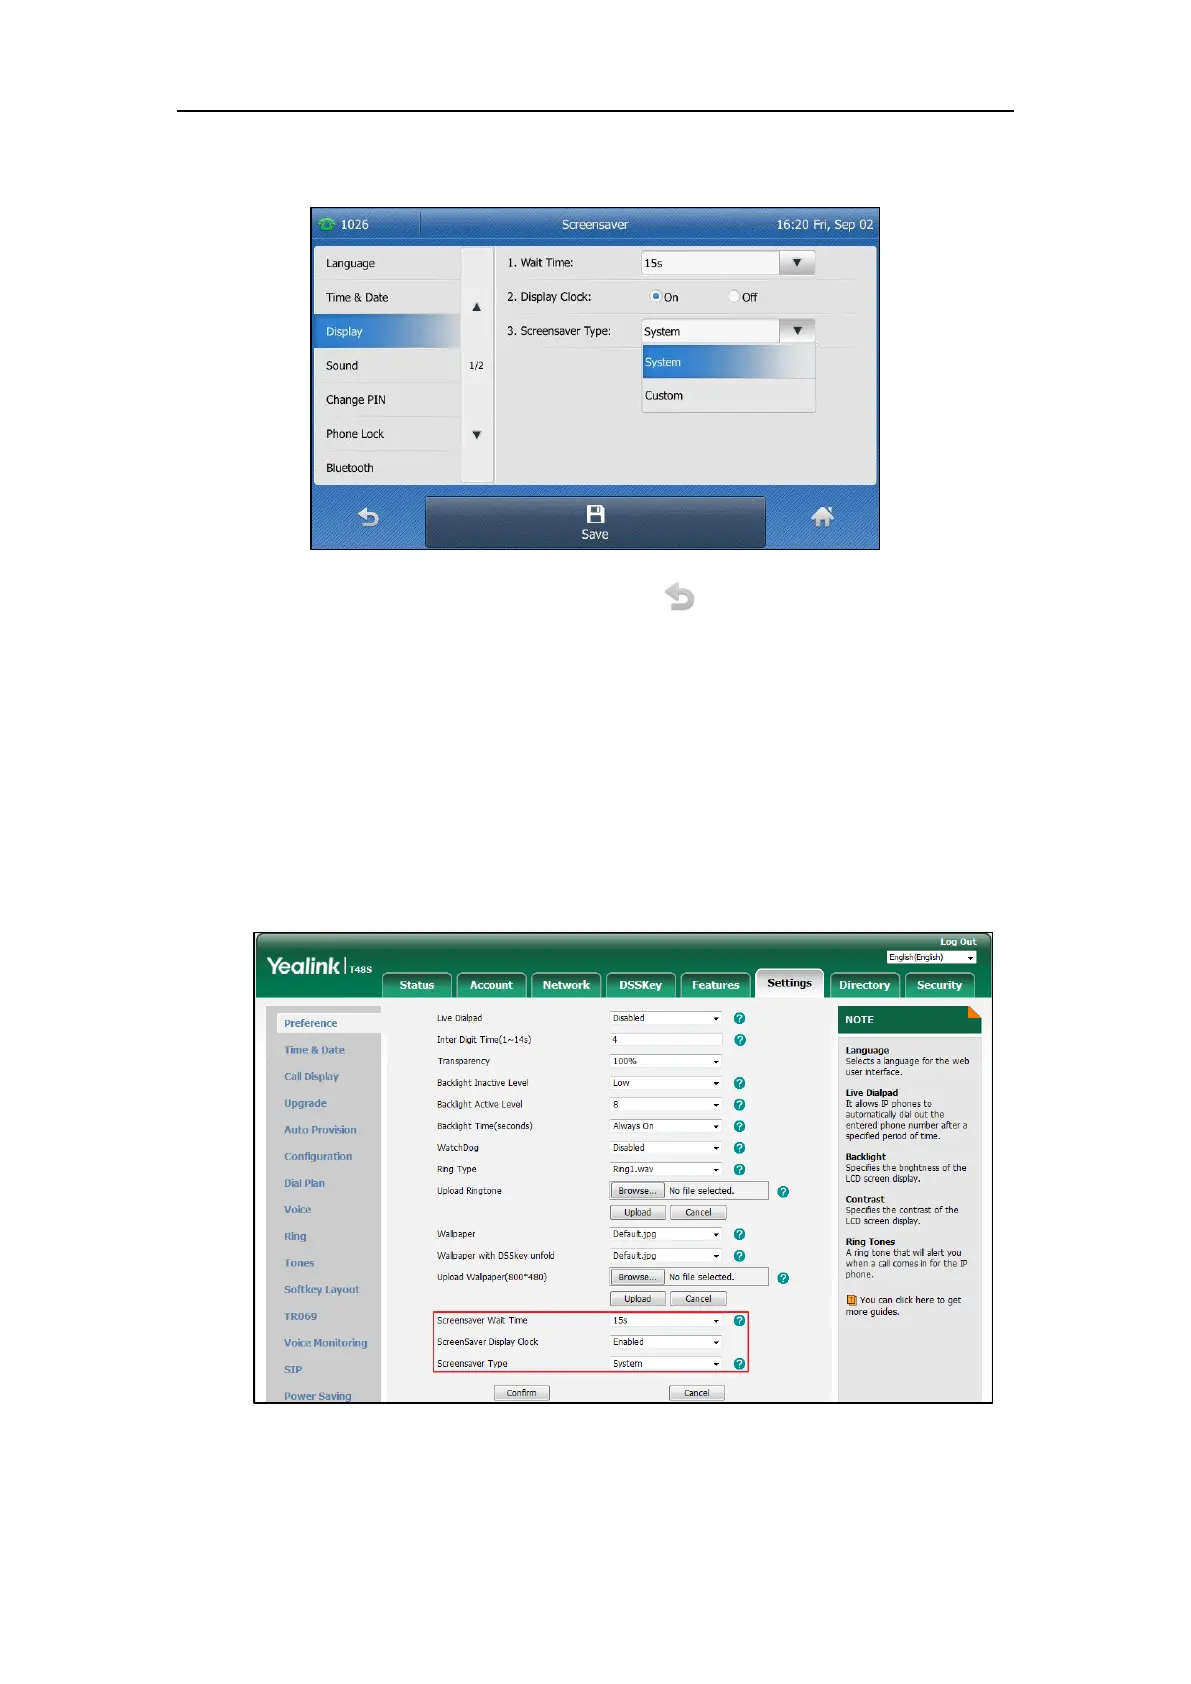
To configure the screen saver via web user interface:
1. Click on Settings->Preference.
2. Select the desired wait time from the pull-down list of Screensaver Wait Time.
3. Select the desired value from the pull-down list of ScreenSaver Display Clock.
4. Select the desired screen saver type from the pull-down list of Screensaver Type.
- If you select System.
The IP phone will automatically set the built-in picture as the screen saver.
- If you select Custom.
The IP phone will automatically set the custom pictures you upload as the screen saver,
and display these pictures alternately.
 Loading...