22
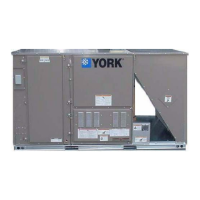
Low Ambient Kit for RTC-7L, 10L and
15L
General information
The condensation control accessory (Low Ambient Kit) is
factory-fitted as an option.
The electronic module controls the outdoor fan speed in
cool cycle to keep the condensing pressure constant at low
outdoor temperatures. This control is not carried out in the
winter cycle, and fans operate at 100% capacity.
The regulator is located on the separator panel, on the out-
door fan side (M3).
With this accessory the operating limit of the outdoor air is
-10°C.
Technical specifications
This accessory includes the following components:
- Single-phase speed regulator, ref. P215DP (LAK).
Cut-off regulation.
- Pressure switch set to 30 bar.
- 24 VAC terminal relay (RRV1) for RTH.
- Connecting hose and cables.
- Screws, wall hole guide and plastic flanges.
Installation
Disconnect main power supply to the unit with switch Q1. See
Figs. 1, 2, 3, 4, 5 and wiring diagram for details on assembly
and wiring connections.
Install the condensation control unit as follows:
1. Remove the top cover and access panels to the outdoor
fan.
2. Install the speed regulators (LAK) on the separator panel,
using the screws supplied. On heat pump models (RTH),
connect the 24 VAC relay (RRV1) to terminal X3.
3. Connect cables inside the electric box in accordance
with the wiring diagram.
4. Disconnect the outdoor fan (M3) hose from the KM3
contactor side, and connect same to the LAK side at
terminals L2, N2 and ground. Connect the supplied out-
door fan hose to contactor KM3 on the electric box and
connect terminals L1, N1 and ground to the LAK side.
5. Connect the control hoses of heat pump models (RTH)
to terminals 11 and 14 of the RRV1 relay and on the LAK
side of terminals 1 and 3.
6. Install the wall hole guide on the separator panel and
insert the pressure switch pressure intake.
7. Connect the pressure intake of the pressure switch to the
high pressure intake at the condenser outlet and make
sure there are no leaks.
8. Check correct operation. Set maximum fan output regula-
tion (LAK) and disconnect the magneto thermal switch
of the compressor (F1). Connect power supply to the
unit with switch Q1. Activate stage 1 of cool and make
sure contactors KM1, KM2 and KM3 are enabled. The
outdoor fan, M3, should rotate 100%. With a voltmeter,
check the output voltage (230 VAC) at terminals L2 and
N2 of the LAK1 regulator. Set output to a minimum (cut-
off). Make sure the outdoor fan turns off.
9. If the unit is heat pump (RTH), activate stage 1 of heating
and make sure the outdoor fan M3 rotates 100%.
Deactivate this stage.
10. Connect the magneto thermal switch to the compressor
(F1).
11. Replace the top cover and the access panel to the out-
door fan.
Loose cables can cause overheating of terminals or incorrect ope-
ration of the unit. Fire hazards may also exist. Therefore, make sure
all cables are connected tightly.
Operation
In summer cycle, allows adjusting outdoor fan speed to keep
a constant condensing pressure at low outdoor temperatures.
The pressure switch is factory-set to 30 bar. This setting
can be modified with the adjusting screw on the pressure
switch. Clockwise increases pressure and counter clockwise
decreases pressure.
On heat pump models, the control has an intake that, in
heat cycle, remains closed through the contact on the cycle
changeover relay (RRV1). Fan speed at maximum (output
voltage 230 VAC).
 Loading...