19
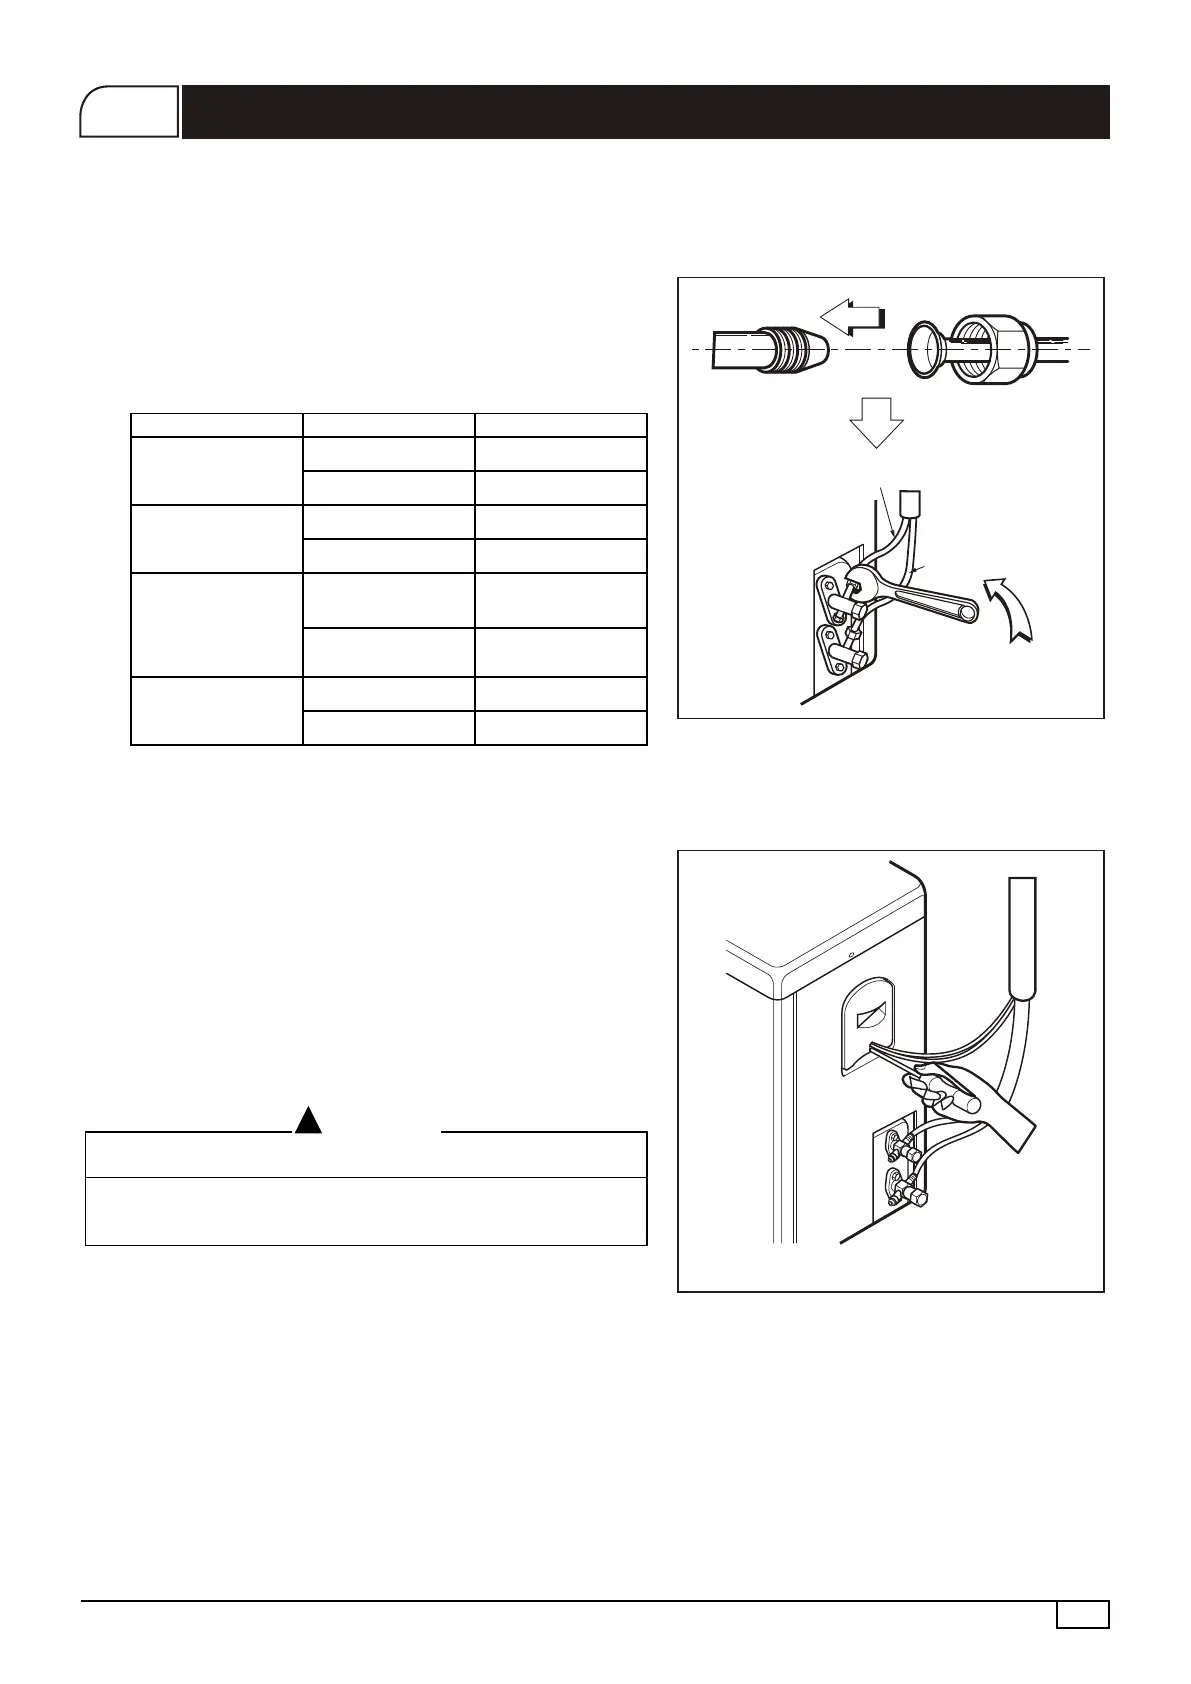
Fig. 22
Fig. 23
Gas side piping
Outdooe unit
Liquid side piping
Torque wrench
1. Connecting piping to outdoor unit
2. Connecting cable to outdoor unit
Align the center of the pipings and sufciently tighten
the are nut with ngers.
Finally tighten the are nut with torque wrench until the
wrench clicks.
□ When tightening the flare nut with torque wrench, ensure
the direction for tightening follows the arrow on the
wrench.
Model Pipe Diameter of pipe
YSM3F10AAS
YSM3F15AAS
Liquid pipe ø6.35mm (1/4")
Gas pipe ø12.7mm (1/2")
YSM3F18AAS
YSM3F20AAS
Liquid pipe ø6.35mm (1/4")
Gas pipe ø15.88mm (5/8")
YSM3F22AAS
YSM3F25AAS
YSM3F28AAS
YSM3F30AAS
YSM3F35AAS
Liquid pipe ø9.52mm (3/8")
Gas pipe ø15.88mm (5/8")
YSM3F40AAS
YSM3F50AAS
YSM3F60AAS
Liquid pipe ø9.52mm (3/8")
Gas pipe ø19.05mm (3/4")
1)
2)
1) Open the control board cover from the outdoor
unit by removing the screws.
2) Connect wires to the terminals on the control
board individually and secure the cables onto the
control board with clamp.
Perform grounding
□ This product should be grounded.
□ Defective grounding could cause an electric shock.
!
CAUTION
Connection of Outdoor Pipes and Cables
 Loading...