19
PRW24F02CPG, PRB24F01BPG Use, Care, and Installation Guide
ZEPHYRONLINE.COM
Installation Instructions
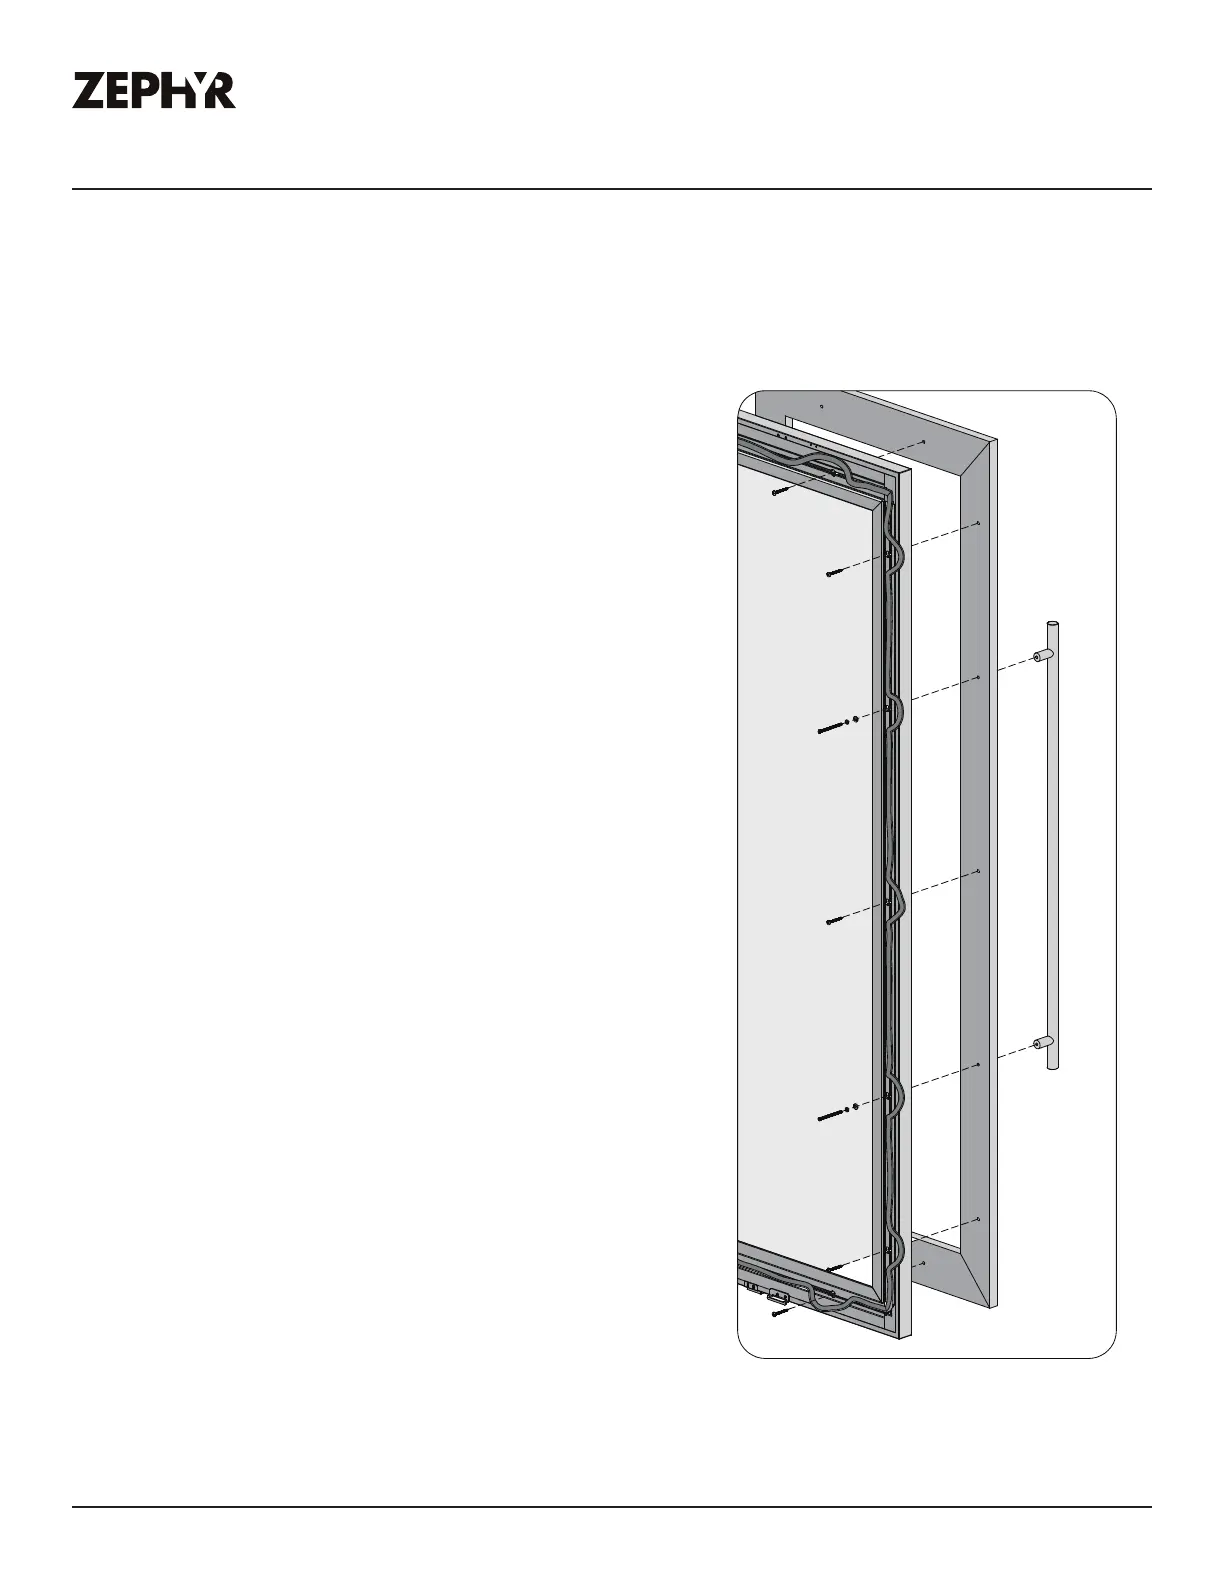
Installing the Overlay Panel
To install the overlay panel onto the door, please follow the instructions below. Refer to the dimensions
section to ensure proper measurements prior to installation. If you plan to use a custom handle, install
the custom handle to the overlay panel before mounting the overlay panel onto the door.
1. Open the door.
2. Temporarily remove the door gasket to see the 14 holes
for the overlay panel. There are 2 holes on the top and
bottom sides of the door with 5 holes on the left and
right.
3. Open the hardware package containing 14 self-tapping
screws (ST4*30 size) for the overlay panel.
4. Clamp the overlay panel with the door firmly with bar
clamps and screw the self-tapping screws into the
overlay panel. Perform this step per screw until the
overlay panel is completely secured
NOTE: If using a Zephyr accessory handle, 2 of the 5
holes on either the left or right side will be used for
installing the door handle. Only 12 of the 14 self-
tapping screws will be used rather than all 14.
5. Reattach the door gasket and close the door.
 Loading...