DEX & DBX Installation, Maintenance and User Instructions - April 2011 11
Fig 9
Commissioning
Before switching on the power supply, ensure the appliance is completely
filled with water by carefully opening and closing the hot water tap until all air
has been eliminated from the water heater and no more air emerges.
Every time the appliance is drained (e.g. after work on the plumbing system
or following repairs to the appliance), the heater must be re-vented in this way
before reconnecting the power supply.
Model DEX only
The maximum power rating of the appliance can be selected from 18, 21, 24
or 27kW at the time of installation. The maximum power rating should only be
selected with reference to the technical data on page 3, after ensuring that
correct cable sizing and fuse protection is in place and with regard to local
site conditions and electrical regulations.
This should only be done by a competent installer.
1.Switch on the power supply to the appliance. The digital display will light up.
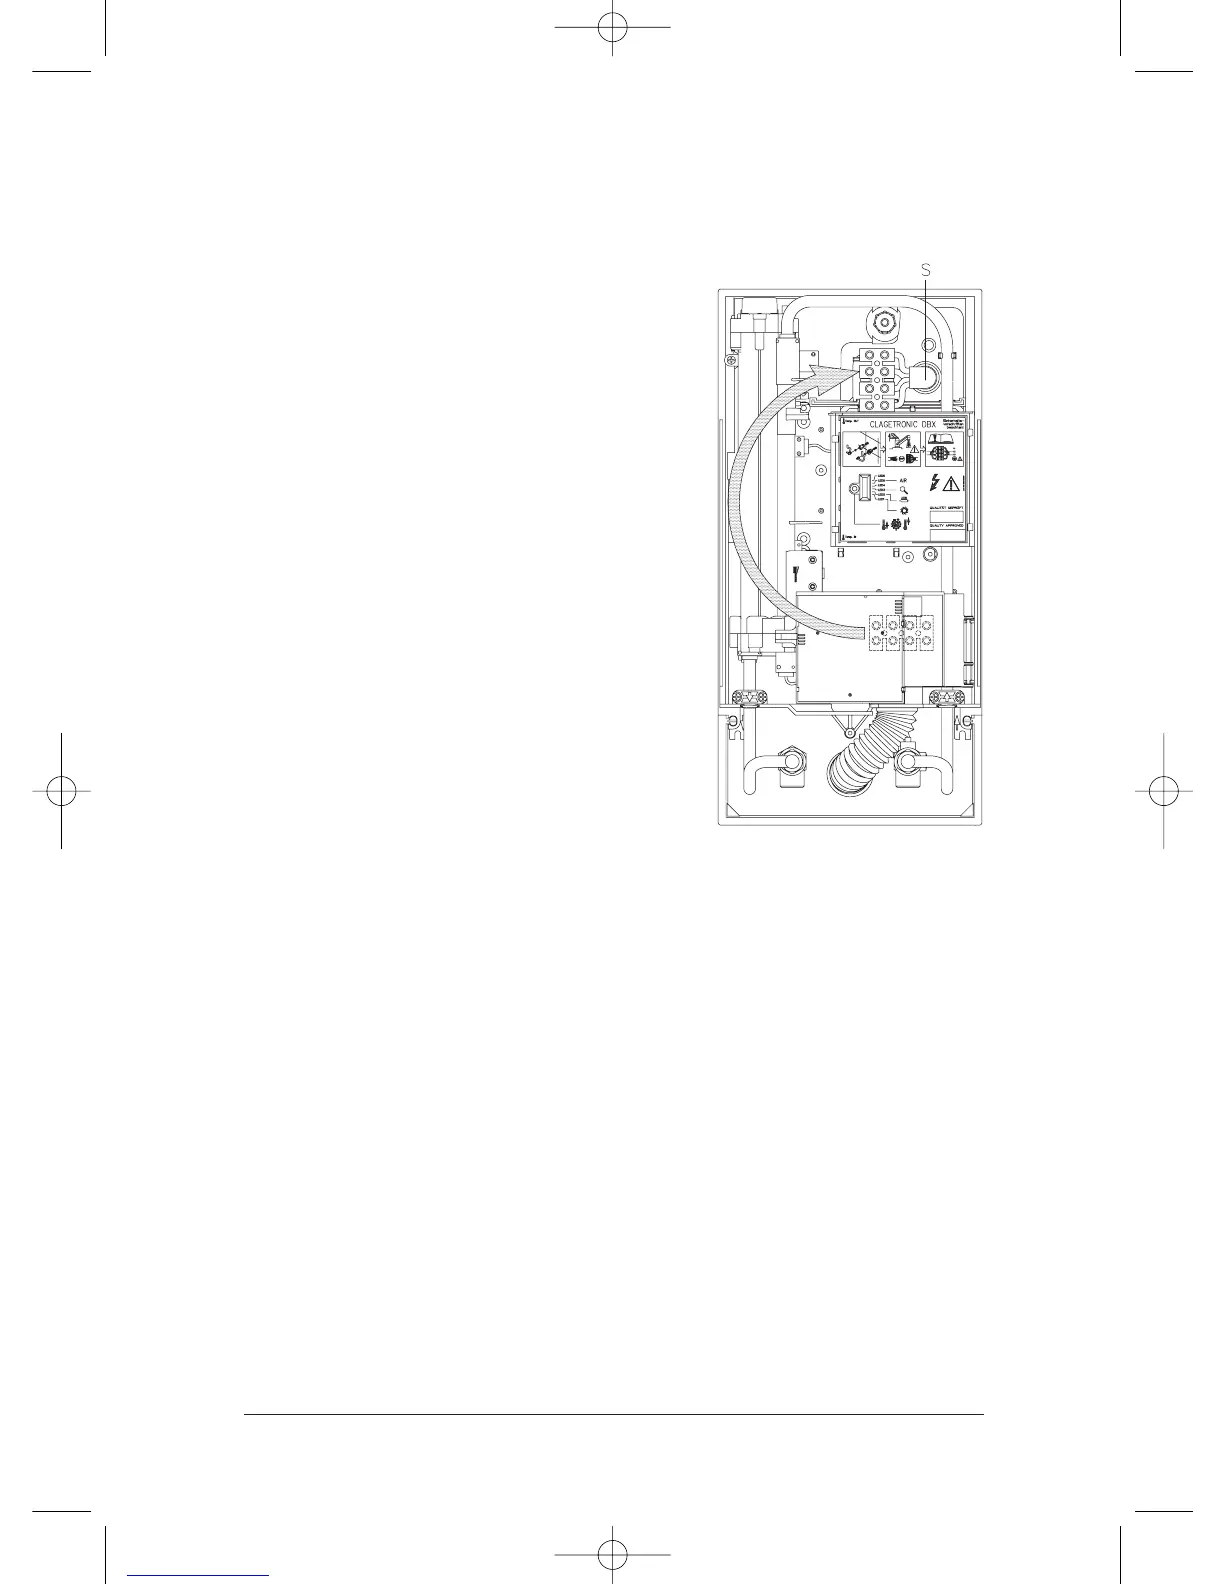
Electrical connection from above
1.Open the prepared breaking point (S) in the
upper part of the appliance by pressing with a
blunt instrument (e.g. Screwdriver)
2.Open the cable grommet to slightly smaller than
the cable size to ensure optimum protection
against water ingress. Fit the grommet into the
cable opening. N.B. The cable grommet must
be used.
3.Strip the cable 6cm above the point where it
emerges from the wall. Support the appliance
while the cable is routed through the grommet.
4.Unscrew the terminal block fixing screw.
Reposition the terminal block on the upper
mounting and secure with the fixing screw.
5.Fit the connecting cables into the terminal
block according to the wiring diagram on page
9. Ensure all connections are fully tightened
and secure.
6.The appliance must be earthed.
7.Re-fit the appliance cover and secure with the
fixing screw before re-fitting the fascia panel.
Check that the power supply is switched off prior to electrical connection!
 Loading...