EasyManua.ls Logo

AMX PRO-DP8 DECOR PROLINK FLUSH MOUNT KEYPAD PANEL User Manual

AMX PRO-DP8 DECOR PROLINK FLUSH MOUNT KEYPAD PANEL
27 pages
To Next Page IconTo Next Page
To Previous Page IconTo Previous Page
Page #20 background image
DIP Switch Configuration
15
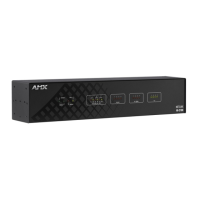
PRO-DP8 Decor 8-Button Wall Panel
DIP Switch Configuration
This section describes the functionality associated with the various DIP switch settings available on
the PRO-DP8 panel. These switches determine the front panel functions and should not be thought
of as user accessible.
DIP Switch Functions (1-8)
The panel functions are set by the configuration of the DIP switch, located on the back of PRO-DP8
panel. The factory default is for all the switches to be in the Off position.
The following table lists the operational assignments for the PRO-DP8 DIP switch.
Always disconnect the PROlink cable from the PRO-DP8 to remove power before
changing DIP switch settings. Once the switche(s) are set, reconnect the PROlink
cable to the PRO-DP8 to provide power to the panel.
On power-up, the pushbutton LEDs momentarily light in sequence until the Channel 1
LED remains on.
DIP Switch Assignments
Switch On Function Off Function (factory default)
1Bit 1 Preset Offset. Offsets panel pushbuttons by 4.
With this offset, the pushbuttons = 5-20.
No offset (pushbuttons = 1-8)
2Bit 2 Preset Offset. Offsets panel pushbuttons by 8.
With this offset, the pushbuttons = 9-24.
No offset (pushbuttons = 1-8)
3Bit 3 Preset Offset. Offsets panel pushbuttons by 16.
With this offset, the pushbuttons = 17-32.
No offset (pushbuttons = 1-8)
4 Can select zones on 2 packs (12 zones). Can select zones on 1 pack (6 zones).
5 Select zones starting with pack 1 (zone 1). Select zones starting with pack 2 (zone 7).
6 Preset 64+ Offset Preset 8+ Offset
7 Recall Presets only (on pushbuttons 1-8) Enables Zone Select function on pushbutton 5,
and up/down ramping on pushbuttons 6 and 7.
8 Program/record disable Program/record enable.

Questions and Answers:

AMX PRO-DP8 DECOR PROLINK FLUSH MOUNT KEYPAD PANEL Specifications

General IconGeneral
BrandAMX
ModelPRO-DP8 DECOR PROLINK FLUSH MOUNT KEYPAD PANEL
CategoryController
LanguageEnglish

Summary

Presets, Channels and Zones

Packs

Wiring and Installation

Preparing the PRO-DP8 and Dimmer Control Cards

Instructions for preparing the PRO-DP8 panel and its associated dimmer control cards for installation.

Wiring the PRO-DP8

Provides instructions and guidelines for wiring the PRO-DP8 panel using PROlink connectors and cables.

Using a PROlink 4-pin connector for data and power

Step-by-step guide on connecting the PRO-DP8's PROlink connector to dimmer Packs for data and power.

Testing

Provides steps to test the PRO-DP8 panel after installation to ensure proper operation and communication.

Troubleshooting

Offers solutions to common installation problems encountered with the PRO-DP8 panel.

DIP Switch Configuration

DIP Switch Functions (1-8)

Details the operational assignments and functions of the 8 DIP switches located on the back of the PRO-DP8 panel.

Using Switches 1, 2 and 3 to Set Button Offset Values

Explains how to use DIP switches 1-3 to set offset values for panel pushbuttons, affecting preset numbering.

Using Switches 4 and 5 to Specify Which Pack(s) to Control

Describes how DIP switches 4 and 5 determine which dimmer Packs (1-3) the PRO-DP8 panel communicates with.

Using Switch 7 to Enable Either Preset Recall mode, or Zone Select/Preset Ramping

Explains how DIP switch 7 controls panel behavior between Preset Recall and Zone Select/Ramping modes.

Panel Programming/Operation

Related product manuals