5
User’s Guide
9125921 BB Revised 07/28/14
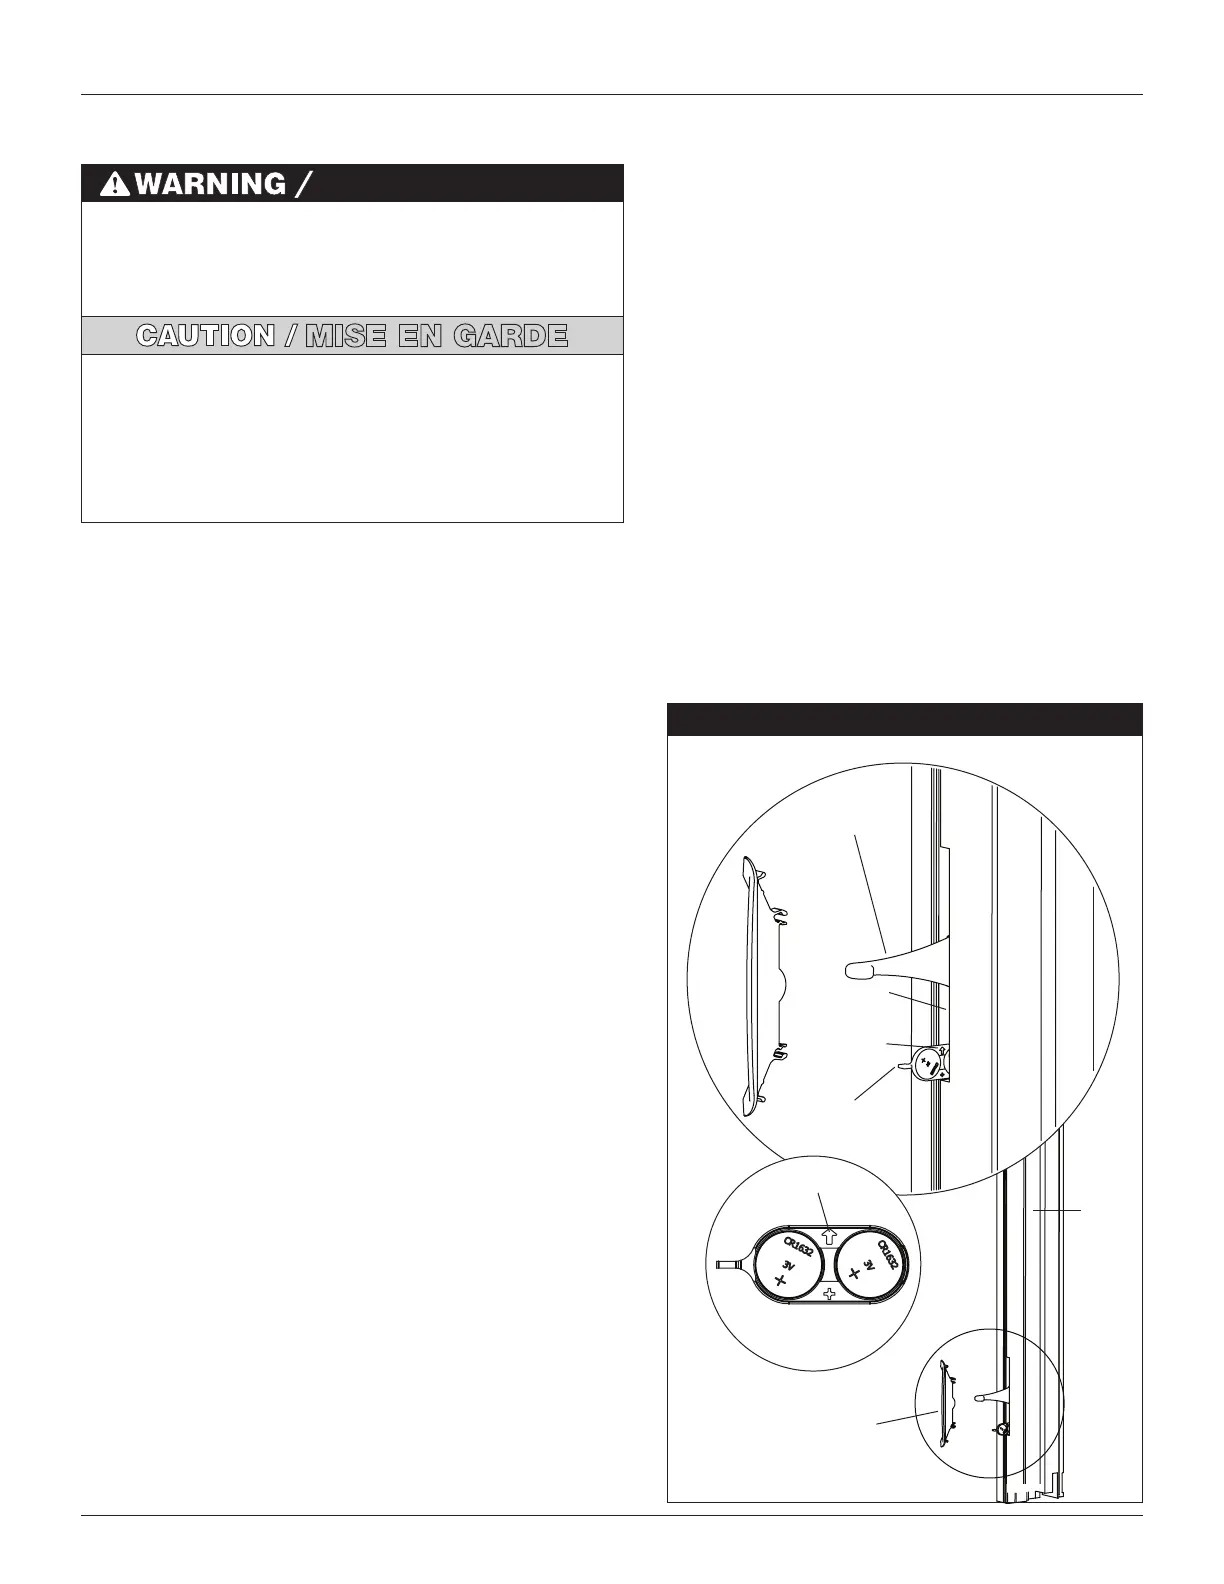
Casement and Awning Windows
Side
Jamb
Lock
Lever
Battery
Tray
Lock
Bezel
Arrow Up
Arrow
Lock
Lever
Battery
Tray Tab
Battery Tray
Interior View
L.E.D Light
Location
Battery Replacement Instructions
Tools Needed for Battery Replacement:
Casement and Awning Windows
When a low battery is detected in a wireless sensor, a low
battery message will display on your keypad when properly
configured with your security system. This message is sent
30 days prior to the battery being depleted.
The tools needed are dependent upon the product in
which the batteries are being replaced.
• Safety glasses • Flashlight
• Small needle nose pliers • Phillips screwdriver
• Small flat head screwdriver
1. Move the window lock lever(s) from the lower locked
position to the center position. The sash can be
opened or closed.
2. Remove the lock bezel using a small flat head
screwdriver, taking care not to scratch the wood or
lock bezel (left-hand lock for awning windows - from
the interior). Removal of the lock lever is not necessary.
3. Below the lock lever in the lock bezel opening, locate
the battery tray tab. Due to the recessed location of
this tab, the use of a flashlight may be necessary to
illuminate the work area.
4. Using a small needle nose pliers, carefully pull on the
tab to remove the battery tray.
5. Remove the discharged batteries (see battery disposal
information on page 4).
6. Replace the batteries with (2) two fresh CR-1632
lithium coin cell batteries. Take care to properly
position the “+” terminals of both batteries to
correspond with the “+” marking on the battery
tray for proper battery polarity.
7. Again using a small needle nose pliers, insert the
battery tray making sure the arrow on the face of
the battery tray is facing upward. Continue to fully
push the battery tray in. The battery tray will
encounter several points of light resistance as the
batteries contact the sensor.
8. Verify the proper battery polarity by observing the
L.E.D. light illumination during the battery
insertion. If the L.E.D. does not illuminate, check
to make sure Steps 6 and 7 were followed
correctly and insert the battery tray in sensor.
9. Replace the lock bezel.
10. Close and lock the window unit.
11. Verify that the sensor is communicating with the
security control panel by unlocking the window
and checking the keypad for the window unlock
message and then opening the window and
checking the keypad for the window open
message.
When replacing the battery, do not touch any of the
circuitry on the sensor. Static from your body could
damage the sensor.
Ne pas toucher aux circuits du capteur en changeant les
piles. L’électricité statique du corps peut endommager le
capteur.
Batteries are small parts and, if swallowed, could pose a
choking hazard to young children.
Les piles sont des petites pièces qui, si elles sont avalées,
pourraient être un risque d’étouffement pour les jeunes enfants.
 Loading...