7
User’s Guide
9125921 BB Revised 07/28/14
Monumental Single-Hung Windows
Battery
Tray
Lower
Sash
Phillips
Screwdriver
Lock Lever Screw
Lock Lever
Washer
Sash
Lock Cover
Battery
Tray
Right
Sash
Lock
Screw Cap
Sensor
Interior View
L.E.D Light
Location
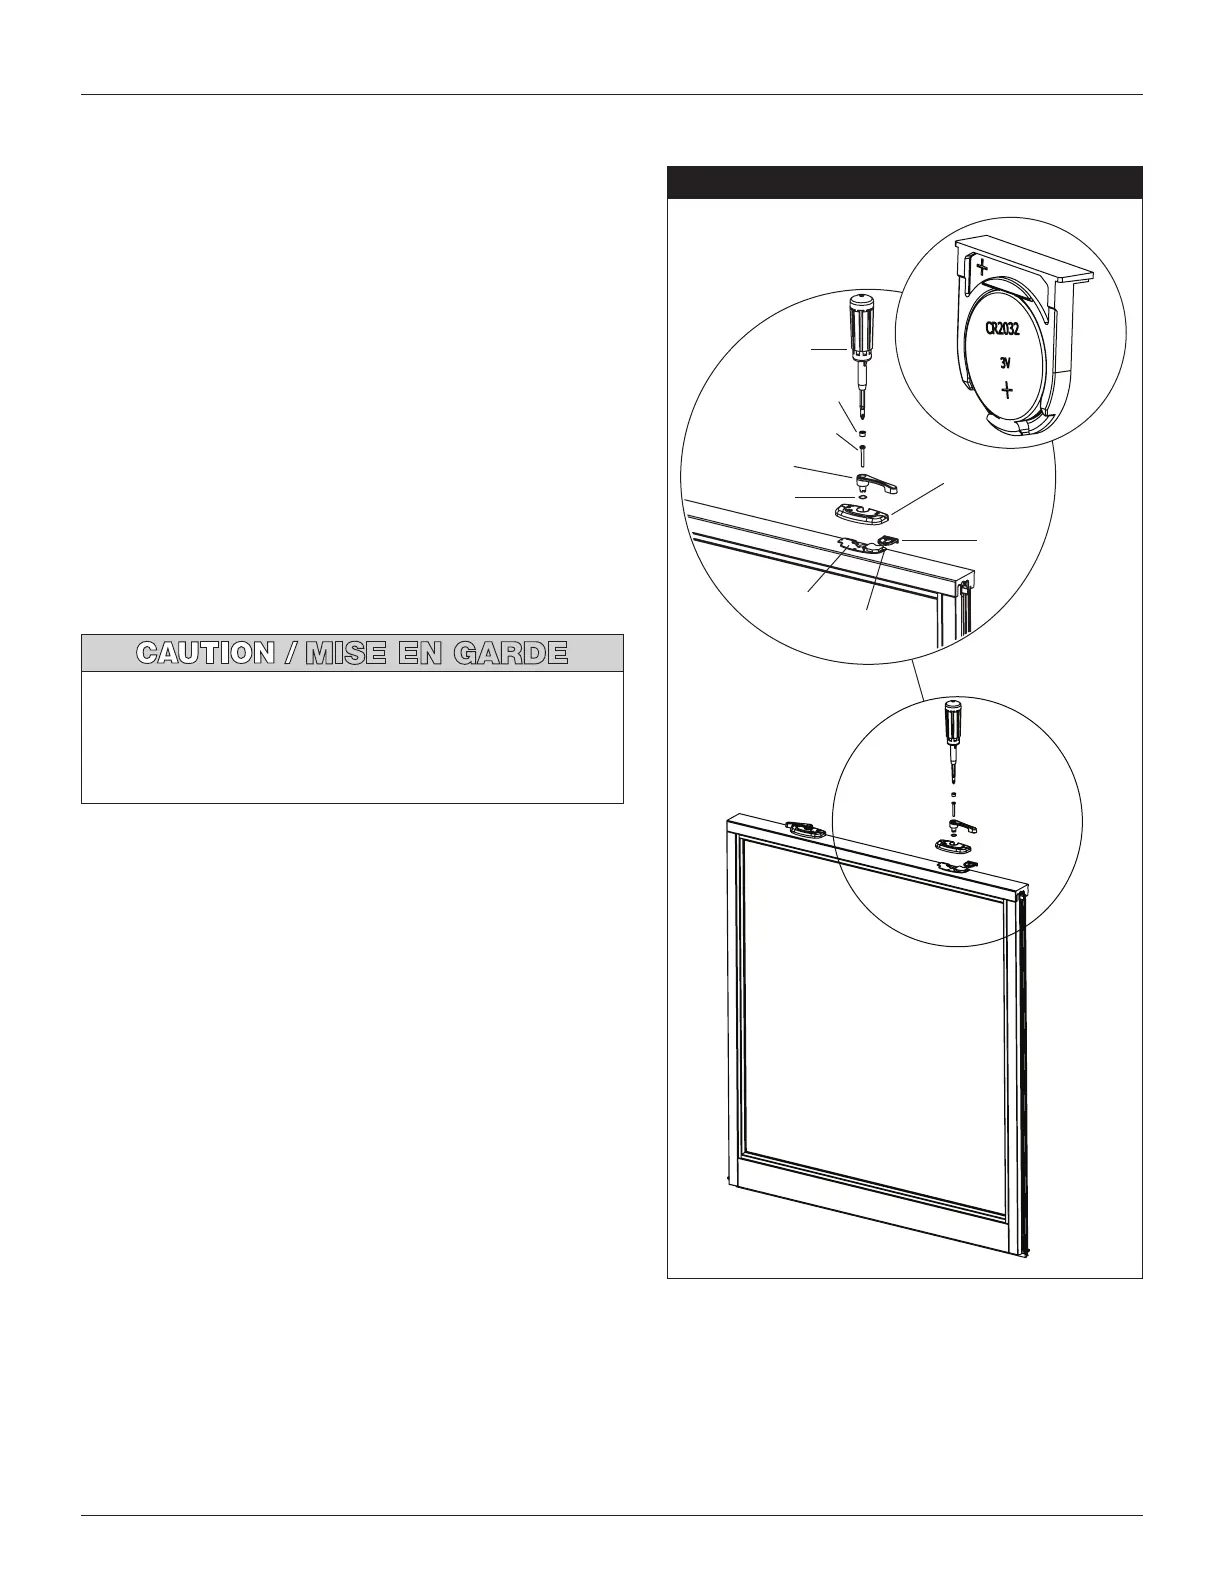
Battery Replacement Instructions - continued
Monumental Single-Hung Windows
1. Close the unit (upper and lower sash) and lock the left
sash lock.
2. Remove the plastic/metal screw cap on the right lock
lever using a small flat head screwdriver. Take care
not to scratch the finish of the plastic/metal screw
cap.
3. Using a Phillips screwdriver, loosen and remove the
right lock lever screw.
4. Remove the right lock lever and washer and keep with
the lock lever screw for reassembly later.
5. Remove the right sash lock cover to expose the
sensor.
6. Carefully remove the battery tray from the sensor.
The sensor is tethered to the sash by an antenna wire.
7. Remove the discharged battery (see battery disposal
information on page 4).
8. Replace the battery with a fresh CR-2032 lithium coin
cell battery. Take care to properly position the “+”
terminal of the battery to correspond with the “+”
marking on the battery tray for proper polarity.
9. Insert the battery tray half way back into the sensor.
Look for the L.E.D. light adjacent to the battery
opening to illuminate to verify proper battery polarity.
10. If the L.E.D. light does not illuminate, remove the
battery tray and verify for proper battery polarity.
11. Upon successful illumination of the L.E.D. light, place
the right lock lever and sash lock cover over the
sensor and fasten using the lock lever screw. Note: To
help protect the lock mechanism, hand tightening is
recommended.
12. After attaching cover, carefully seat the battery tray
fully into the sensor so that it is flush with the back of
the sash lock cover.
13. Prior to replacing the plastic/metal screw cap, verify
the sash lock is functioning properly by unlocking
both sash locks, opening the window, closing the
window and locking both the sash locks.
14. Replace the plastic/metal screw cap.
15. Verify that the sensor is communicating with
the security control panel by unlocking the
window and checking the keypad for the window
unlock message and then opening the window
and checking the keypad for the window open
message.
Significant movement of the sensor could cause damage to
the antenna solder joint, resulting in poor sensor operation.
Tout mouvement significatif du capteur peut endommager la
soudure de l’antenne et nuire au fonctionnement du capteur.
 Loading...