PLACING THE SYSTEM IN SERVICE
After all testing has been successfully completed, the system may
be placed in service.
NOTICE
Record installation date on label inside control
module enclosure before securing cover.
1. Confirm cover seal is clean and correctly in place (not
twisted). A small amount of silicone lubricant will improve the
seal effectiveness. Set cover in place so that screws line up
with enclosure. (Battery module must be installed with retain-
ing strap secured.)
NOTICE
Cover should fit in place easily. Do not
force cover into position. Make certain
wires are not pinched between cover and
enclosure.
2. Secure front cover to enclosure using the four captive screws.
3. Remove gas motor wire connector from test module and
connect to gas motor assembly.
NOTICE
When gas motor wire connector is
removed from test module, the control
module yellow release LED and audio
alarm will temporarily pulse. This will stop
when wire connector is reconnected to
gas motor.
4. Push “reset” button on CHECKFIRE MP-N control module to
reset system. Reset has been acknowledged by the control
module when the sounder emits three rapid beeps and the
LEDs all illuminate.
The fire suppression system will discharge dry chemical if
the cartridge is installed when operating the strike button.
Make sure cartridge is not installed at this time.
Pull ring pin and push strike button on manual actuator
several times to ensure smooth movement.
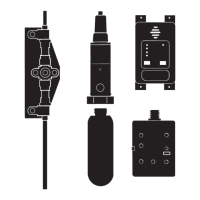
5. Install LT-10-R cartridge into manual actuator by completing
the following steps (Figure 36):
a. Make certain puncture pin is fully retracted and insert ring
pin through actuator body into puncture pin shaft. Attach
visual inspection seal, Part No. 197.
b. Remove shipping cap and weigh cartridge before installa-
tion. Replace if weight is 1/4 ounce (7.1 g) or more below
weight stamped on LT-10-R cartridge (Shipping Part No.
423423).
c. Screw cartridge into actuator body and hand tighten.
FIGURE 36
003943
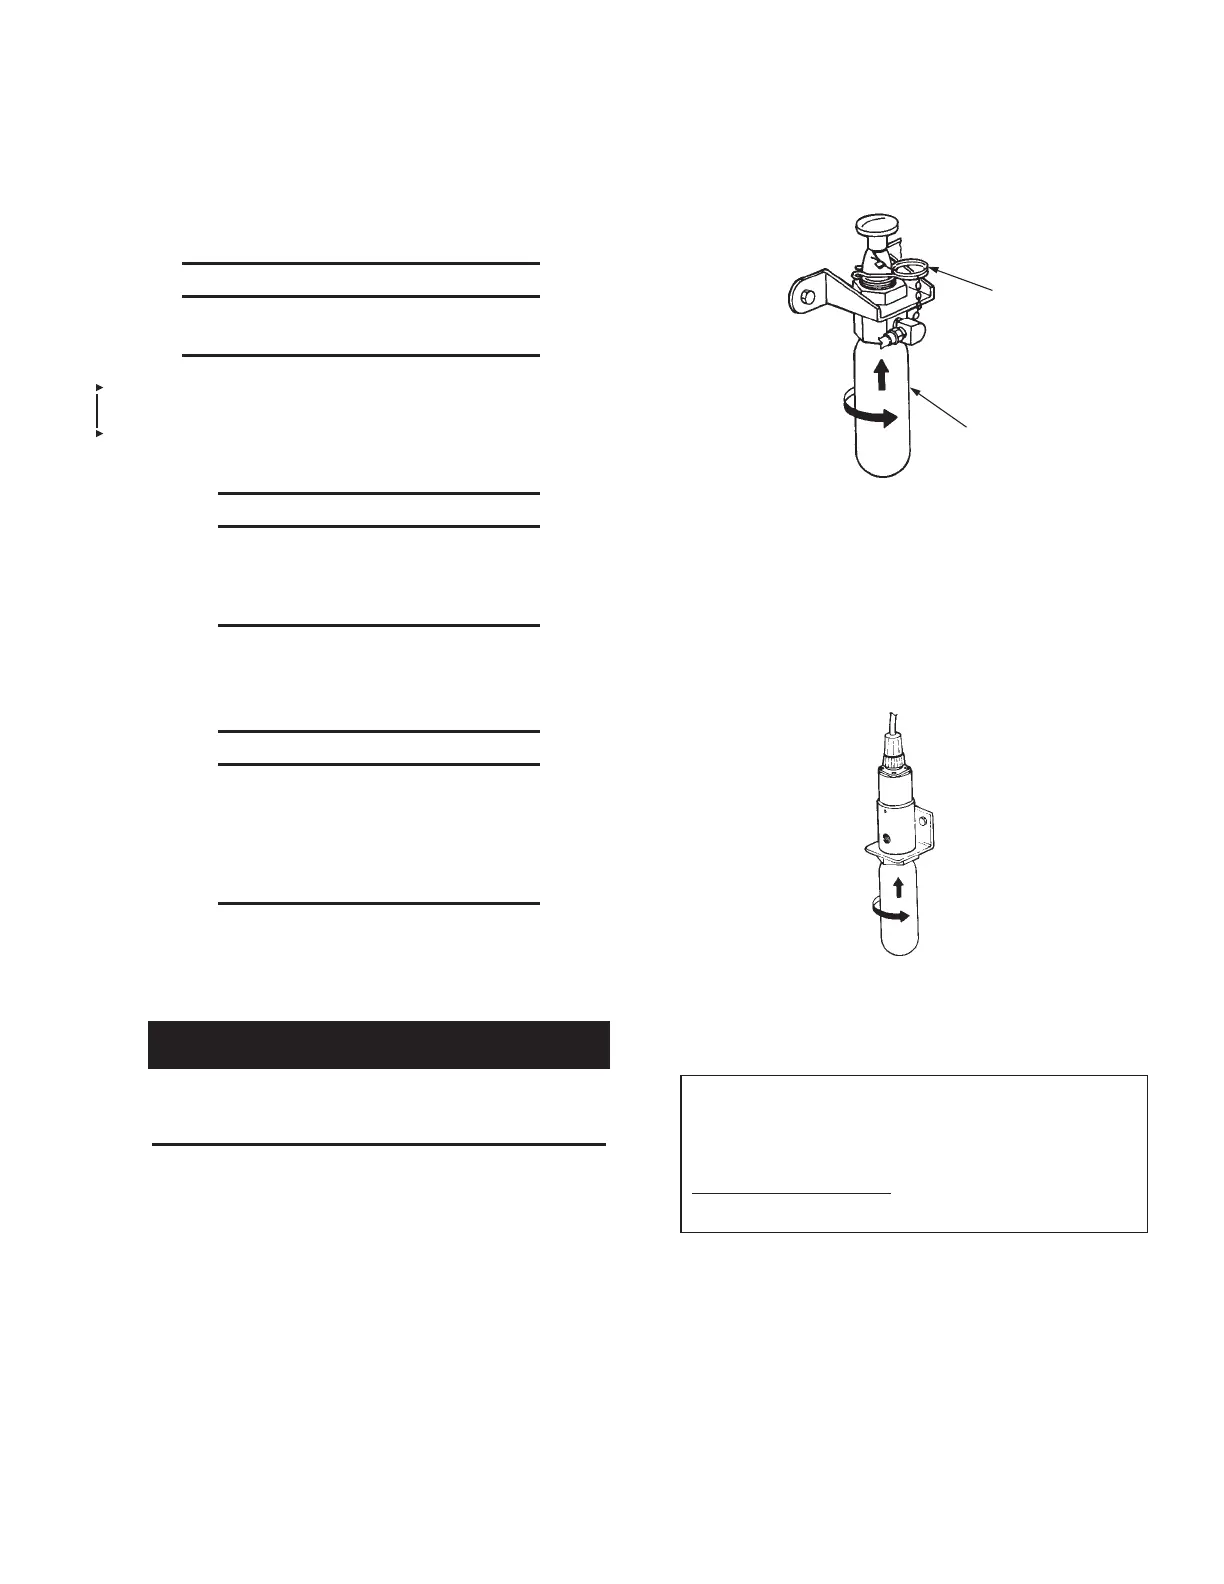
6. Install LT-10-R cartridge into gas motor actuator by complet-
ing the following steps:
a. Make certain puncture pin is fully retracted. See Figure 37.
b. Remove shipping cap and weigh cartridge before installa-
tion. Replace if weight is 1/4 ounce (7.1 g) or more below
weight stamped on LT-10-R cartridge (Shipping Assembly
Part No. 423423).
c. Screw cartridge into actuator body and hand tighten.
FIGURE 37
003944
7. If a vehicle shutdown device is not used, affix the ʻʻWHEN
FIRE ALARM SOUNDSʼʼ nameplate (Label No. 71086) in the
operatorʼs line of vision. (See Figure 38.)
FIGURE 38
!
CAUTION
WHEN FIRE ALARM SOUNDS
THIS VEHICLE IS EQUIPPED WITH AN AUTOMATIC FIRE
DETECTION, ALARM, AND SUPPRESSION SYSTEM. WHEN
FIRE ALARM SOUNDS, BRING EQUIPMENT TO A SAFE
STOP, SHUT OFF ENGINE, AND EXIT.
TO MANUALLY OPERATE: PULL RING PIN AND STRIKE
RED PALM BUTTON ON ACTUATOR.
LABEL NO. 71086
INSTALLATION
2012-MAY-18 REV. 02 PAGE 23
CHECKFIRE MP-N Electric
Detection and Actuation System Manual
LT-10-R
CARTRIDGE
RING PIN
AND SEAL
 Loading...