46
use and maintenance Area 51
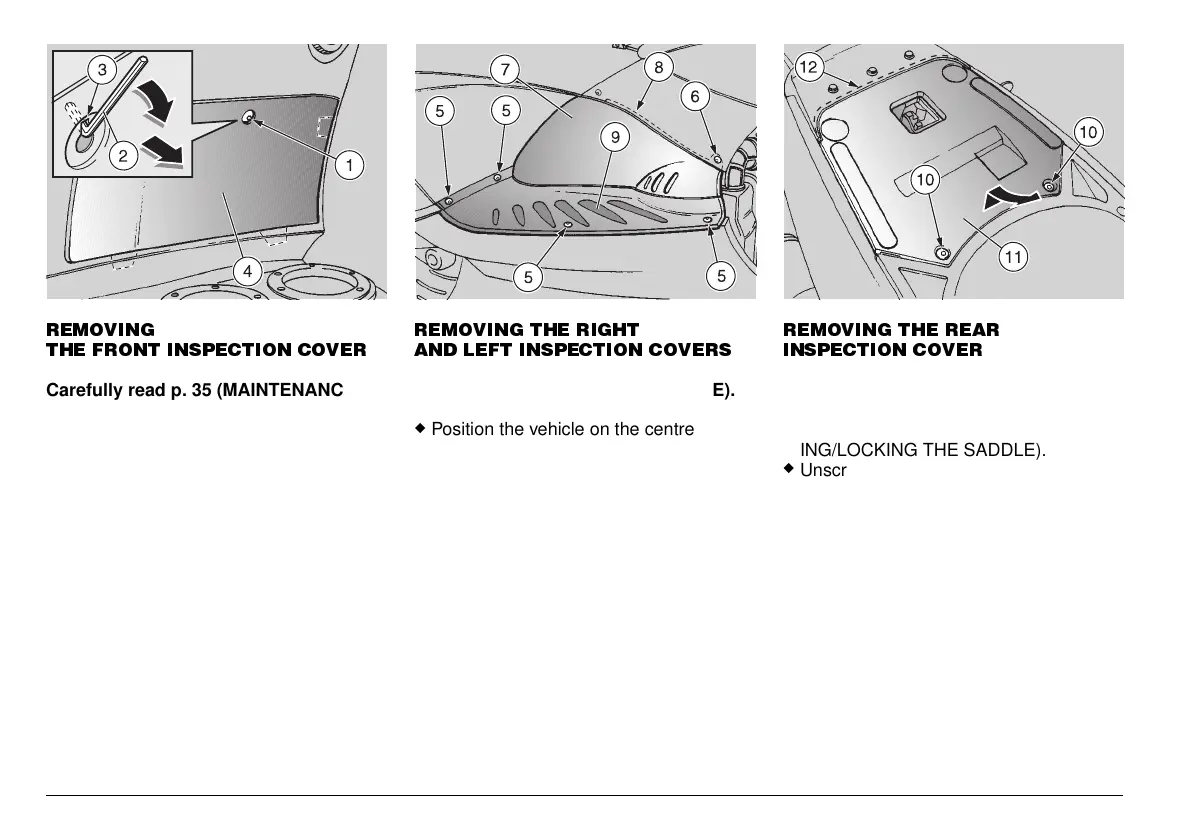
5(029,1*
7+( )5217 ,163(&7,21 &29(5
Carefully read p. 35 (MAINTENANCE).
Handle the painted components
with care and avoid scraping or
damaging them.
◆
Position the vehicle on the centre stand.
◆
Unscrew and remove the screw (1).
Proceed with care.
Do not damage the tangs and/or
their seats.
◆
Introduce the short part of the bent hexa-
gon spanner (2) in the appropriate seat
(3), rotate the spanner downwards, pull it
and remove the front inspection cover
(4).
Upon reassembly, correctly in-
sert the tangs in their seats.
5(029,1* 7+( 5,*+7
$1' /()7 ,163(&7,21 &29(56
Carefully read p. 35 (MAINTENANCE).
◆
Position the vehicle on the centre stand.
◆
Unscrew and remove the four screws (5).
◆
Only for the left inspection cover: un-
screw and remove the screw (6).
◆
Remove the inspection cover (7) by with-
drawing it sidewards.
Upon reassembly, correctly in-
sert the upper part (8) in its seat.
◆
Take the mat (9).
Upon reassembly, correctly posi-
tion the mat (9) under the inspec-
tion cover (7), with the antislip profiles
fitted in the appropriate seats.
5(029,1* 7+( 5($5
,163(&7,21 &29(5
Carefully read p. 35 (MAINTENANCE).
◆
Raise the saddle, see p. 21 (UNLOCK-
ING/LOCKING THE SADDLE).
◆
Unscrew and remove the two screws
(10).
◆
Lift the front part of the inspection cover
(11) and remove it by withdrawing it in
the travelling direction.
Upon reassembly, correctly in-
sert the rear part (12) in its seat.
 Loading...