MPS
the exact same combination of fittings, hoses and diffusor plate! The following
combinations have been calibrated by Aqua Computer:
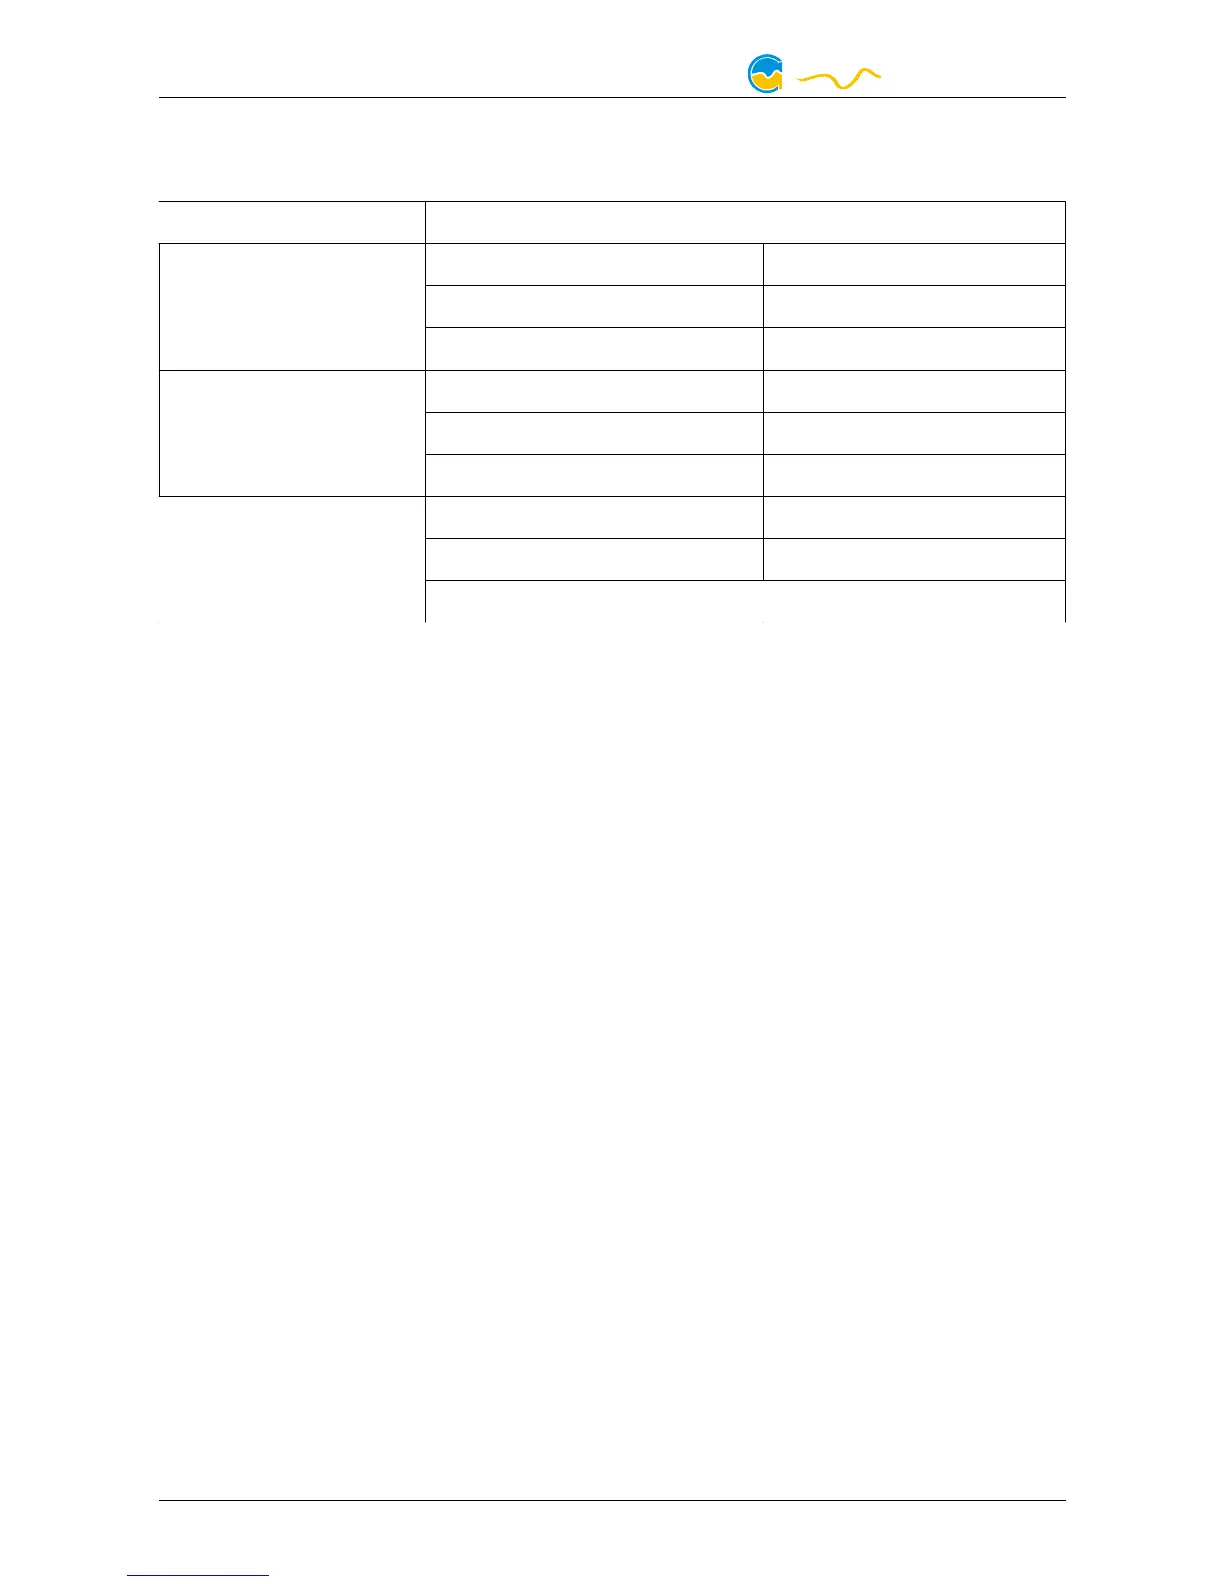
Sensor
SensorSensor
Sensor Hose system
Hose systemHose system
Hose system Diffusor plate
Diffusor plateDiffusor plate
Diffusor plate
mps flow 100 plug&cool (8/6 mm) NO
10/8 mm and 11/8 mm NO
13/10 mm (or larger) NO
mps flow 200 plug&cool (8/6 mm) YES
10/8 mm and 11/8 mm NO
13/10 mm (or larger) NO
mps flow 400 plug&cool (8/6 mm) YES
10/8 mm and 11/8 mm YES
13/10 mm (or larger) NO
All calibration data has been determined using fittings supplied by Aqua Comput-
er. Due to different dimensions, actual flow rates may differ from sensor readings
when used with fittings supplied by other manufacturers!
4.3. Installation of the diffusor plate
4.3. Installation of the diffusor plate4.3. Installation of the diffusor plate
4.3. Installation of the diffusor plate
If indicated in the table in the previous chapter, place the stainless steel diffusor
plate on top of the coolant inlet thread of the sensor (engraved as “in ►” on the
body) and turn it clockwise using a small screwdriver until the plate locks into
place on the bottom of the thread bore. The diffusor plate should be centered rel-
ative to the drill hole diameter on the bottom of the hole
4.4. Integration into the cooling loop
4.4. Integration into the cooling loop4.4. Integration into the cooling loop
4.4. Integration into the cooling loop
Install suitable fittings into the threads of the sensor. Gently tighten the fittings by
hand and do not use excessive force in order not to damage the threads in the
plastic body. Connect both sides of the sensor to your cooling loop ant take spe-
cial care to observe the flow direction indicated on the sensor body!
After installation and initial operation, it may take hours until the sensor is com-
pletely deaerated and sensor readings stabilize. If you use a pump with deaeration
mode such as the aquastream XT pump, you can activate this mode for some time
to speed up the process.
For electrical connections and configuration of the sensor please refer to chapter
eight and following chapters.
- 6 - Aqua Computer GmbH & Co. KG © 2012-2016
Gelliehäuser Str. 1, 37130 Gleichen

 Loading...