2920 1351 01
13
Instruction book
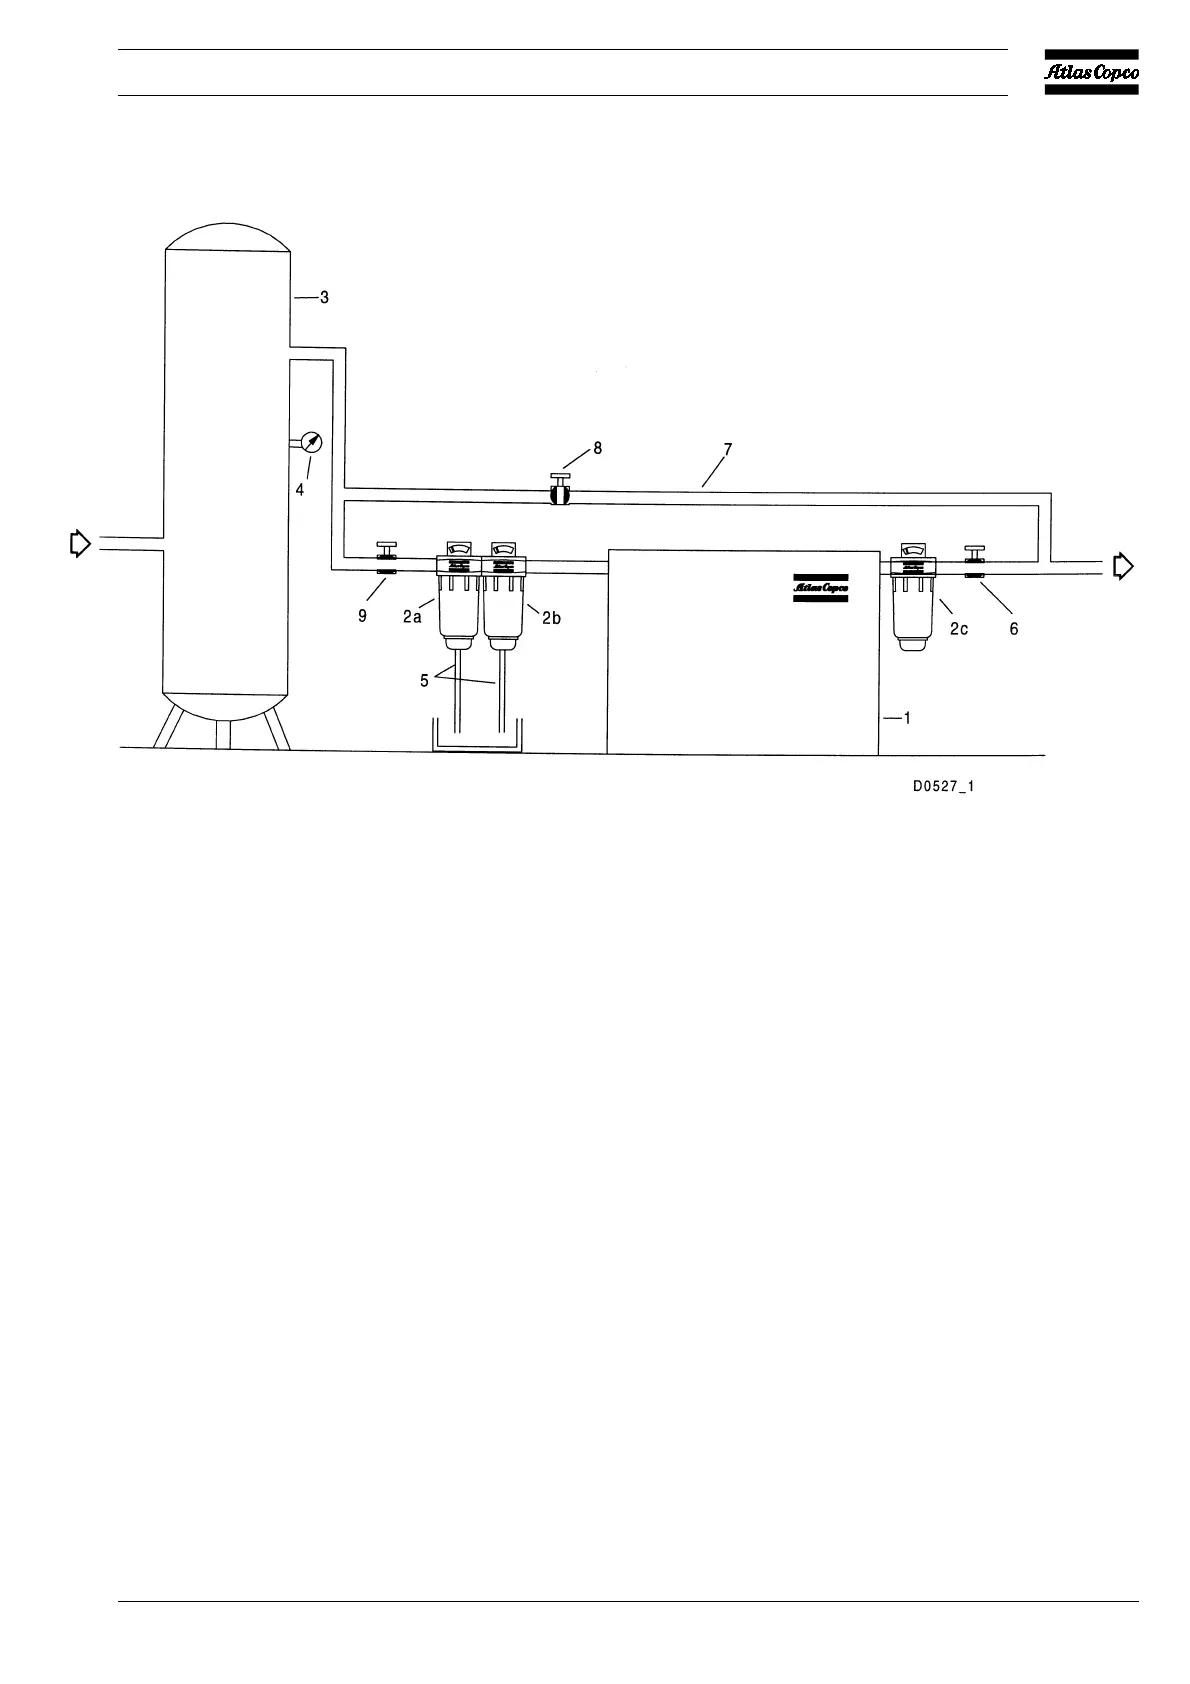
2.2 Installation proposal (Fig. 7)
4. A sticker dealing in short with the operating instructions
and explaining the pictographs is delivered with the
literature set. Affix the sticker next to the control panel.
Make yourself familiar with the instructions and pictographs
explained.
5. On water-cooled dryers, connect the water cooling pipes to
the marked in and out connections. It is recommended to
fit a manual shut-off valve in the water inlet.
6. Remove all the bags with silica gel attached to the dryer.
7. Check that the primary side connection of the transformer
(T1-Fig. 3) corresponds with the supply voltage.
8. Check that the electrical installation corresponds to the local
codes. The dryer must be earthed and protected against
short circuits by fuses of the inert type in all phases. An
isolating switch must be installed near the dryer. Connect 3
cables from the main fuses to terminals (L1, L2 and L3-
Fig. 3), connect the earth cable to the earth terminal (PE-
Fig. 3).
2.3 Installation instructions
1. Install the dryer where the ambient air is as clean as possible
and where the temperature of the air will never exceed or
drop below the temperature limits (see section 7). Keep
the ventilation gratings of the dryer free.
2. Connect the compressed air lines to the marked inlet and
outlet pipes of the dryer; if required, via valves and
preferably a by-pass valve. Apply a sealing medium to the
threaded connections.
3. Fit manual condensate drain valve (2-Fig. 8) onto the
condensate drain pipe.
Lay out the condensate drain hose (3-Fig. 8) via a funnel
towards a drain collector to allow visual inspection. The
hose must pitch downwards, away from the dryer and the
open end must never dip into the water of the drain collector.
If the condensate drain has been led down outside the
compressor room where the pipe may be exposed to freezing
temperatures, the pipe must be insulated.
1. FD dryer
2a. DD-type general-purpose prefilter
2b. PD-type high-efficiency prefilter
2c. DD-type afterfilter
3. Air receiver with condensate drain
4. Pressure gauge
5. Drain pipes
6. Dryer outlet valve
7. By-pass system
8. By-pass valve
9. Dryer inlet valve
Fig. 7. Installation proposal
 Loading...