Fast Track Guide 7. Upgrading the Mediant 1000
Version 4.8 31 February 2006
Note: At this point, the process can be canceled with no consequence to the Mediant
1000 (click the Cancel button). If you continue the process (by clicking the
Start Software Upgrade button, the process must be followed through and
completed with a Mediant 1000 reset at the end. If you click the Cancel button
in any of the subsequent screens, the Mediant 1000 is automatically reset with
the configuration that was previously burned in flash memory.
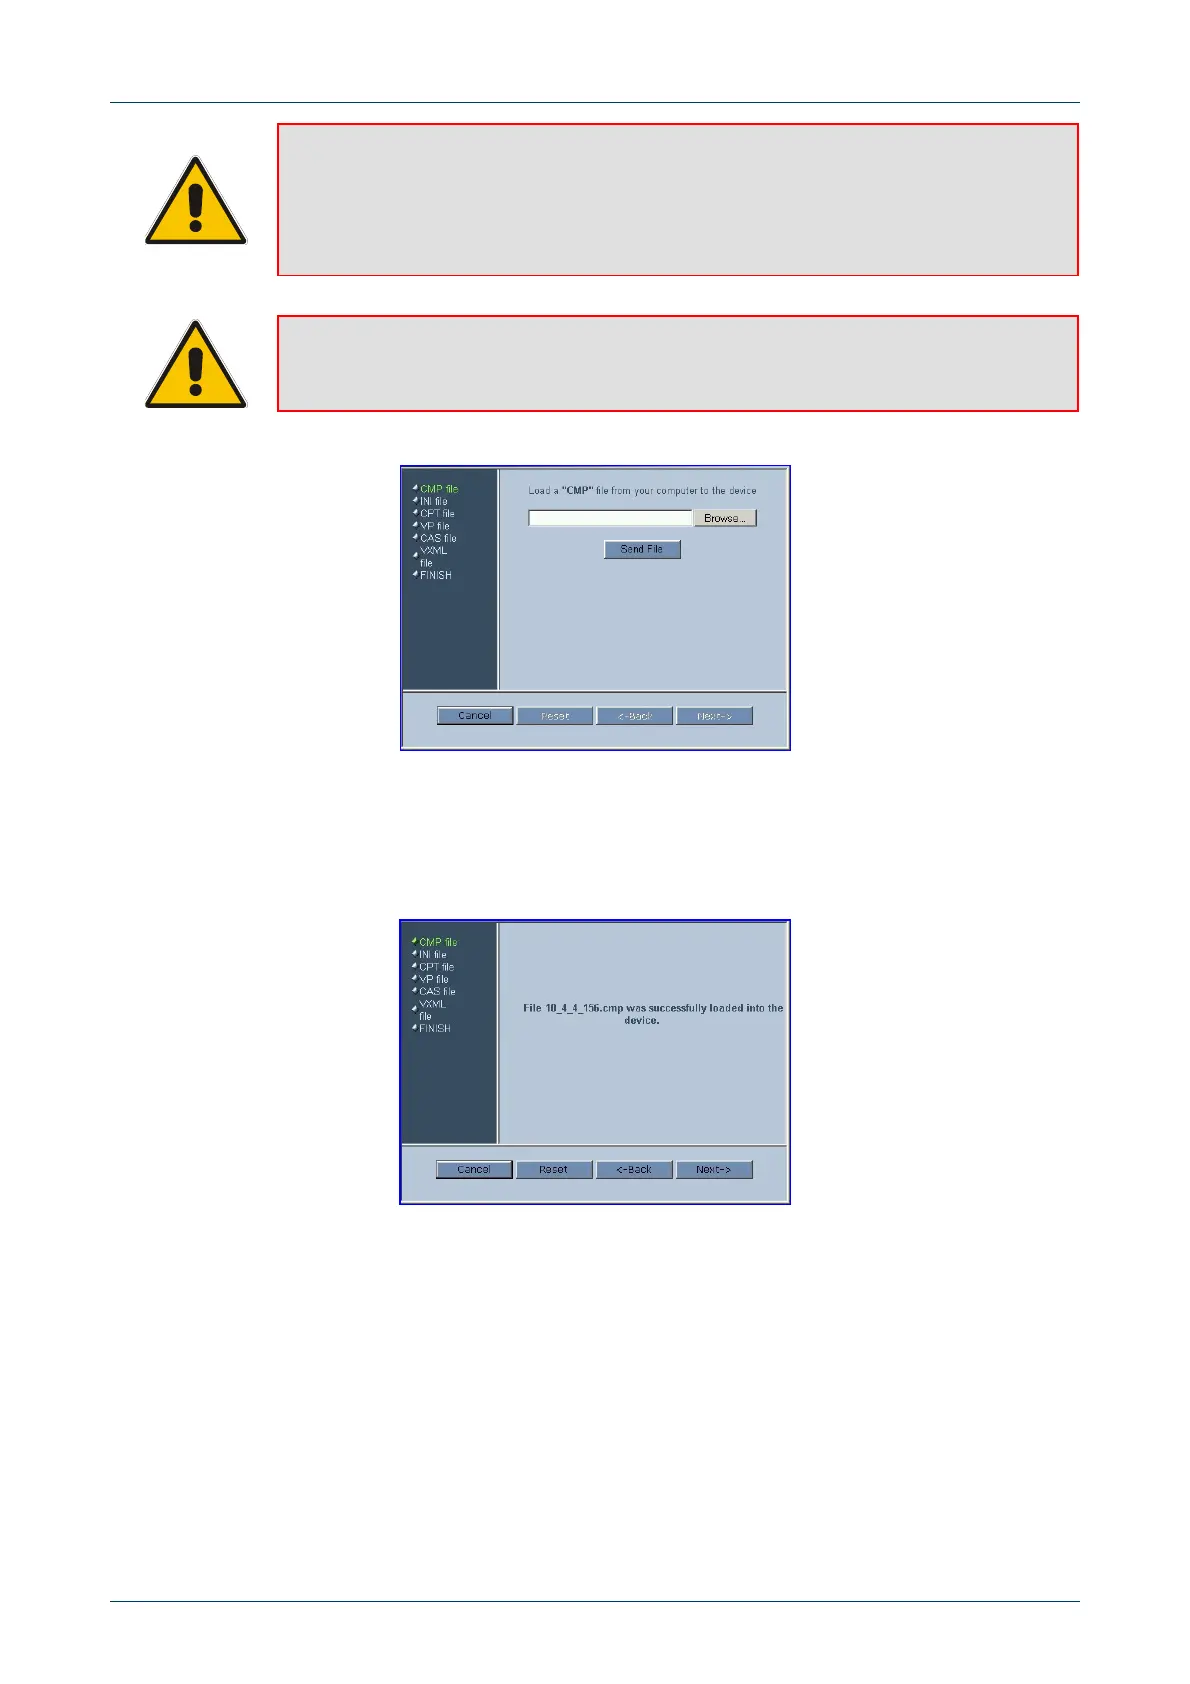
3. Click the Start Software Upgrade button; the ‘Load a cmp file’ screen appears (Figure 7-2).
Note: When in the Wizard process, the rest of the Web application is unavailable and
the background Web screen is disabled. After the process is completed,
access to the full Web application is restored.
Figure 7-2: Load a cmp File Screen
4. Click the Browse button, navigate to the cmp file and click the button Send File; the cmp file
is loaded to the Mediant 1000 and you’re notified as to a successful loading (refer to Figure
7-3).
Figure 7-3: cmp File Successfully Loaded into the Mediant 1000 Notification
5. Note that the four action buttons (Cancel, Reset, Back, and Next) are now activated
(following
cmp file loading).
You can now choose to either:
• Click Reset; the Mediant 1000 resets, utilizing the new cmp you loaded and utilizing the
current configuration files.
• Click Cancel; the Mediant 1000 resets utilizing the cmp, ini and all other configuration
files that were previously stored in flash memory. Note that these are NOT the files you
loaded in the previous Wizard steps.
• Click Back; the ‘Load a cmp File’ screen is reverted to; refer to Figure 7-2.
• Click Next; the ‘Load an ini File’ screen opens; refer to Figure 7-4. Loading a new ini file
or any other auxiliary file listed in the Wizard is optional.
 Loading...