32 33
external gear ratio 1/: indication of gear stepdown ratio for an additional gear. For example, for a
quarter-turn gear with a ratio of 1:120, enter 120.
Travel will then be indicated in degrees.
thread in mm: Indication of pitch of a linear system to allow travel to be displayed in mm, rather
than in number of revolutions
stroke: Indication of stroke value measured when adjusting valve.
24 CREATING OR ChANGING PASSWORD
Select change in the MENU turn to OK to confirm.
Select data sheet in the CHANGE menu and turn to OK to confirm.
Select entry code in the DATA SHEET menu and turn to OK to confirm.
Enter 1st digit with the blue button, then turn to OK to confirm.
Enter 2nd digit with the blue button, then turn to OK to confirm.
Enter 3rd digit with the blue button, then turn to OK to confirm.
The new code will not be taken into account until the user exits
the change menu and confirms the change (change ok?)
Make sure you can remember this code to access the change menu again.
If you forget your code
Switch off power to the system unit and open the control unity to access
the INTELLI+ board (supporting the display). Move the jumper on the board
from position A to position B, then turn the power back on. The password
has now been reset to zero. Place the jumper back in its original position
(A).
If you leave the jumper in position B, you will still be able to enter a new
password, but it will be reset to zero the next time you switch the unit on.
25 USING ANALOGUE POSITION SIGNAL (DEPENDING ON MODEL)
On some models, the actuator can use an analogue signal to transmit its percentage position (0 -
100%) to a remote device.
The output signals are automatically calibrated on the actuator’s stroke (0 - 100%) and so the trans-
mitted position signal does not need any adjustment.
The transmitted signals are totally isolated from the
INTELLI+ circuits.
Use a rectified, filtered or stabilised 12 - 32V DC
power supply for this position signal. It is also possible
to use the internal 24V power supply on terminals
6(-) and 7(+).
Max. permissible loading is shown on the table.
The following signals can be used:
4-20 mA, 0-20 mA, 4-12 mA or 12-20 mA.
4-20 mA, 4-12 mA or 12-20 mA outputs can connected
with two wires, with the external power supply in series
with the signal reading. (see actuator circuit diagram)
The 0-20 mA output can be used to obtain a 0-10V
signal using an external 500 ohm (or 499 ohm 1%)
resistor.
The power supply voltage will be 15 to 32V.
ENTRY CODE
(000
jumper
Power supply
(volts)
Max. permissible
load (ohms)
12 150
34 750
30 1050
32
33
34
35
0-10V position remote signal
15 - 32V
+
-
+
-
0-10V
500
Ohm
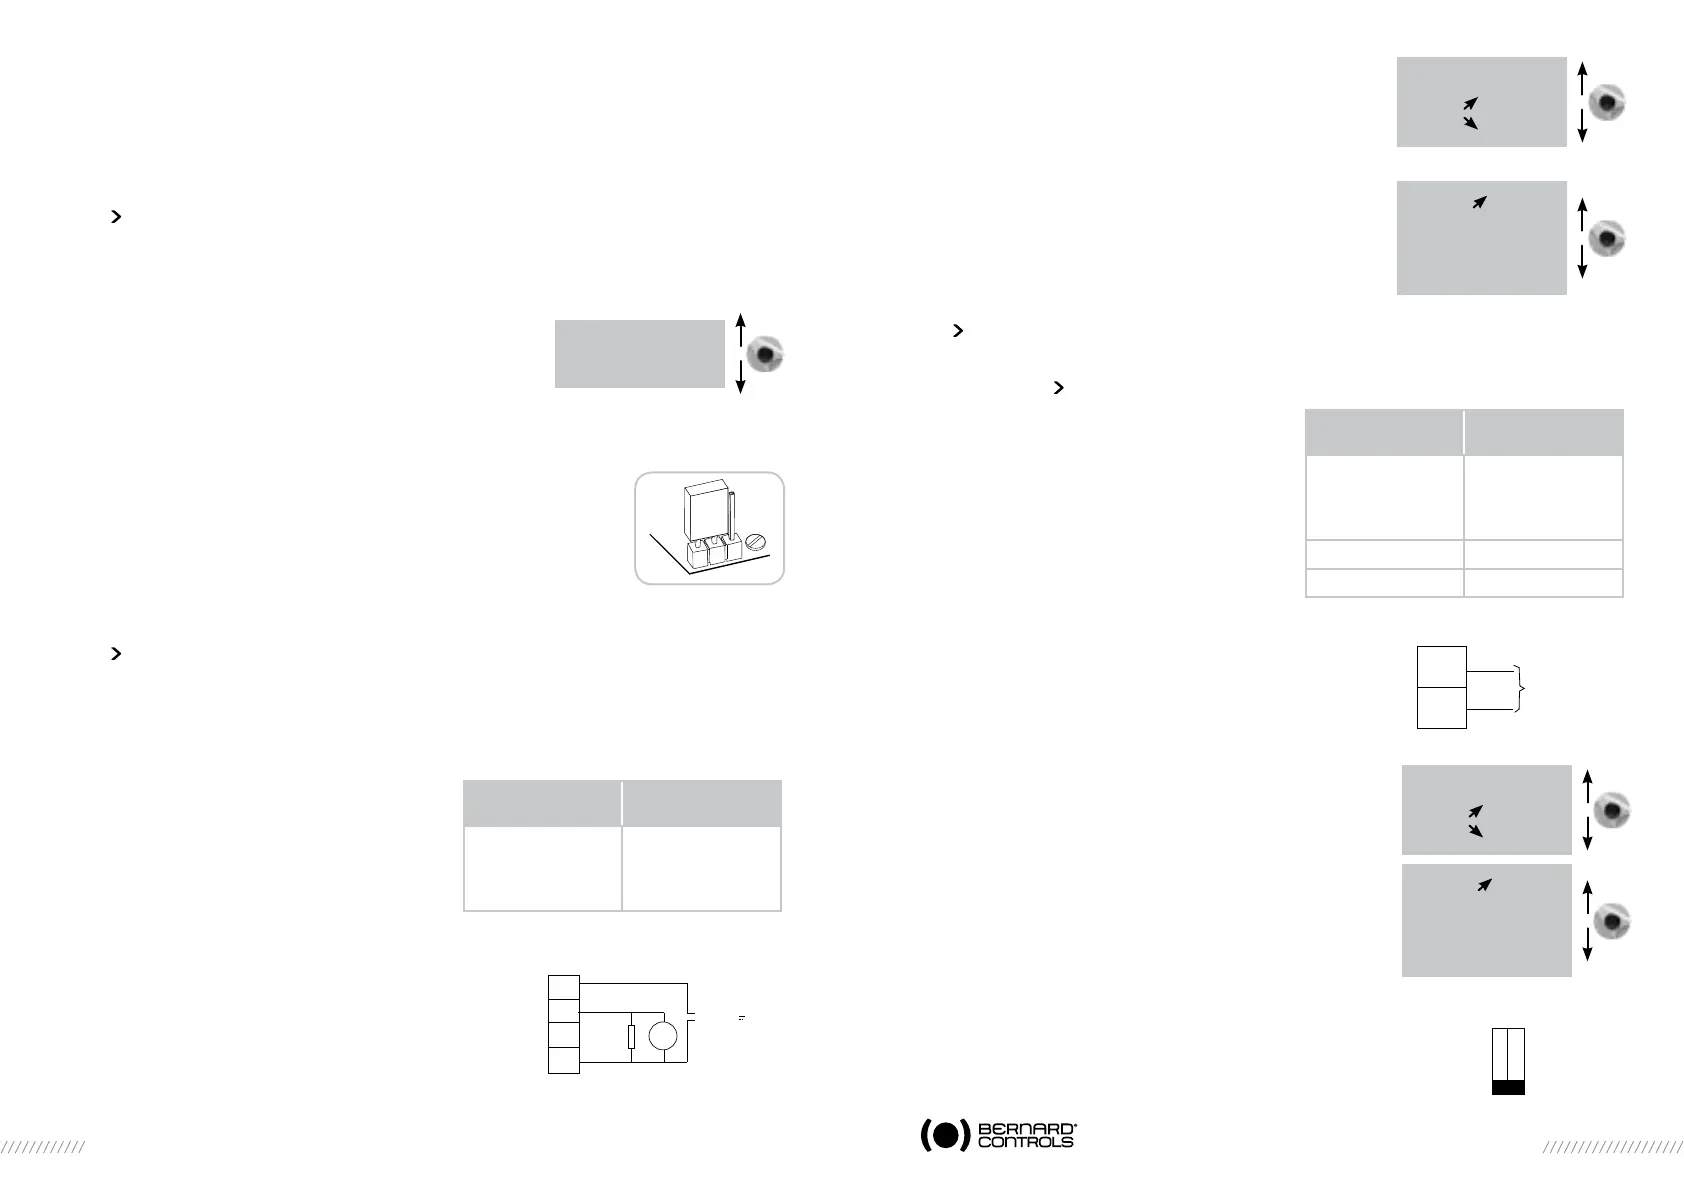
To select the signals’ direction of variation and type
Select change in the MENU and turn to OK to confirm.
Select position in the CHANGE menu and turn to OK to confirm.
Select opt. posit. signal in the POSITION menu and turn to OK
to confirm.
Choose signal’s direction of variation and turn to OK to confirm.
Select signal type and turn to OK to confirm.
26 USE AS A POSITIONER WITh AN ANALOGUE CONTROL SIGNAL
(DEPENDING ON MODEL)
26.1
INPUT SIGNAL
On some models, the actuator can operate as a
positioner using a proportional command, such as a
4-20 mA analogue signal.
The input signal is automatically calibrated on the
actuator’s stroke (0 - 100%) and so there is no need
to adjust the actuator’s operating range.
The input signal is isolated from the on/off
commands and from the remote position signal.
The actuator can still be operated in on/off mode
with the open, close and stop
commands or using proportional control. One of the auxiliary commands must be used to select
between these two control modes.
In the standard configuration, auxiliary command is set for AUTO
/ ON-OFF to allow the control mode to be selected remotely:
AUTO = proportional control (analogue) or ONOFF= on/off
control. See section 11.2 for configuration details and information
on using this command.
Control signal
4-20 mA, 0-20 mA, 4-12 mA, 12-20 mA or 0-10 V
To select the signals’ direction of variation and type:
Select change in the MENU and turn to OK to confirm.
Select positioner in the CHANGE menu and turn to OK
to confirm.
Select signal type in the POSITIONER menu and turn to OK
to confirm.
Choose signal’s direction of variation and turn to OK to confirm.
Choose signal type and turn to OK to confirm.
With 0-10 V signals, two contacts are also switched to OFF.
The contacts are located on the INTELLI+ board (supporting
the display) inside the control unit.
OPT POSIT SIGNAL
signal ( ) opening
signal ( ) opening
SIGNAL ( ) OPENING
(4-20 mA)
(0-20 mA) / (0-10V)
(4-12 mA)
(12-20 mA)
Signal
Input impedance
(Ohms)
4-20 mA 160
0-20mA 160
4-12mA 160
12-20mA 160
0-10V 11000
30
31
-
+
4 - 20 mA
0 - 20 mA
0 - 10 V
SIGNAL RANGEL
signal ( ) opening
signal ( ) opening
SIGNAL ( ) OPENING
(4-20 mA)
(0-20 mA) / (0-10V)
(4-12 mA)
(12-20 mA)
51
A
B
ON
mA
Volt
 Loading...