8-4
Getting Started
1.1.2
Configure VoIP Speakers Using Static IP Addresses
1. Connect the Windows PC and VoIP Speaker to an 802.3af compliant PoE switch, or a
PoE injector adapter (IEEE 802.3af compliant), for each VoIP Speaker.
2. Configure the Windows PC IP Address as 10.16.2.2, with Gateway IP Address as 10.16.2.1.
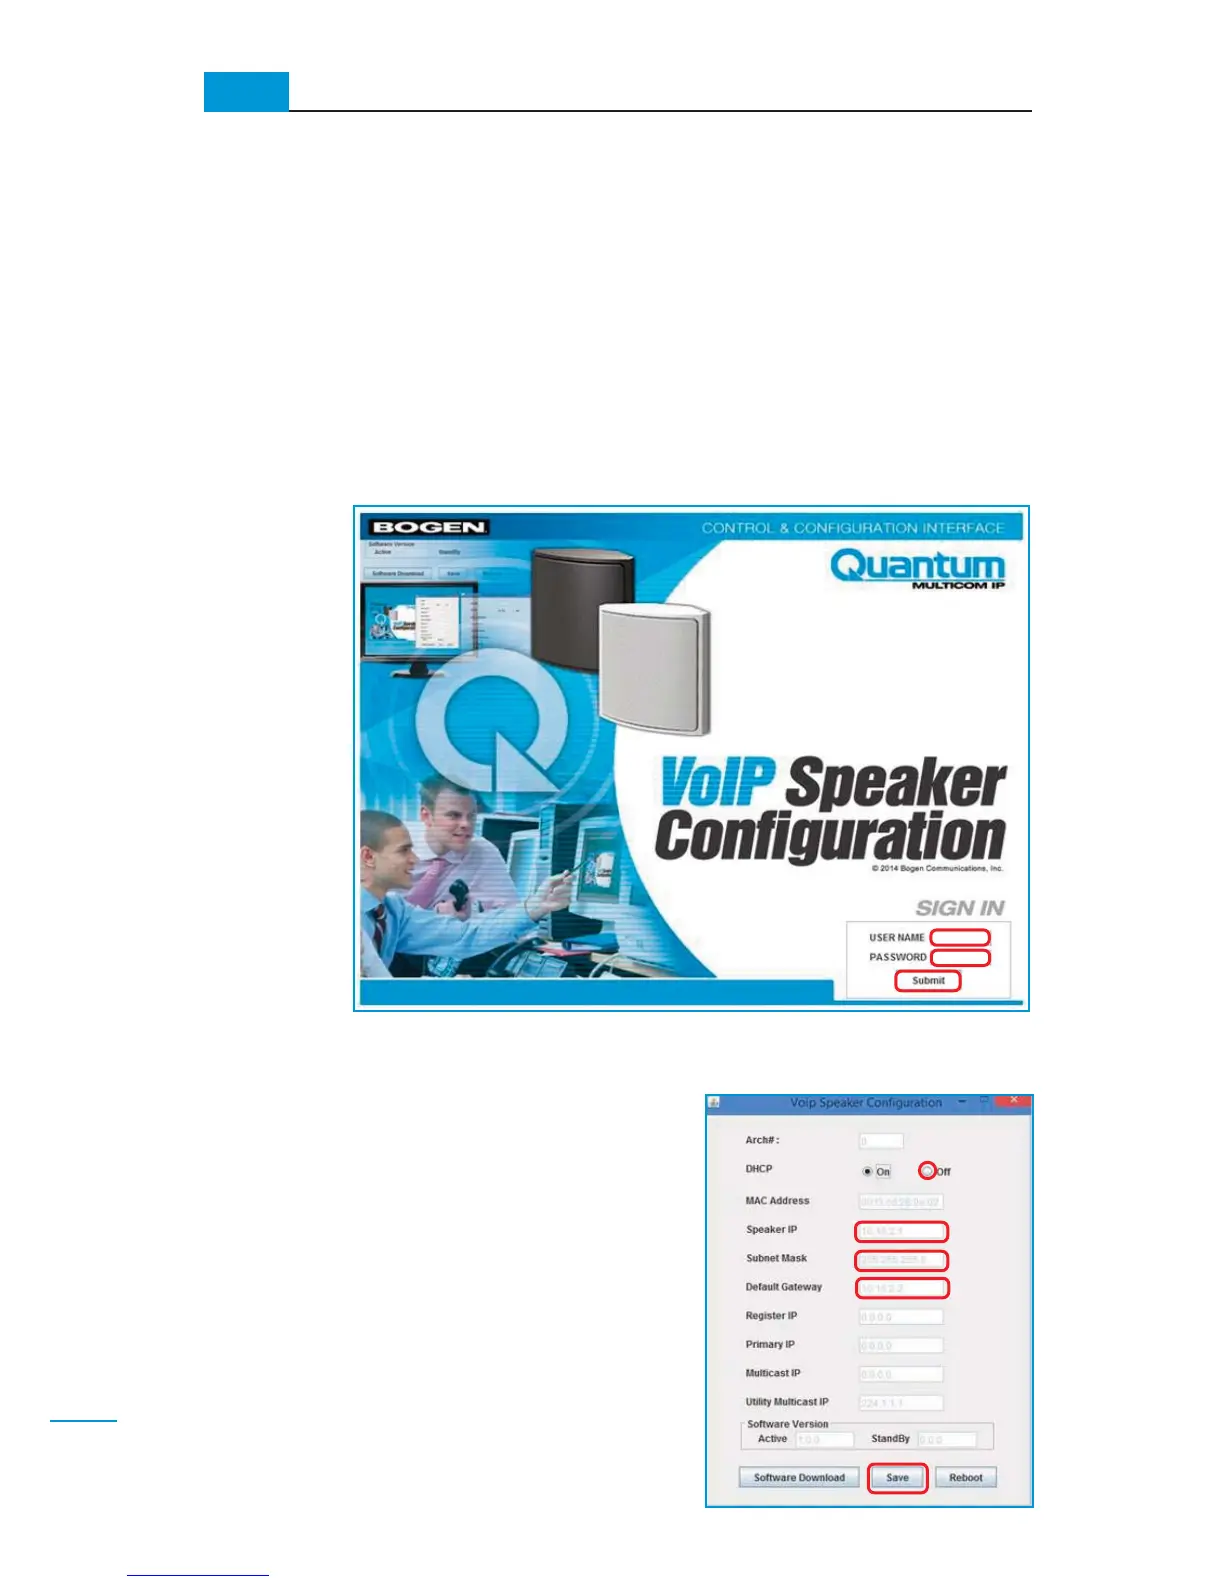
3. Use a web browser to open the VoIP Speaker Configuration Login Page
(Figure 1-1)
. Enter
the following into the browser’s address bar: http://10.16.2.1:8080.
4. Enter the Login Page sign-in credentials:
Username: maint Password: bogen
After entering the Username and Password, click
Submit. The VoIP Speaker Configuration window
(Java-applet) will open
(Figure 1-2)
.
5. Change the DHCP option from “On” to “Off” to
configure static IP Addresses.
NOTE: If after selecting “Off”, a popup screen
appears that says: “Cannot edit Speaker IP when
Primary IP is present. Please un-configure Primary IP from
Utility.” This alerts you to the fact that the speaker is
already configured and must first be un-configured
before you can proceed. See Section 3, How to
Un-configure a VoIP Speaker, for details on how to
un-configure the speaker.
If the VoIP Speaker Configuration Login Page above does not display, wait one minute, try again.
(Fig.1-1)
(Fig.1-2)
✍
✍
After the VoIP Speaker has been plugged into the PoE switch, it will take about a minute for the
VoIP Speaker to boot. Each VoIP Speaker will then repeatedly attempt to get an IP Address from
a DHCP server for one minute. After trying for one minute, the speaker will configure itself with a
default IP Address (10.16.2.1) and default Gateway IP Address (10.16.2.2).
NOTE: Only one speaker can be configured at a time using this IP address assignment process.
Connecting two or more un-configured IP speakers to the network without a DHCP server will cause
duplicate IP addresses and conflicts.
 Loading...