✍
8-5
Getting Started
NOTE: If the DHCP “On” option is selected, you will not be able to edit the fields to configure
static address information.
6. Enter values for Speaker IP, Subnet Mask, and Default Gateway, then click Save.The speaker
will automatically reboot and reconfigure the network interface.
NOTE: The VoIP Speaker will accept configuration commands for up to 15 minutes, after which
time it will reboot. It is important that you finish this step within 15 minutes. See Section 6.2.2,
Default IP Address Assignment, for further information on the 15 minute configuration time window.
✍
1.2
Configure Primary Quantum IP Address
After the VoIP Speakers’ IP Address have been configured (using static or DHCP), the next step
is to configure the VoIP Speaker with the Primary Quantum IP Address (the Quantum Node that
is currently set as Primary Node type in the network). All VoIP Speakers should use the same
Primary Quantum IP Address, even if the VoIP Speaker will be added to the Station List of
a different Quantum Node that is not the Primary Node in the network. One or more VoIP
Speakers can be configured at the same time.
1. You need to load the application called VoIP Speaker Locator onto the PC. Copy the file
named
VoIPSpeakerLocator.jar
to the Windows PC that will configure the VoIP Speaker(s).
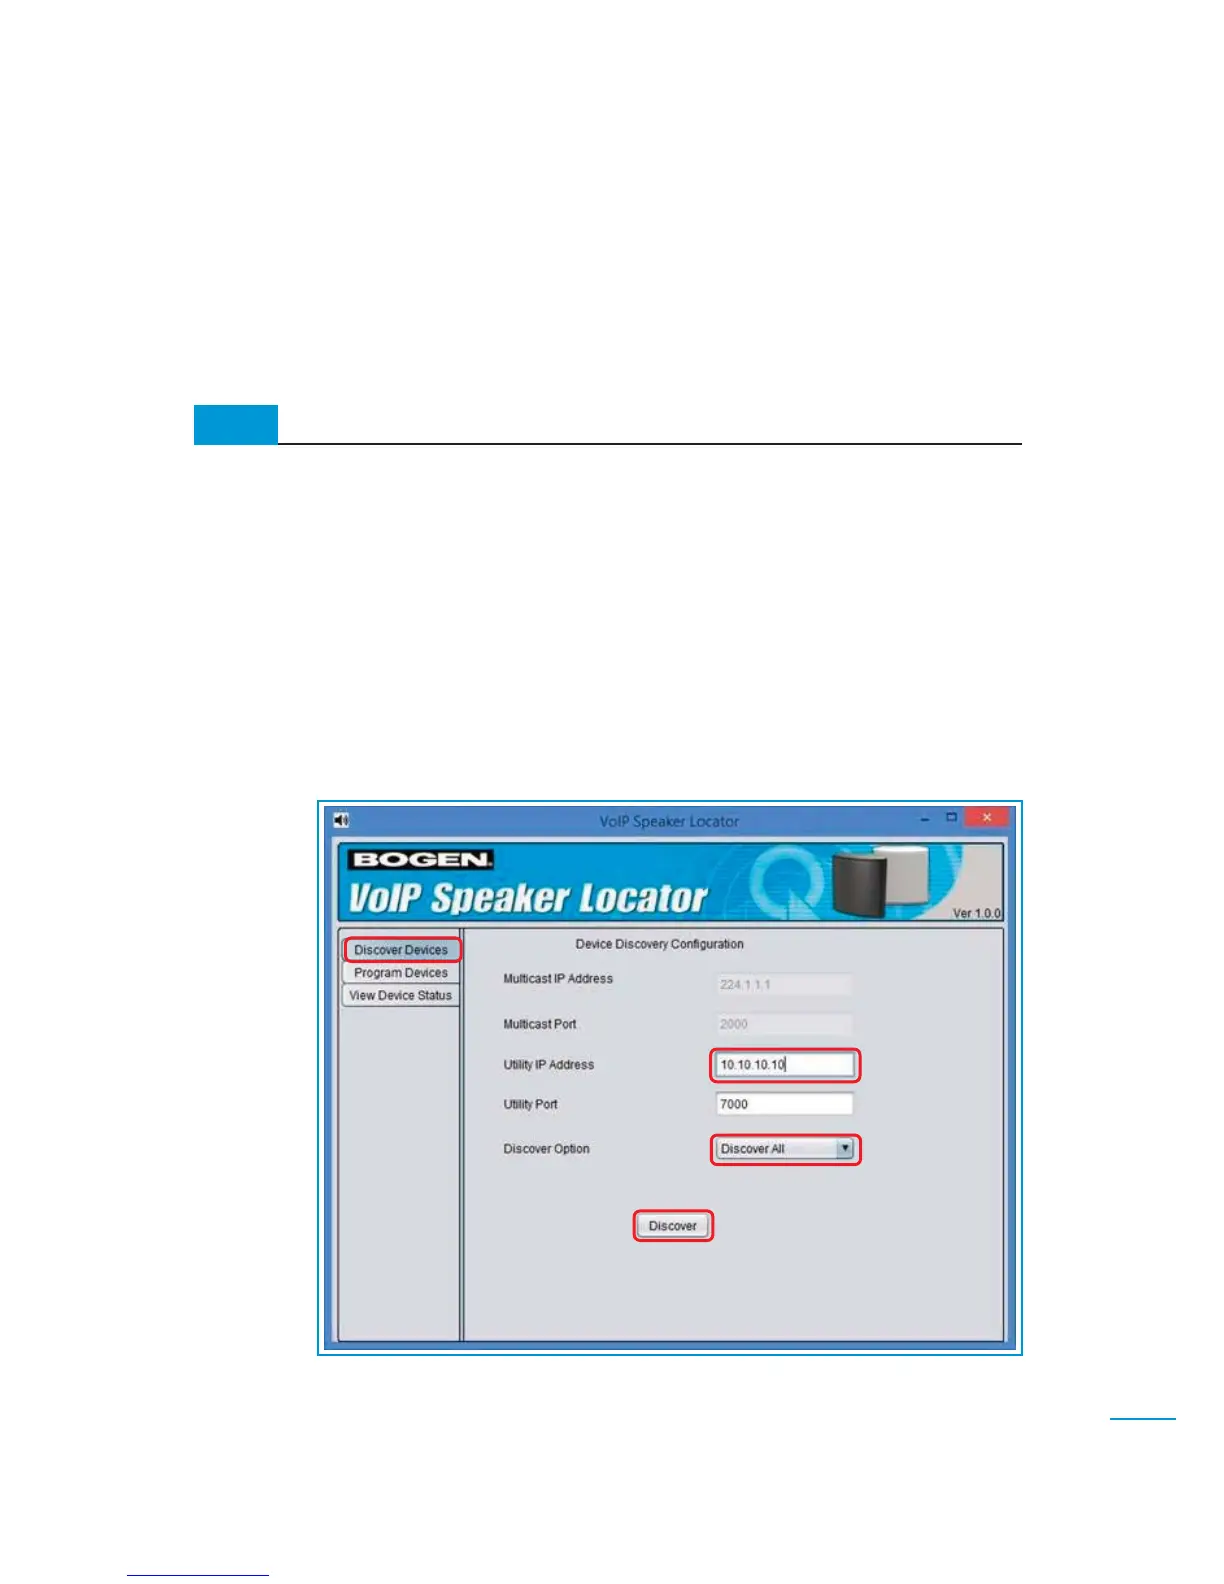
2. Start the VoIP Speaker Locator application by double-clicking the VoIPSpeakerLocator.jar
icon on the desktop. After displaying a splash screen, the application will display the Device
Discovery Configuration Screen
(Figure 1-3)
.
3. Enter the Windows PC’s IP Address into the Utility IP Address field. This should be the IP
Address for the PC interface that is used to connect to the same network that the VoIP Speakers
are connected to (e.g., 10.10.10.10).
(Fig.1-3)
 Loading...