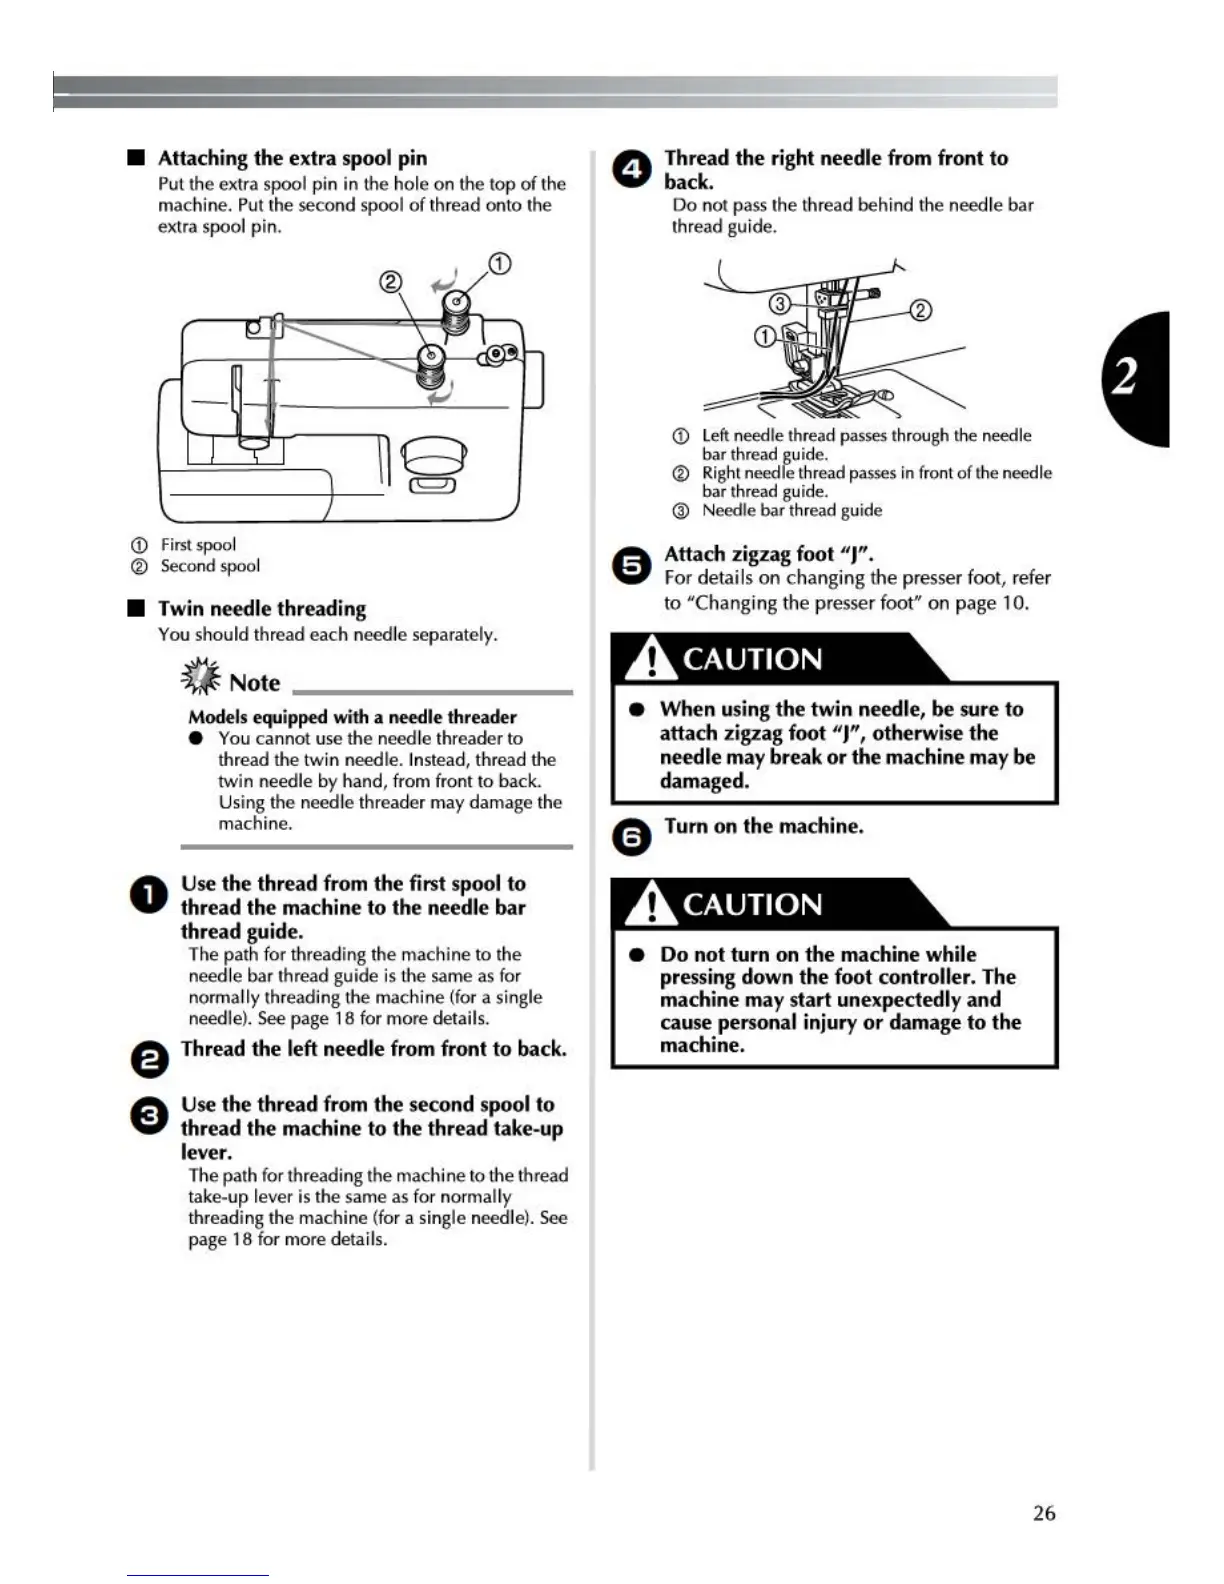
• Attaching the extra spool pin
Put
the
extra spool
pin
in
the
ho
le
on
the top
of
the
machine.
Put the second spool
of
thread
onto
the
extra
spool pin.
<D
Fi
rst
spoo
l
®
Seco
nd
spoo
l
• Twin needle threading
You should thread each needle separately.
0
e
e
~
Note
----------
Models equipped with a needle threader
e You cannot use
the
needle threader
to
thread
the
tw
in needl
e.
Instead, thread
the
tw
in needle
by
hand,
from
front
to
back.
Using
the
needle threader
may
damage the
machine.
Use
the thread from the first spool to
thread
the
machine to the needle bar
thread guide.
The path
fo
r threading
the
machi
ne
to
the
needle bar thread guide is the same
as
for
norma
ll
y threading the
mach
ine (for a single
needle).
See
page 18 for
mo
re details.
Thread the left needle from front to back.
Use
the thread from the second spool to
thread the machine to the thread take-up
lever.
The path f
or
threading
the
machine
to the thread
take-
up
lever is
the
same as for
no
r
mally
threading
the
machine (
for
a single needle).
See
page 18 for
more
detai I
s.
Thread the
ri
g
ht
needle from front to
back.
Do
no
t
pass
the
thread behind the needle bar
thread guide.
<D
Left
need
le th
read
passes
through the needle
bar thread
gu
ide.
® Right
need
fe thr
ead
passes
in front
of
the needle
bar thread guide.
@ Needle bar thr
ead
guide
Attach zigzag foot "J".
For
detai
Is
on
changing
the
presser
foot,
refer
to
"Chang
in
g
the
presser
foot"
on
page
10.
_AcAUTION
• When using the twin needle, be sure to
attach zigzag foot
"J
",
otherwise the
needle may break
or
the machine may be
damaged.
e Turn on the machine.
,A.CAUTION
• Do not turn on the machine while
pre
ss
in
g down the foot controller. The
machine may start
unexpectedly and
cause
personal injury
or
damage to the
machine.
26
 Loading...