14
Tutorial
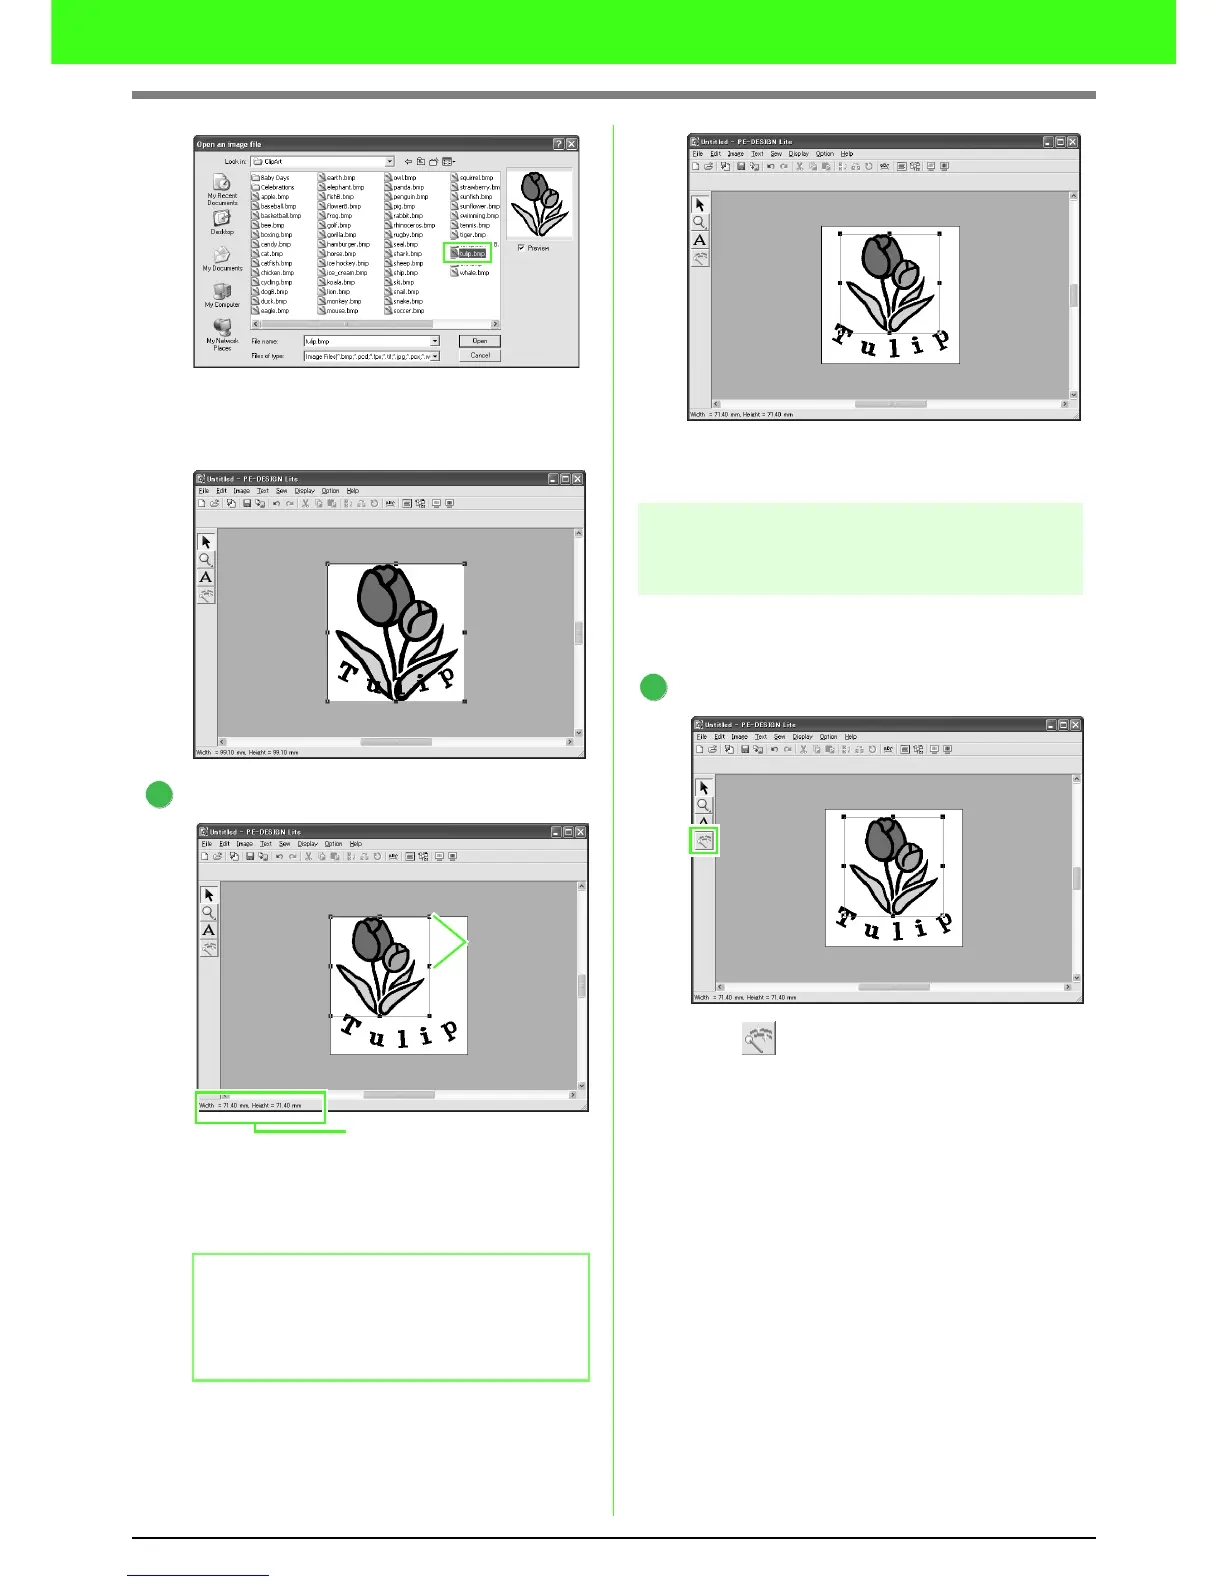
Select the sample file tulip.bmp, and then
click Open, or double-click the file’s icon.
→ The image appears in the Design Page.
Adjust the image size and position.
Drag the handle to adjust the selected image
to the desired size.
Move the pointer over the selected image, and
then drag the image to the desired position.
Step 4 Automatically converting
the image to an embroidery
pattern
Next, the image will automatically be converted to
an embroidery pattern.
Start Auto Punch.
Click on the Tool Box.
→ The Auto Punch dialog box appears.
b Memo:
If the handles have disappeared, right-click
the image, and then click
Modify Image
in the
menu that appeared.
2
The Status bar shows image
dimensions (width and height).
Handles
1
 Loading...