8
Do not let the oil turn black. Change it before it fails. If
the oil is kept in good condition the pump will last for
years. If the oil starts to turn black do not hesitate to
flush again. Keeping on top of the oil changes will pre-
vent costly overhauls.
If you are just switching from one type of oil to another
a single six hour flush is all that is necessary (follow the
above instructions). Remember to change to a new
exhaust filter or filters after the flushing and not before.
3.2 Automotive-Type Oil Filter
The pump is equipped with an automotive-type oil filter
(Ref. 100). When replacing the automotive-type oil fil-
ter, use only a Busch genuine filter.
Note: Make sure to tighten the Busch oil filter secure-
ly against the aluminum sealing surface so that leaks
will not occur.
3.3 Exhaust Filter
Every nine (9) to twelve (12) months, or as necessary,
replace the exhaust filter elements. The service life of
the exhaust filters varies widely with pump application.
It is only necessary to change the filters when the ele-
ments become clogged with foreign material or burned
oil. Indications of clogged filters are smoke and oil mist
coming from the pump exhaust, higher than normal
motor current or oil leaking from the gas ballast valve
on RA models.
A pressure gauge (Ref. 90) is supplied with your R 5
vacuum pump as part of the oil fill plug. This gauge has
a green field and a red field. A pressure within the
green field would indicate normal pressure. Any pres-
sure in the red field (for a continuos period of time)
requires an immediate change of the exhaust filter(s).
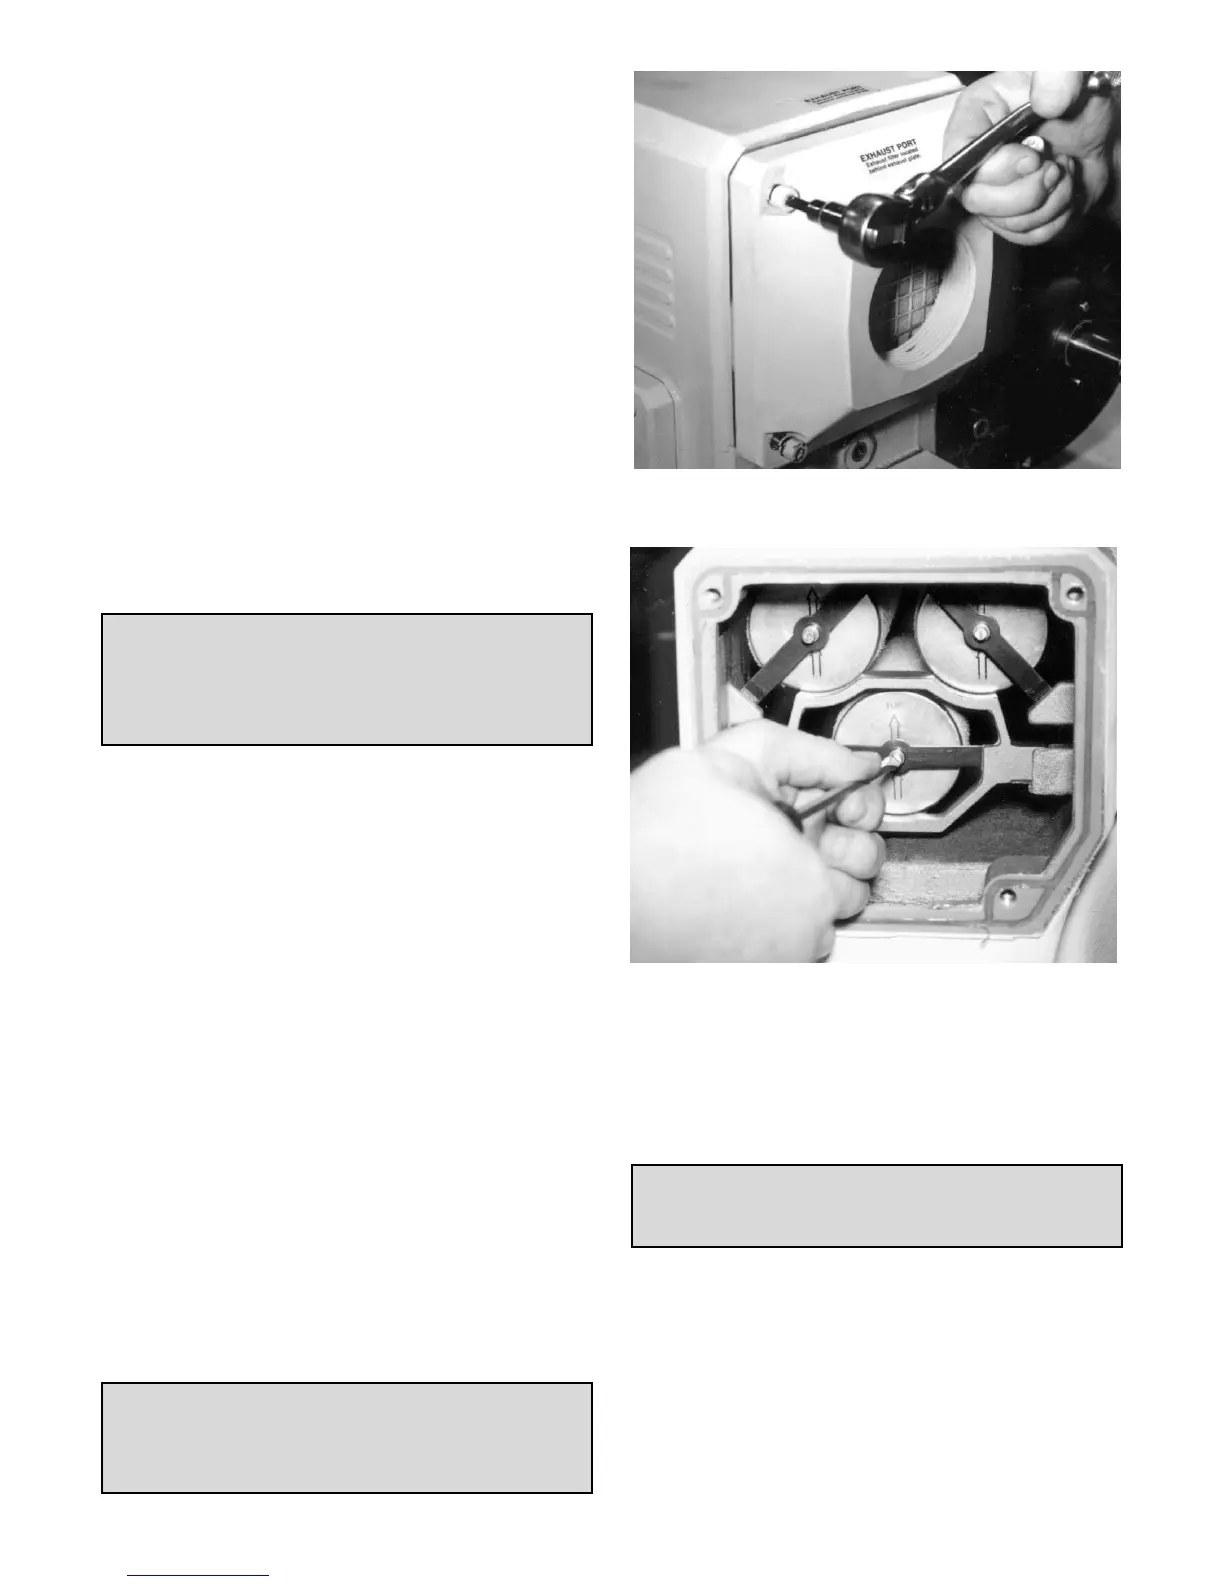
In order to replace the filter, remove the four socket
head cap screws (Ref. 146 on 0025 through 0101 / Ref.
142 0n 0250) and lockwashers (Ref. 143) retaining the
exhaust port housing (see Fig. 3). Pull the housing off
the exhaust box and set it aside. Use a slotted head
screw driver to loosen the exhaust filter retaining spring,
then rotate and remove the spring (see Fig. 4). Pull the
filter cartridge (Ref. 120) out of the exhaust box.
To field test an exhaust filter element, remove it from
the pump, allow it to cool, clean the sealing end (or O-
ring end), and use compressed air to blow through the
element. Apply approximately 3 to 6 psi (maximum
allowable operating pressure across the filter).
Use a shop rag to seal off the connection between the
air hose and the filter. If you can blow through it, the
element is good. If not, discard it and install a new one.
The filter cannot be cleaned successfully. Visually
inspect the filter element for cracks.
Reinstall the filter elements. Make sure the open end of
the element is properly seated down in its recess in the
exhaust box with the O-ring (Ref. 121) correctly posi-
tioned. Retain the filter with the spring clip, tighten the
WARNING: Do not inhale through the filter
or allow your mouth to come in direct con-
tact with the filter.
Fig. 4 - Removing the Filter Spring
Fig. 3 - Removing the Exhaust Housing
WARNING: If the gas entering this pump is
a health hazard, use rubber gloves and all
necessary personal protection equipment
when performing the exhaust filter replace-
ment operation.
WARNING: Wear safety glasses when
installing or removing the spring retainers.
The retainers can, if not secured correctly,
slip off and fly out of the exhaust box.
 Loading...