8. Slide coil assembly into casing. Be sure coil bracket on each corner of vertical pan engages coil support rails.
9. Reinstall 2 snap-in clips to correctly position and secure coil assembly in unit. Be sure clip with large offset is used on right side of unit
to secure horizontal pan.
10. Remove 2 oval coil access panel plugs and reinstall into holes on left side of coil access panel and fitting panel.
11. Remove insulation knockouts on right side of coil access panel.
12. Reinstall access and fitting panels, aligning holes with tubing connections and condensate pan connections. Be sure to reinstall metal clip
between fitting panel and vertical condensate pan.
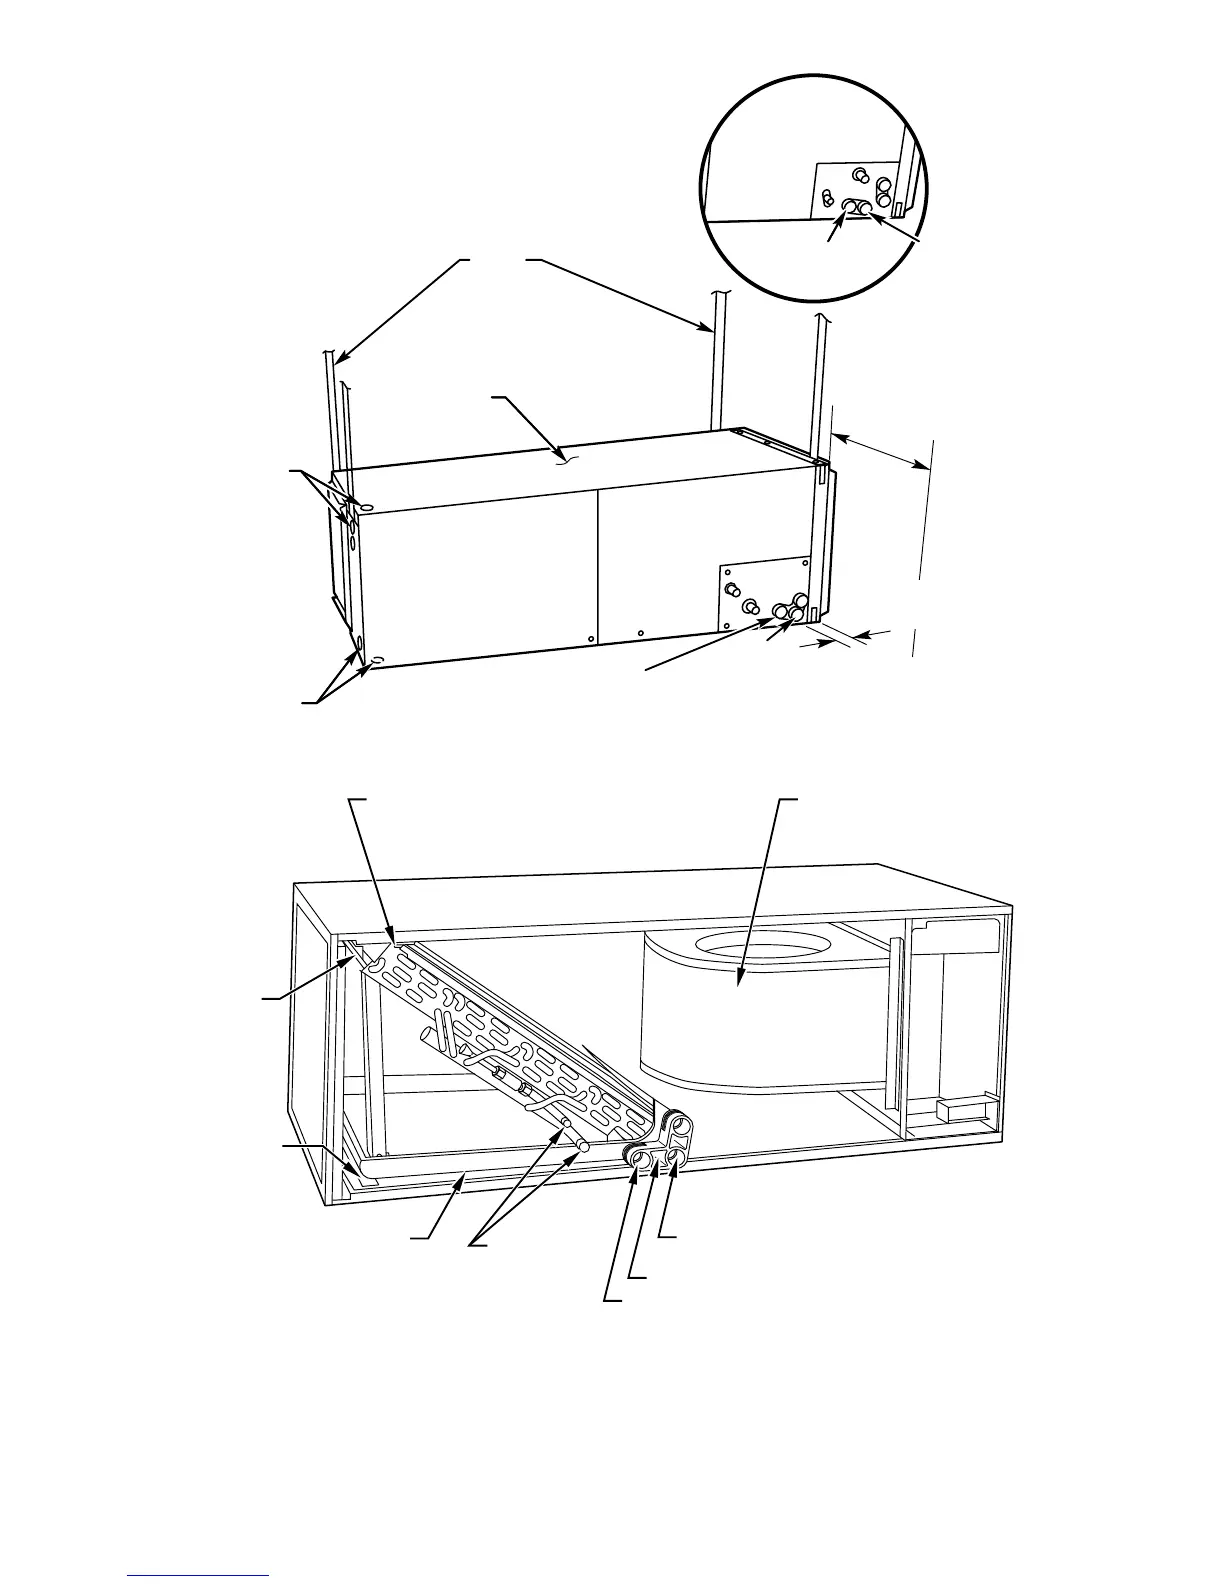
Fig. 6—Slope Coil in Horizontal-Left Application
A95292
UNIT
FIELD
SUPPLIED
HANGING
STRAPS
LOW VOLT
ENTRY
OPTIONS
POWER
ENTRY OPTIONS
SECONDARY
DRAIN
24-IN.
FRONT SERVICE
CLEARANCE
(FULL FACE
OF UNIT)
SECONDARY
DRAIN
A-COIL
HORIZONTAL LEFT
PRIMARY
DRAIN
PRIMARY
DRAIN
1
3
/4 IN.
FILTER ACCESS
CLEARANCE
Fig. 7—Slope Coil in Horizontal-Right Application
A95288
COIL MOUNTING
SCREW
BLOWER
ASSEMBLY
COIL
SUPPORT
RAIL
SLOPE COIL
SKI
REFRIGERANT
CONNECTIONS
PRIMARY DRAIN
OVERFLOW HOLE
DRAINPAN
SECONDARY DRAIN
—6—
 Loading...