EasyManuals Logo
Home>Casio>Musical Instrument>Celviano AP-65R

Casio Celviano AP-65R User Manual

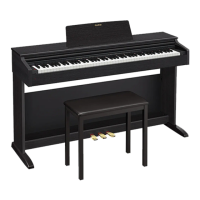
Casio Celviano AP-65R
44 pages
To Next Page IconTo Next Page
To Previous Page IconTo Previous Page
Page #17 background imageLoading...
Page #17 background image
BE
Gs
SYNCHRO/ENDING
INTRO
TEMPO
ACCOMP.
VOLUME
“inate
a
ot
op
7
|
Ee
MODE
NORMAUFILL
=N
VARIATIONFILLN
START/STOP
Adjusting
the
Tempo
You
can
adjust
the
tempo
(number
of
beats
per
minute}
of
rhythm
play
within
a
range
of
30
to
255
To
adjust
the
tempo
Press
one
of
the
TEMPO
buttons
to
increase
[al
or
decrease
[¥]
the
tempo
setting.
aNOTESE
*
Pressing
both
TEMPO
buttons
(4
and
W)
at
the
same
time
resets
the
tempo
to
the
defauit
value
of
the
currently
selected
thythm.
*
The
tempo
value
indicates
the
number
of
quarter
note
beats
per
minute,
Adjusting
the
Accompaniment
Volume
You
can
adjust
the
volume
of
the
accompaniment
part
sepa-
rately
from
the
overall
yolume.
Use
the
ACCOMP
VOLUME
sider
to
adjust
the
ac-
companiment
volume.
E-28
i
é
i
|
Using
an
Intro
Pattern
This
piano
lets
you
insert
a
short
intro
irto
a
rhythm
pattern
to
make
startup
smoother
and
more
natural.
The
following
procedure
describes
how
to
use
the
Intra
fea
ture,
Before
starting,
you
should
first
select
the
rhythm
you
want
to
use,
and
set
the
tempo.
PREPARATION
*
Select
a
rhythm
and
set
its
tempo.
+
Select
the
accompaniment
mode
you
want
to
use.
To
insert
an
intro
Press
the
INTRO
button
to
start
the
selected
rhythm
with
an
intro
pattern,
*
With
the
above
setup,
the
intro
pattern
is
played
and
the
auto
accompaniment
with
intro
pattern
starts
as
soon
as
you
play
chords
on
the
accompaniment
keyboard.
INOTES
The
standard
rhythm
pattem
starts
to
play
after
the
intro
pattem
is
complete.
Using
a
Fill-in
Pattern
Fill-in
patterns
let
you
momentarily
change
the
rhythm
pat
tern
to
add
some
interesting
variation
to
your
performances.
‘The
fallowing
procedure
describes
how
to
use
the
Fill-in
fea
ture.
To
insert
a
fill-in
1.
Press
the
START/STOP
button
to
start
rhythm
play.
2,
Press
the
NORMAL/FILL-IN
button
to
insert
2
fill-in
pattern
for
the
rhythm
you
are
using.
aNOTER
The
fil-in
pattern
does
not
play
if
you
press
the
NORMAL/FILL-
IN
button
while
an
intro
pattern
is
playing.
Sree
reer
nme
mei
nner
NR
IHRE
ene
ee
'
ae
TE
IT
TNE
Ea
Using
Variation
Rhythm
Patterns
In
addition
to
the
standard
rhythm
pattern,
you
can
also
switch
toa
secondary
“variation”
rhythm
pattern
for
a
bit
of
variely
-
To
change
to
the
variation
rhythm
pattern
1.
Press
the
START/STOP
button
to
start
rhythm
play.
2:
Press
the
VARIATION/FILL-IN
button
to
switch
to
the
variation
pattern
for
the
rhythm
you
are
using.
HNOTES
To
swilch
back
to
the
normal
(non-variation)
rhythm
pattern,
press
the
NORMAL/FILL-{N
button.
To
insert
a
fill
in
into
a
variation
rhythm
While
a
variation
rhythm
pattern
is
playing,
press
the
VARIATION/FILL-IN
button
to
insert
a
fill
in
pattern
for
the
variation
rhythm
you
are
using.
Synchro
Starting
Accompaniment
with
Rhythm
Play
You
can
set
up
the
piano
to
start
rhythm
play
at
the
same
t:me
you
play
the
accompaniment
on
the
keybuard.
PREPARATION
*
Select
a
rhythm
and
set
its
tempo.
*
Select
the
accompaniment
mode
you
want
to
use.
To
use
synchro
start
1.
Press
the
SYNCHRO/ENDING
button
to
put
the
piano
into
synchro
start
standby.
ied
2.
Play
a
chord
on
the
accompaniment
keyboard.
+
The
rhythm
pattern
starts
to
play
autumatically
as
svan
as
you
play
a
chord.
HNOTESE
+
Only
the
rhythm
plays
(without
chords)
if
all
the
lamps
above
the
MODE
button
are
af.
+
Ifyou
press
the
INTRO
bution
betore
playing
anything
on
the
keyboard,
the
rhythm
starts
autornaticatly
with
an
intro
pattern
when
you
play
something
on
the
<eybaard,
*
To
cancel
synetva
start
standby,
press
the
SYNCHRO/END-
ING
button
one
more
time,
Finishing
with
an
Ending
Pattern
You
can
end
your
performances
with
an
ending
pattern
that
brings
the
thythm
you
are
using
to
a
natural-sounding
con-
clusion
To
finish
with
an
ending
pattern
While
the
rhythm
is
playing,
press
the
SYNCHRO/
ENDING
button.
=
This
causes
the
ending
pattern
to
play,
which
brings
rhythm
accompaniment
to
an
end,
SNOTES
The
timing
when
the
ending
pattern
starts
depenas
on
when
you
press
the
SYNCHRO/ENDING
button.
If
you
press
the
button
befure
the
second
bea:
of
the
current
measure,
the
ending
pat
tern
starts
playing
immediately.
Pressing
the
button
at
any
paint
in
the
measure
after
the
second
beat
results
in
the
ending
pat-
tem
playing
fram
the
beginning
of
the
following
measure.
Using
Auto
Harmonize
When
you
are
using
Auto
Accompaniment,
Auto
Harmonize
automatically
adds
an
additional
note
to
your
melody
in
ac-
cordance
with
the
chord
that
is
being
played.
The
result
is
a
harmony
effect
that
makes
your
melody
line
richer
and
full-
er.
To
use
Auto
Harmonize
7.
Use
the
MODE
button
to
select
FINGERED
or
CASIO
CHORD
as
the
accompaniment
mode.
+
The
currently
selected
accompaniment
mode
is
the
‘one
whose
tamp
is
lit.
See
“About
the
MODE
But-
ton”
on
page
E-24
for
details.
one
‘Auto
Accompan.ment
off
6
ome"
——
[FULL
RANGE
CHORO,
Greceneo
~
uns
FINGEREO
samen
Ome
eo
CASIO
CHORD
E-29

Questions and Answers:

Question and Answer IconNeed help?

Do you have a question about the Casio Celviano AP-65R and is the answer not in the manual?

Casio Celviano AP-65R Specifications

General IconGeneral
BrandCasio
ModelCelviano AP-65R
CategoryMusical Instrument
LanguageEnglish

Related product manuals