— 9 —
3. Test mode
Note: Do not perform the menu item unless explained here.
(It may damage the internal data and camera becomes unusable.)
3-1. Booting
To boot the test mode;
Turn the camera on while pressing SHIFT and MENU buttons.
To boot MENU1 (Must be done in the test mode)
Press SHIFT ➜ SHIFT ➜ MENU keys in order rapidly.
To boot MENU2 (Must be done in the test mode)
Press FLASH ➜ FLASH ➜ MENU keys in order rapidly.
To boot MENU3 (Must be done in the test mode)
Press SELF ➜ SELF ➜ MENU keys in order rapidly.
* To execute
Use + or – keys to select a test item then press shutter button to execute it.
3-2. Item for testing
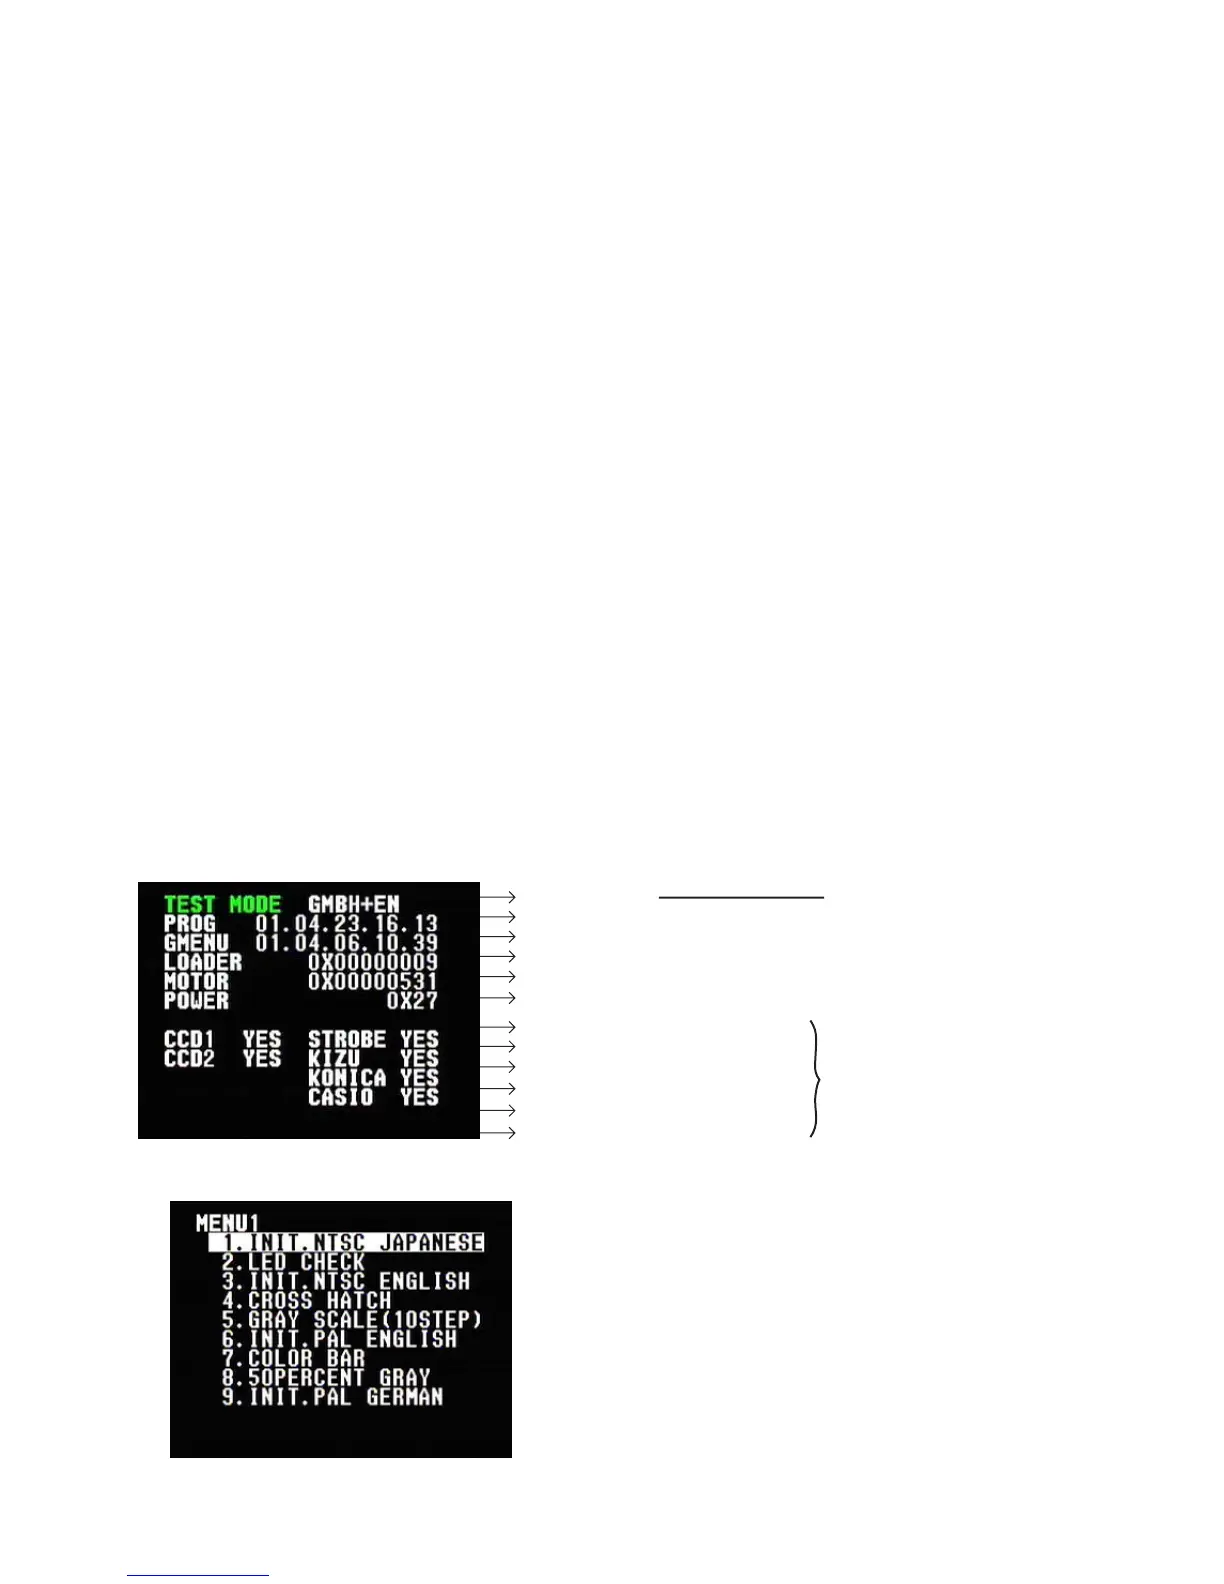
1 TEST MODE
2 MENU1
• TEST MODE
• PROGRAM Version
• Graphic Menu Version
• Loader Version
• Motor MCU Version
• Power MCU Version
Indicates in green-color if all items
have been adjusted.
Indicates "YES" if adjustments have
been completed.
Indicates "NO" if adjustments have
not been proceeded.
Indicates "NG" if an adjustments
failure occurred.
• CCD ADJUST 1 (Yes/No/NG)
• CCD ADJUST 2 (Yes/No/NG)
• STROBE ADJUST (Yes/No/NG)
• KIZU (Yes/No/NG)
• KONICA (Yes/No/NG)
• CASIO (Yes/No/NG)
 Loading...