— 6 —
7. Connect an AC adaptor and turn the camera on within 5 seconds. Camera may be turned on automatically
when an AC adaptor is connected. If not, use the power switch. Display shows “read time out” on Status
screen and program data cannot be loaded if it takes too long between clicking Progress button and
turning camera on.
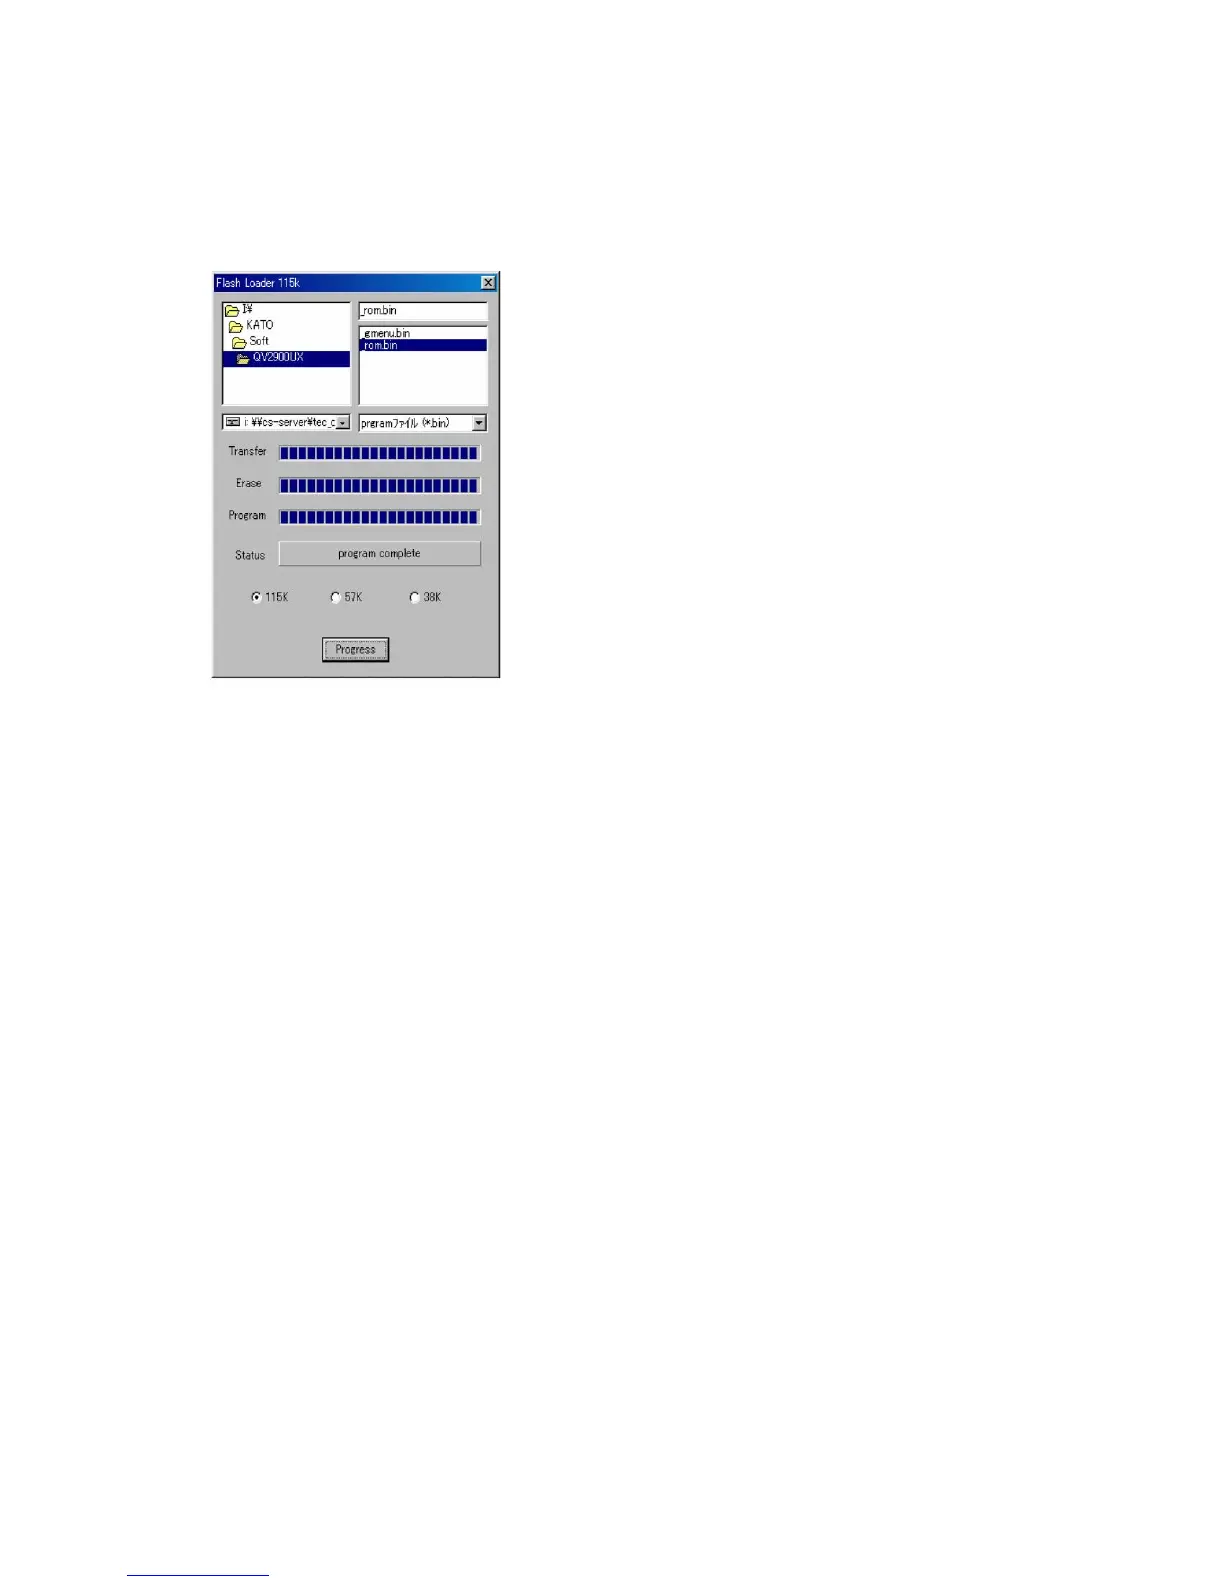
8. Program data is transferred. Program executes Transfer, Erase, Program in order.
9. Program is loaded properly if Status screen shows “program completed”.
10. Disconnect the AC adaptor. (Power switch cannot turn the camera off.)
11. Choose graphic menu data “_gmenuXXXX.bin” on the above step 4 and perform steps 5 to 10.
12. Insert CF card.
13. While pressing down SHIFT and MENU keys, turn the power on to set the camera in test mode and
check the version number.
14. Turn the camera off then on again and perform the final check by shooting, playing back and erasing.
 Loading...