Rinse Aid
To fill the rinse aid compartment
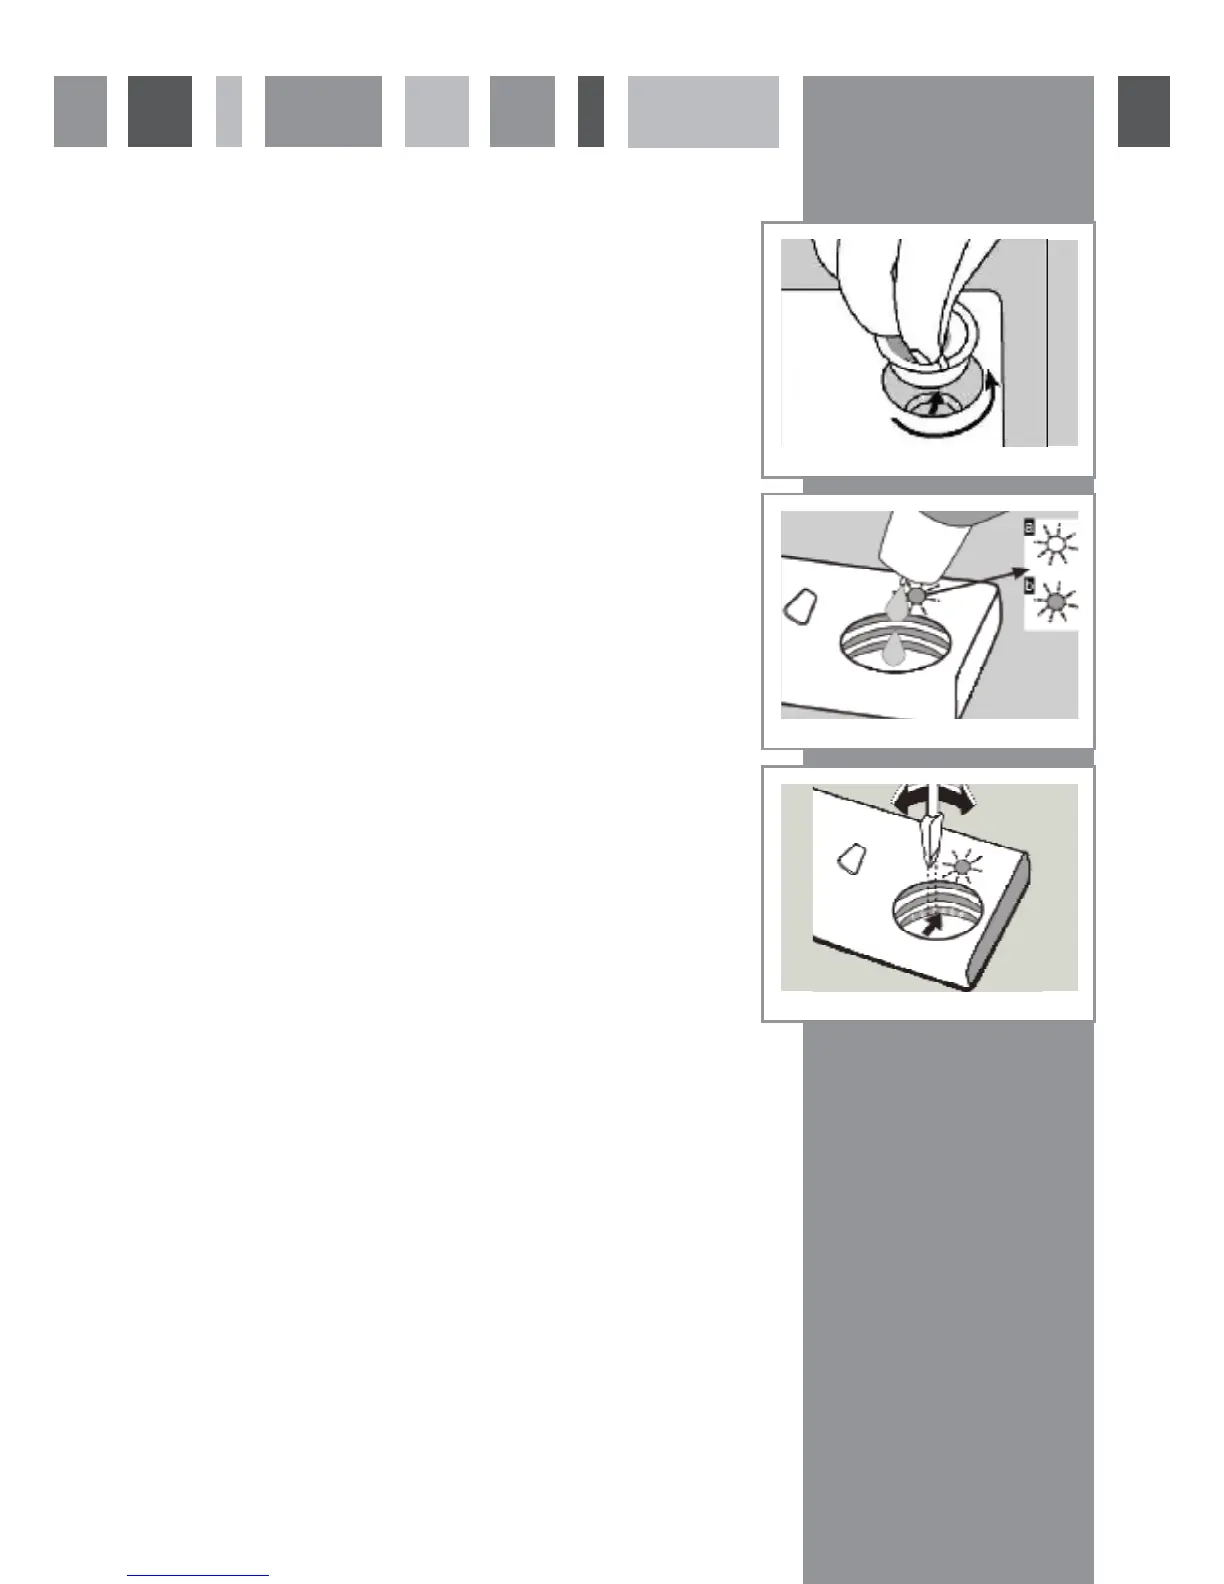
1. Open the rinse aid compartment by turning and removing the cap as
shown in figure 4.
2. Fill the rinse aid compartment until the rinse aid indicator goes dark,
as shown in figure 5 (where a indicates the compartment is empty, and
“b” indicates the compartment is full).
3. Replace the cap, ensuring the markers on the cap line up with the
compartment prior to screwing the cap back in place.
Rinse Aid Adjustment
The level of rinse aid use is preset to 4. You can adjust the level of rinse aid
use by adjusting as shown in figure 6.
If water stains form on the dishes after a wash, the level should be increased.
If blue stains which can be wiped away are left on the dishes after a wash, the
level should be decreased.
Please note: Rinse aid ensures better quality wash results and
increased drying performance.
Always refill the rinse aid when the rinse aid indicator light on the
control panel is illuminated.
fig 4
fig 5
fig 6
Rinse Aid
To fill the rinse aid compartment
1. Open the rinse aid compartment by turning and removing the cap as
shown in figure 5.
2. Fill the rinse aid compartment until the rinse aid indicator goes dark, as
shown in figure 6 (where a indicates the compartment is empty, and “b”
indicates the compartment is full).
3. Replace the cap, ensuring the markers on the cap line up with the
compartment prior to screwing the cap back in place.
Rinse Aid Adjustment
The level of rinse aid use is preset to 3. You can adjust the level of rinse aid
use by adjusting as shown in figure 7.
If water stains form on the dishes after a wash, the level should be increased.
If blue stains which can be wiped away are left on the dishes after a wash, the
level should be decreased.
Please note: Rinse aid ensures better quality wash results and
increased drying performance.
Always refill the rinse aid when the rinse aid indicator light on the
control panel is illuminated.
Rinse Aid
To fill the rinse aid compartment
1. Open the rinse aid compartment by turning and removing the cap as
shown in figure 4.
2. Fill the rinse aid compartment until the rinse aid indicator goes dark,
as shown in figure 5 (where a indicates the compartment is empty, and
“b” indicates the compartment is full).
3. Replace the cap, ensuring the markers on the cap line up with the
compartment prior to screwing the cap back in place.
Rinse Aid Adjustment
The level of rinse aid use is preset to 4. You can adjust the level of rinse aid
use by adjusting as shown in figure 6.
If water stains form on the dishes after a wash, the level should be increased.
If blue stains which can be wiped away are left on the dishes after a wash, the
level should be decreased.
Please note: Rinse aid ensures better quality wash results and
increased drying performance.
Always refill the rinse aid when the rinse aid indicator light on the
control panel is illuminated.
fig 4
fig 5
fig 6
Rinse Aid
To fill the rinse aid compartment
1. Open the rinse aid compartment by turning and removing the cap as
shown in figure 4.
2. Fill the rinse aid compartment until the rinse aid indicator goes dark,
as shown in figure 5 (where a indicates the compartment is empty, and
“b” indicates the compartment is full).
3. Replace the cap, ensuring the markers on the cap line up with the
compartment prior to screwing the cap back in place.
Rinse Aid Adjustment
The level of rinse aid use is preset to 4. You can adjust the level of rinse aid
use by adjusting as shown in figure 6.
If water stains form on the dishes after a wash, the level should be increased.
If blue stains which can be wiped away are left on the dishes after a wash, the
level should be decreased.
Please note: Rinse aid ensures better quality wash results and
increased drying performance.
Always refill the rinse aid when the rinse aid indicator light on the
control panel is illuminated.
fig 4
fig 5
fig 6

 Loading...