5-48
Cisco 6400 Hardware Installation and Maintenance Guide
OL-2133-02
Chapter 5 Maintaining the Cisco 6400
Replacing the Blower Module
Removing the Blower Module
To remove the blower module from the Cisco 6400 chassis:
Step 1 If you are using AC PEMs, remove the AC power cords from the clips on the blower module.
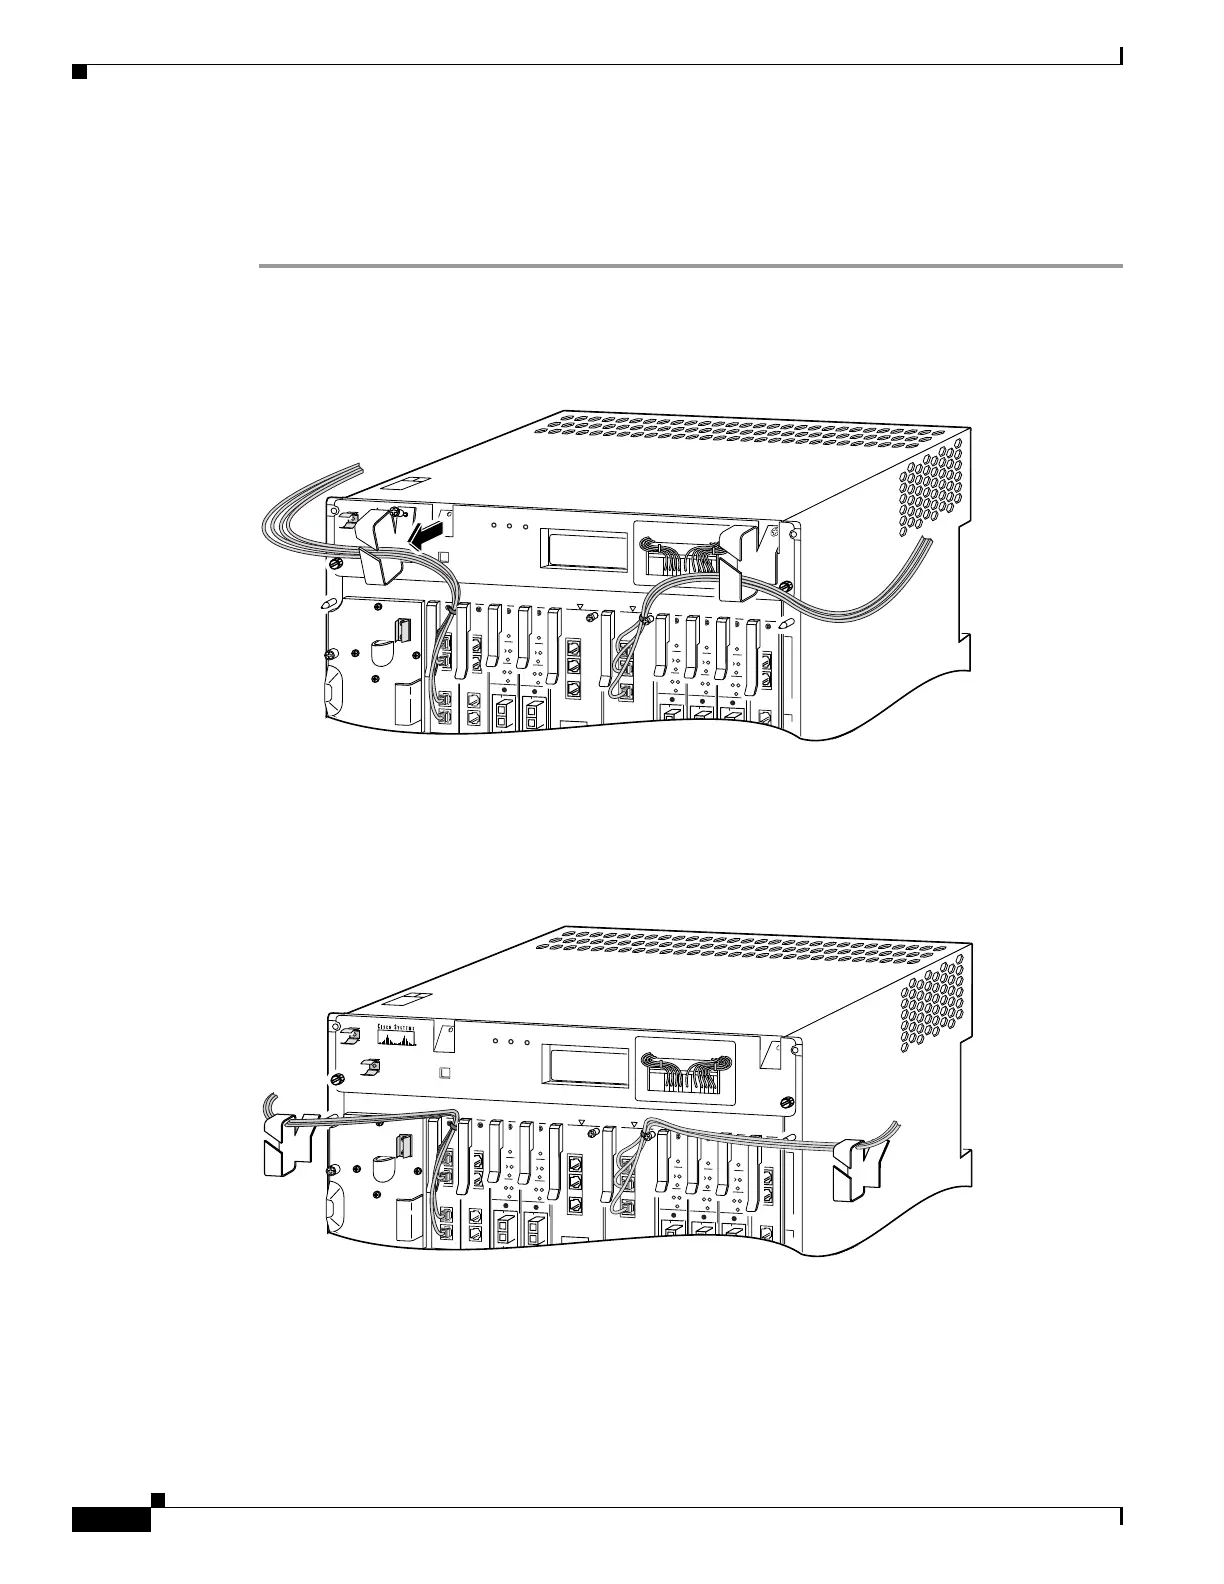
Step 2 Detach the cable management brackets (Figure 5-39).
Figure 5-39 Detaching a Cable Management Bracket
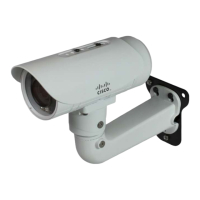
Step 3 Fold the loaded brackets to either side of the Cisco 6400 chassis, leaving the cables attached. The
20-inch service loop will allow you to pull the cables out of the way of the blower (Figure 5-40).
Figure 5-40 Folding Cables and Brackets away from the Blower
Step 4 Remove the two screws on the front of the blower module (Figure 5-41).
Step 5 Carefully slide the blower out of the chassis.
Step 6 Place the blower module on a flat work surface.
NRP
NSP
CON
AUX
ETH
ACT
LNK
FANS
OK
FAN
FAILURE
MULTI-
FAN
FAILURE
1
2
3
4
0A
PROCESSOR ONLY
0B
56
7
8
SUB
SLOT
0
NSP
CON
AUX
ETH
ACT
LNK
NRP
OC-3
STM-1
PORT 0
PORT 1
STATUS
TX
FAIL
RX
STATUS
TX
RX
OC-3
STM-1
PORT 0
PORT 1
STATUS
TX
FAIL
RX
STATUS
TX
RX
OC-3
STM-1
PORT 0
PORT 1
STATUS
TX
FAIL
RX
STATUS
TX
RX
OC-3
STM-1
PORT 0
PORT 1
STATUS
TX
FAIL
RX
STATUS
TX
RX
OC-3
STM-1
PORT 0
PORT 1
STATUS
TX
FAIL
RX
STATUS
TX
RX
NRP
PCMCIA
PCMCIA
CAUTION: WHEN HOT SWAPPING THIS
FAN TRAY, REMOVAL AND REPLACING
MUST BE DONE IN UNDER THREE
MINUTES OR OVER HEATING MAY
OCCUR.
28335
NRP
NSP
CON
AUX
ETH
ACT
LNK
FANS
OK
FAN
FAILURE
MULTI-
FAN
FAILURE
1
2
3
4
0A
PROCESSOR ONLY
0B
56
7
8
SUB
SLOT
0
NSP
CON
AUX
ETH
ACT
LNK
NRP
OC-3
STM-1
PORT 0
PORT 1
STATUS
TX
FAIL
RX
STATUS
TX
RX
OC-3
STM-1
PORT 0
PORT 1
STATUS
TX
FAIL
RX
STATUS
TX
RX
OC-3
STM-1
PORT 0
PORT 1
STATUS
TX
FAIL
RX
STATUS
TX
RX
OC-3
STM-1
PORT 0
PORT 1
STATUS
TX
FAIL
RX
STATUS
TX
RX
OC-3
STM-1
PORT 0
PORT 1
STATUS
TX
FAIL
RX
STATUS
TX
RX
NRP
PCMCIA
PCMCIA
CAUTION: WHEN HOT SWAPPING THIS
FAN TRAY, REMOVAL AND REPLACING
MUST BE DONE IN UNDER THREE
MINUTES OR OVER HEATING MAY
OCCUR.
28336