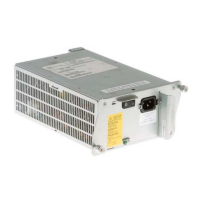
Note The weight of installed power supplies in your Cisco 7200 series router might make it
difficult to remove the network processing engine. If you have difficulty, consider removing power
supplies from the chassis and then removing the network processing engine. Refer to the section
“Removing and Installing an AC-Input Power Supply” on page 28 of this document for information
on removing and replacing an installed power supply.
Step 1 Power down the router and disconnect its input power cable. Refer to the section
“Powering Down the Router and Disconnecting Input Power” earlier in this document.
Step 2 Attach an ESD-preventative wrist strap between you and an unfinished chassis surface.
Step 3 Using a number 2 Phillips screwdriver, loosen the two captive installation screws on the
faceplate of the network processing engine (refer to Figure 12).
If the router is not installed in a standard 19-inch rack or in a Telco rack, skip to Step 7.
If the router is installed in a rack, determine if any permanent rack fixtures, such as a
power strip, are obstructing access to the power supply. If a rack fixture is obstructing
access to the power supply, proceed with Step 4.
Step 4 Using a 3/16-inch flat-blade screwdriver, loosen the four screws that secure the router to
the front mounting strips of the rack.
Step 5 Position at least one person in front of the rack to support the front underside of the router.
Step 6 From the rear of the rack, carefully push the front of the router out of the rack until there
is enough clearance to remove the network processing engine.
Step 7 Grasp the two network processing engine handles and carefully pull the network
processing engine from its chassis slot.
Caution Handle the network processing engine by the carrier edges and handles only; never touch
the printed circuit board components or connector pins (refer to Figure 8).
 Loading...


