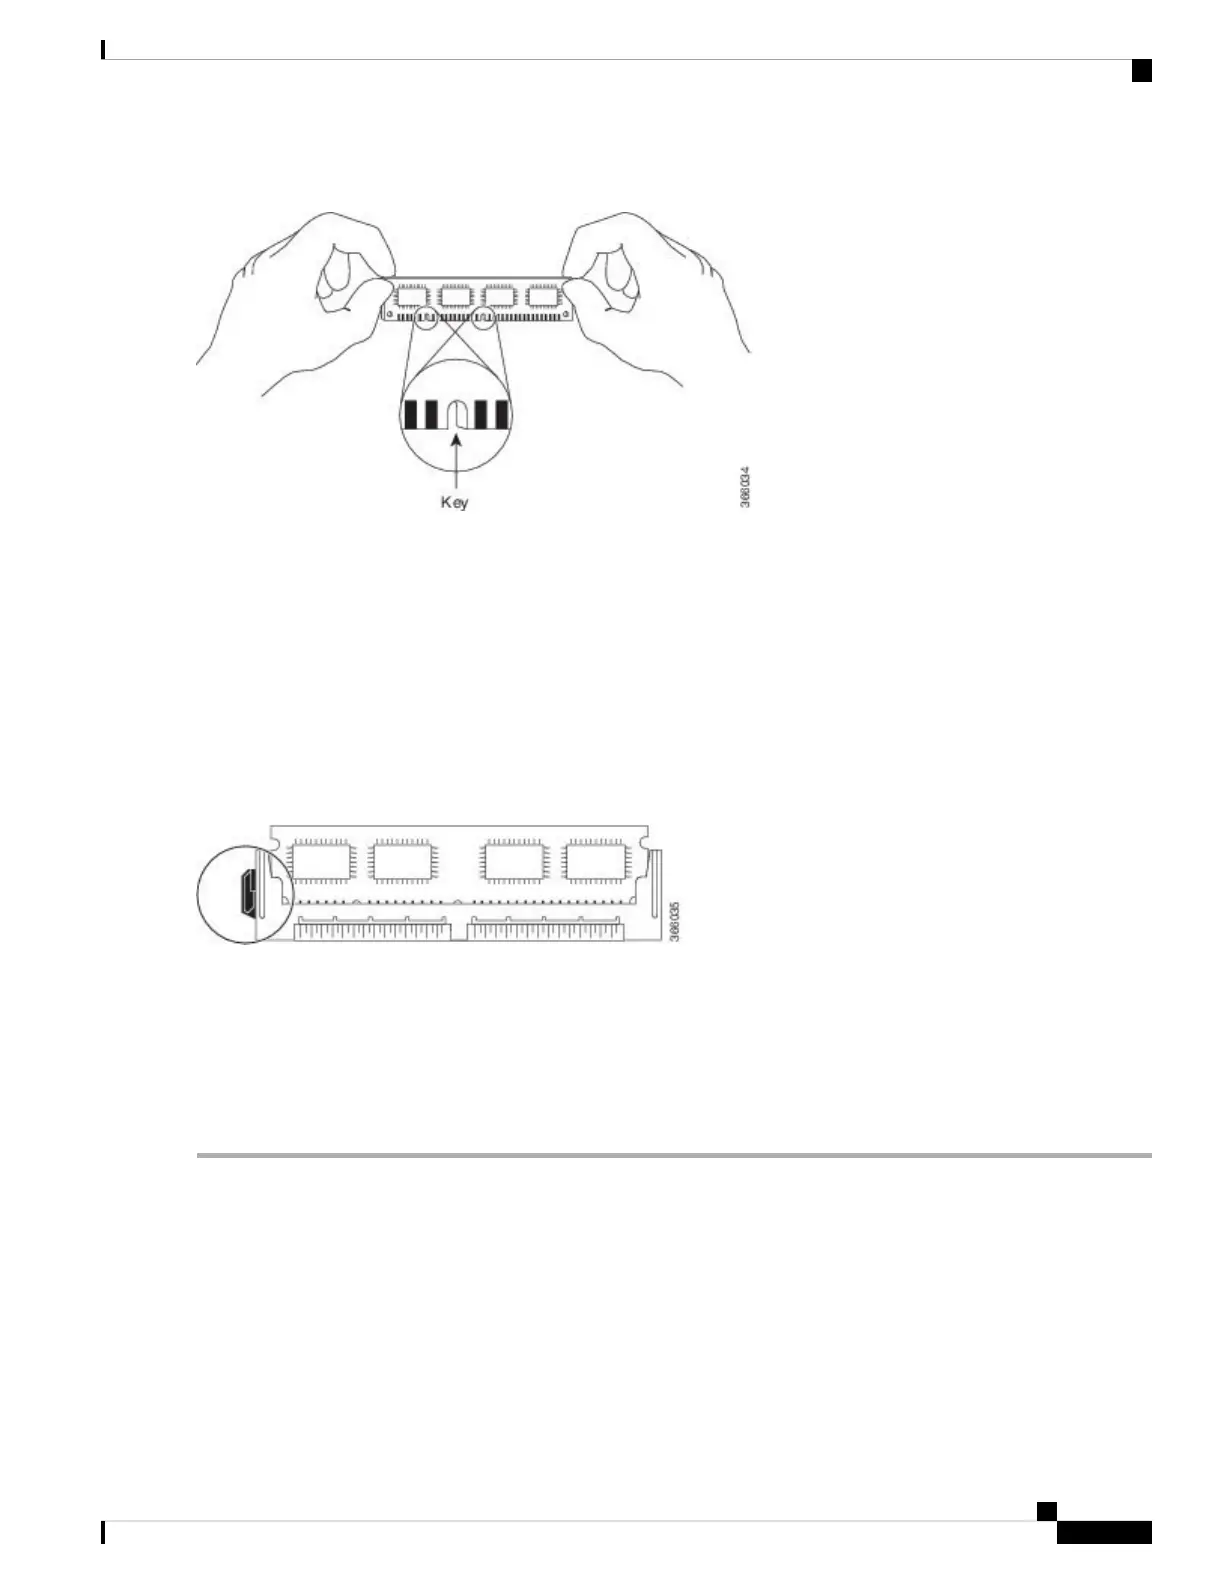
Figure 27: Handling the Cisco ASR1000-RP2 DIMM
Step 5 Align the DIMM with the socket, and insert the connector edge into the socket. Note the two notches (keys) on the
connector edge of the DIMM. These keys are intended to ensure correct orientation of the DIMM in the socket.
When inserting DIMMs, use firm but not excessive pressure. If you damage a socket, you will have to return
the module for repair.
Caution
Step 6 Note the orientation of the socket key on the DIMM and the DIMM socket, and gently push the DIMM into the socket
until the lever is flush against the side of the DIMM socket, and the DIMM edge connector is fully inserted. If necessary,
rock the DIMM gently back and forth to seat it properly. The following figure shows how to install the DIMM in the
socket.
Figure 28: Installing the DIMM in the Socket
Step 7 When the DIMM is installed, check that the release lever is flush against the side of the DIMM socket. If it is not, the
DIMM might not be seated properly. If the DIMM appears misaligned, carefully remove it according to the removal
procedure and then reseat it in the socket. Push the DIMM firmly back into the socket until the release lever is flush
against the side of the DIMM socket.
Step 8 Repeat Step 3 through Step 7 for the remaining DIMMs.
Step 9 Replace the module.
What to do next
This completes the procedure for replacing Cisco ASR1002-X Router DIMMs.
After you have correctly installed the DIMMs and reinstalled the route processor, the system should reboot
correctly.
If the system fails to boot properly or if the console terminal displays a checksum or memory error after you
have installed new DIMMs, ensure that all DIMMs are installed correctly. If necessary, shut down the system
and remove the route processor. Check the DIMMs by looking straight down on them to inspect them at eye
Removing and Replacing FRUs from the Cisco ASR 1000 Series Routers
39
Removing and Replacing FRUs from the Cisco ASR 1000 Series Routers
Replacing the Cisco ASR1002-X Router DIMMs

 Loading...