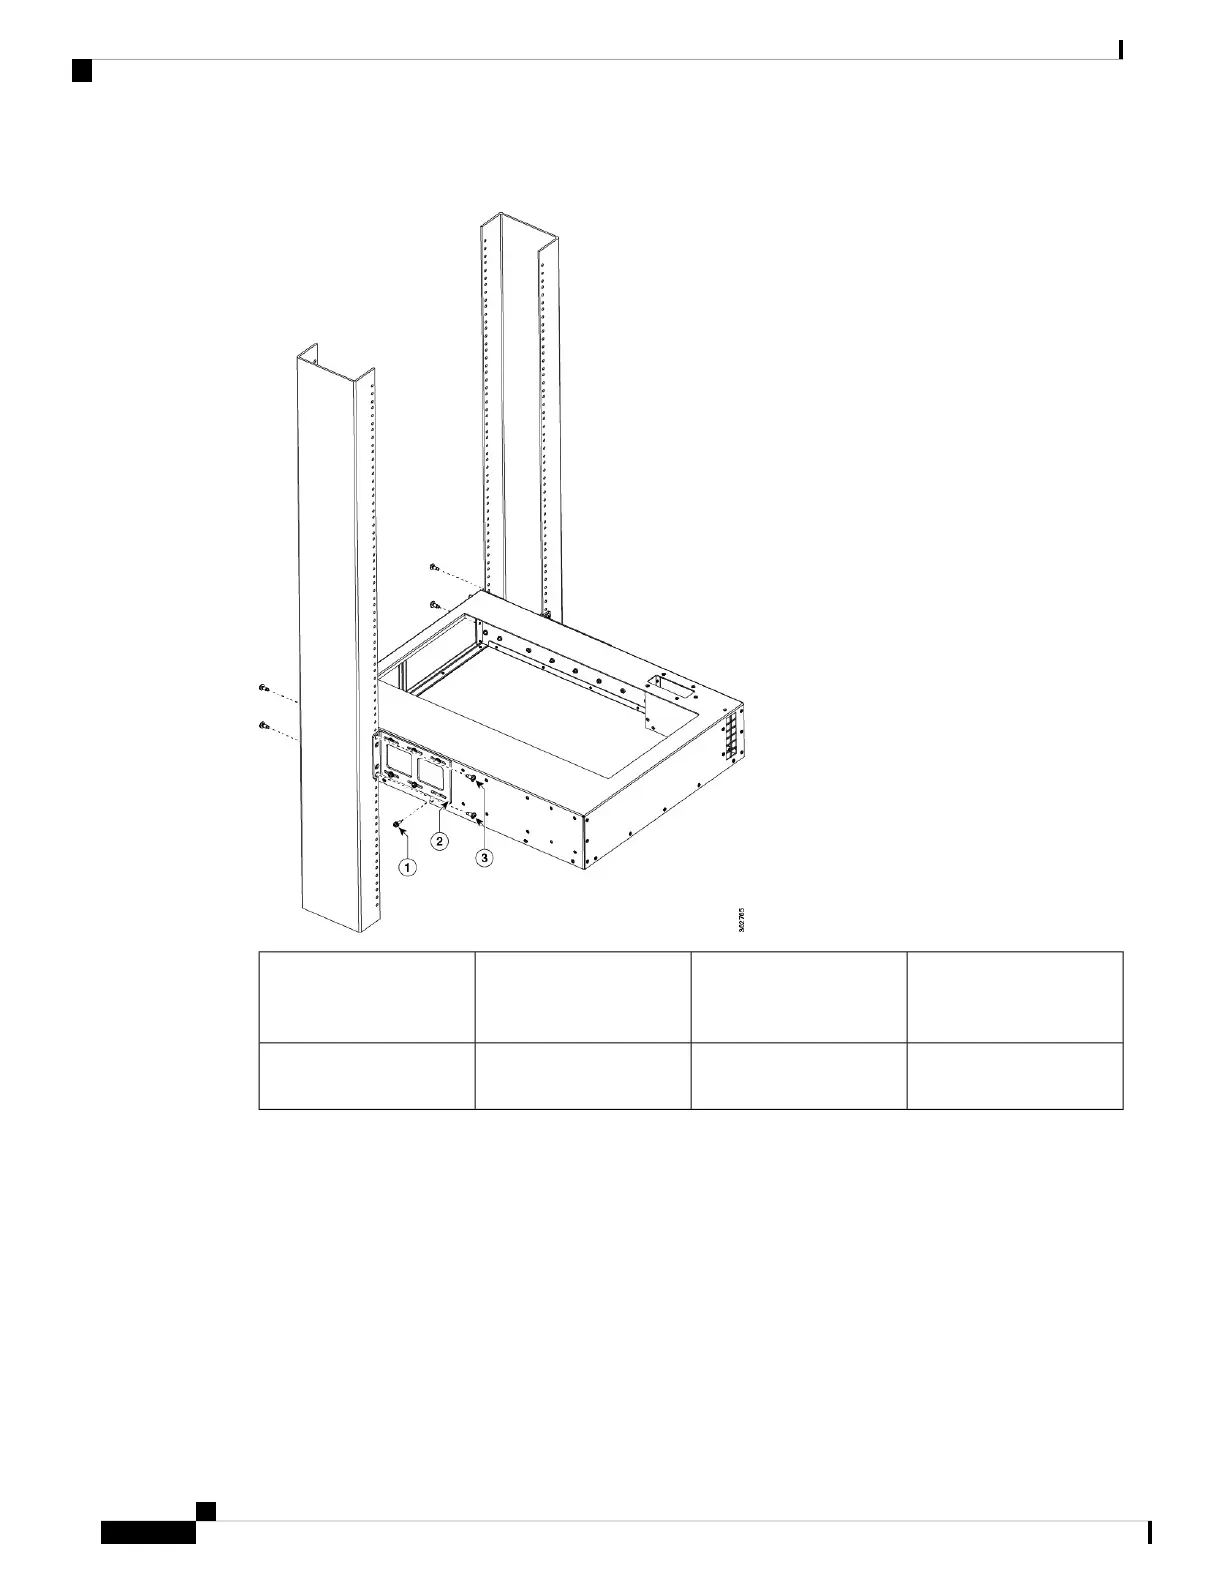
Figure 83: Installing the Plenum in a Two-Post 19-Inch Rack
Screws attaching rear-rack
mounting bracket to rack
(two per bracket)
3Screw attaching rear-rack
mounting bracket to
plenum (six per bracket)
1
Rear rack-mounting
bracket
2
Step 6 Turn the chassis sideways and slide it into the rack (Figure 84: Securing the ASR 9006 Router in a Two-Post
19-Inch Rack, on page 85).
Step 7 Insert and tighten four customer-supplied rack-mounting screws to secure the support bracket on the chassis
to the front of the rack-post (two on each side). These screws can vary in size and type depending on the rack
that you use. Torque the screws to the weight specified for your particular rack (Figure 84: Securing the ASR
9006 Router in a Two-Post 19-Inch Rack, on page 85).
Step 8 Insert six 12-24 x 0.5 in.pan-head screws (part number: 48-0523-01) screws to secure the chassis to the
rack-mounted plenum (Figure 84: Securing the ASR 9006 Router in a Two-Post 19-Inch Rack, on page 85).
Unpacking and Installing the Chassis
84
Unpacking and Installing the Chassis
Installing Optional Air Baffles on the Cisco ASR 9006 Router
 Loading...