Step 3
Position the module in the slot. Make sure that you align the sides of the module with the guides on each side of the slot,
as shown in the figure below .
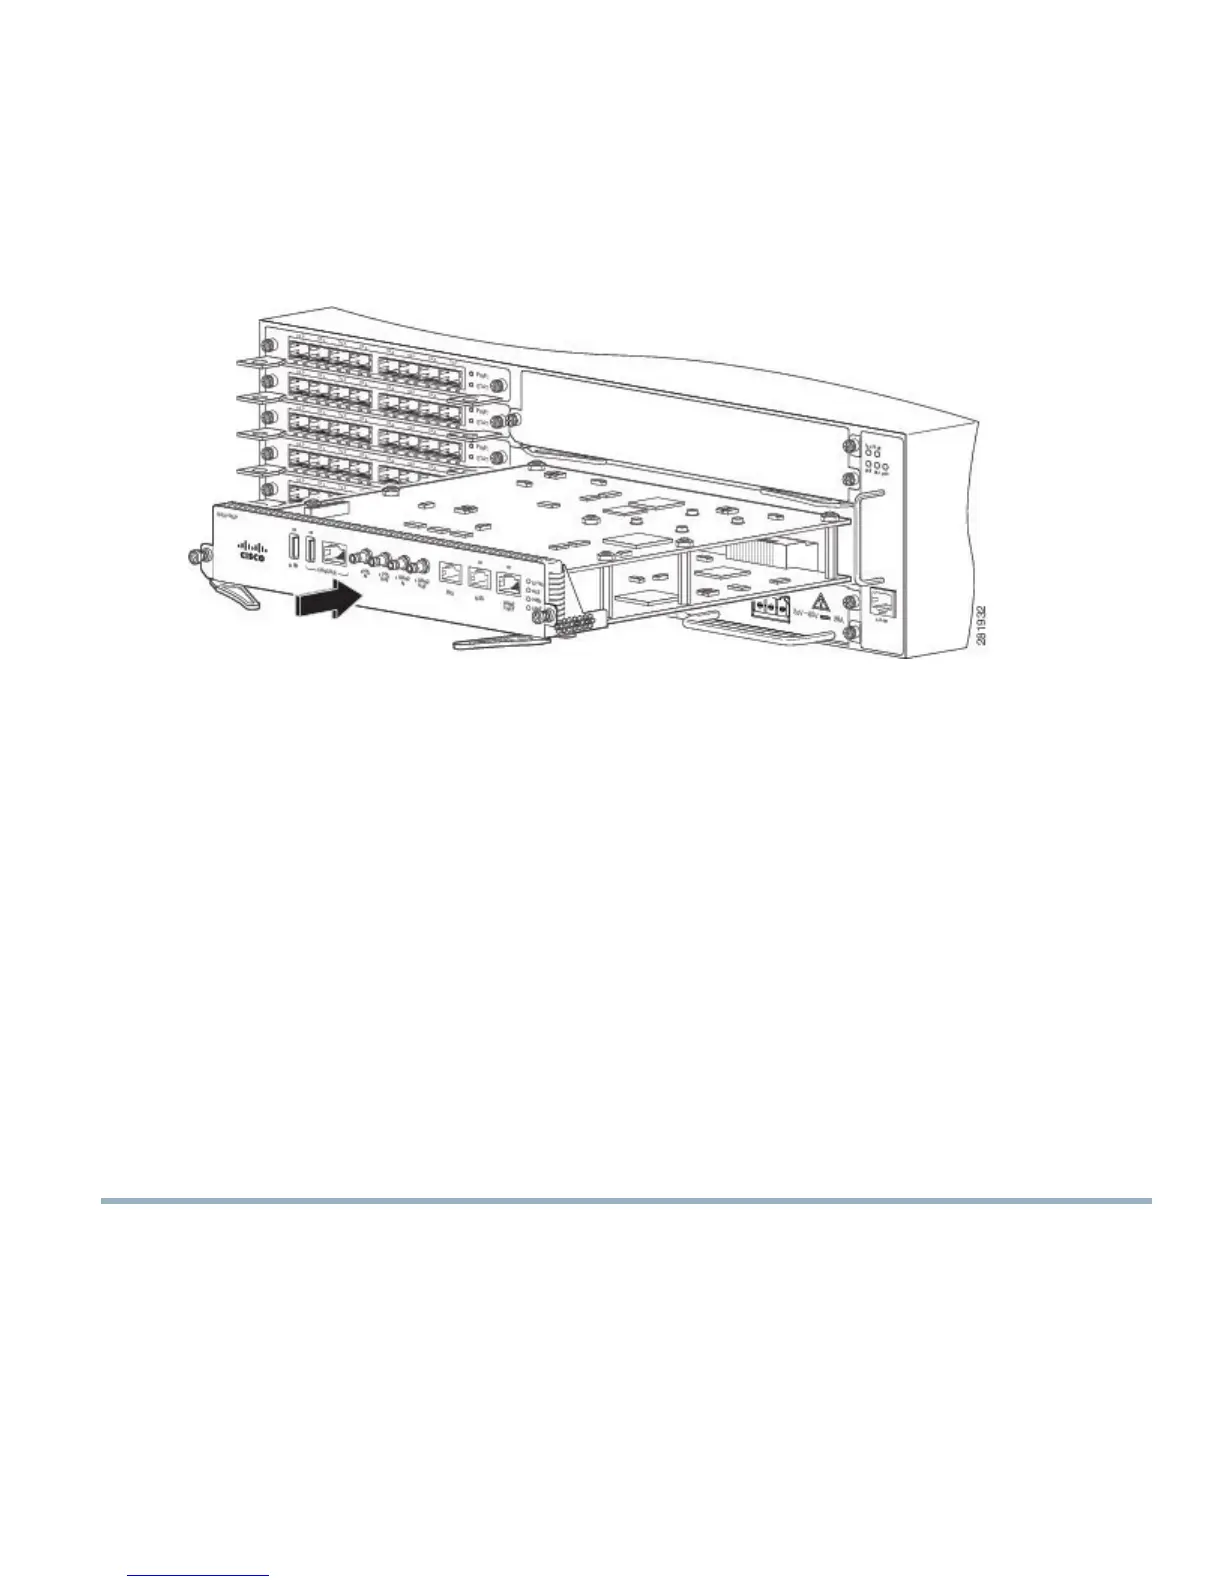
Figure 9: Cisco ASR 903 Router RSP Installation
Step 4
Carefully slide the module into the slot until the EMI gasket on the module makes contact with the module in the adjacent
slot and both the ejector levers have closed to approximately 45 degrees with respect to the module faceplate.
If the top slot already has an RSP module installed, and you install a second RSP module in the slot below it,
be careful not to damage the EMI gasket of the bottom RSP module against the ejector levers of the top RSP
during insertion.
Caution
Step 5
While pressing down, simultaneously close both the ejector levers to fully seat the module in the backplane connector.
The ejector levers are fully closed when they are flush with the module faceplate.
Step 6
Tighten the two captive installation screws on the module. The recommended maximum torque is 5.5 in.-lb (.62 N-m).
Make sure that the ejector levers are fully closed before tightening the captive installation screws.Note
Step 7
Verify that the captive installation screws are tightened on all of the modules installed in the chassis. This step ensures
that the EMI gaskets on all the modules are fully compressed in order to maximize the opening space for the new or
replacement module.
If the captive installation screws are loose, the EMI gaskets on the installed modules will push adjacent modules
toward the open slot, which reduces the size of the opening and makes it difficult to install the new module.
Note
Blank module filler plates (Cisco part number A900-RSPA-BLANK) should be installed in any empty chassis
slots to keep dust out of the chassis and to maintain consistent airflow through the chassis.
Note
When installing the cabling to an RSP, we recommend that you leave a service loop of extra cabling sufficient to
allow for fan tray removal.
Note
Close all unused RJ-45 and USB ports on the RSP module using the appropriate dust caps to prevent dust from
accumulating inside the cage. For information on dust caps, see Installing Dust Caps section in the Cisco ASR
903 and ASR 903U Aggregation Services Router Hardware Installation Guide.
Note
13

 Loading...