Step 2 Grasp the spring or alligator clip on the ESD wrist strap and momentarily touch the clip to a bare metal spot
(unpainted surface) on the rack. It is recommend that you touch the clip to an unpainted rack rail so that any
built-up static charge is then safely dissipated to the entire rack.
Step 3 Attach the alligator clip directly over the head of the system ground lug screw or to the system ground lug
barrel.
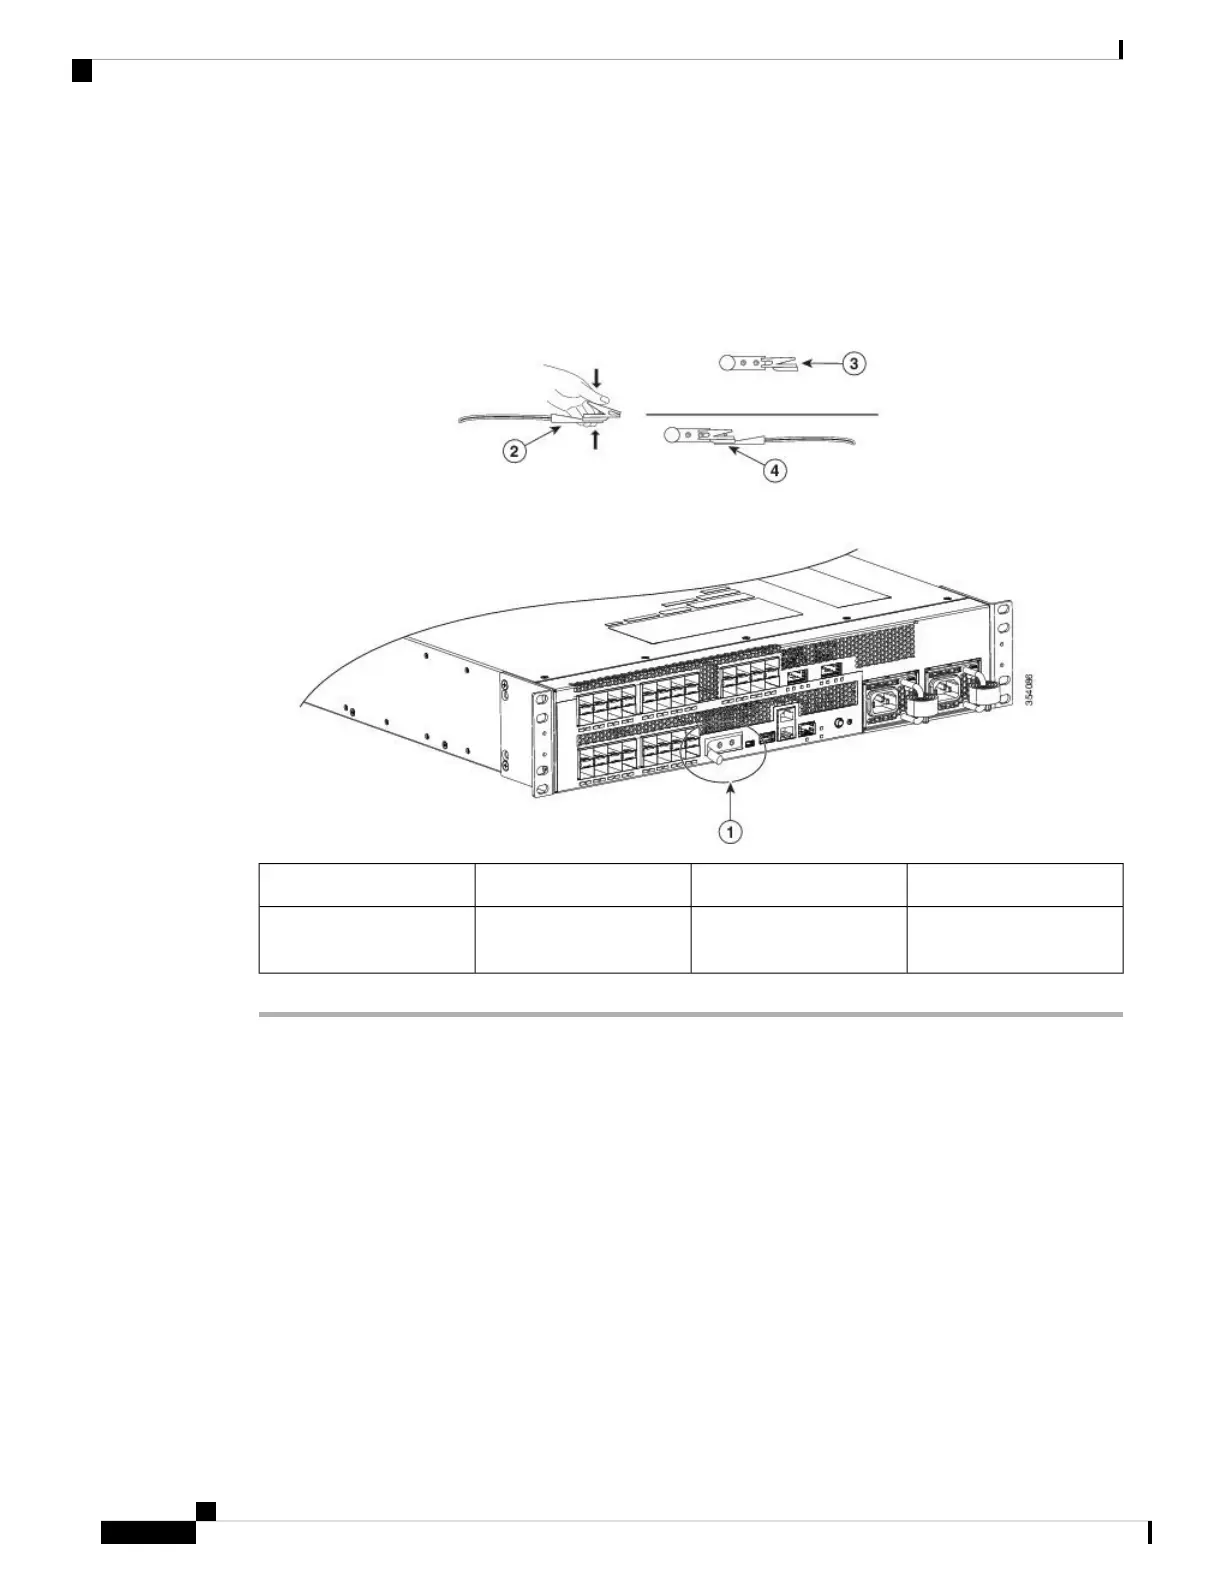
Figure 13: Attaching the ESD Wrist Strap to the System Ground Lug Screw
Alligator clip3System ground lug1
Clip attached to the
system ground lug
4ESD wrist strap2
Power Requirements
When preparing your site for the switch installation, follow these requirements:
• When installing two power supplies, connect each power supply to a separate input power source. If you
fail to do this, your system might be susceptible to total power failure due to a fault in the external wiring
or a tripped circuit breaker.
• To prevent a loss of input power, be sure that the total maximum load on each source circuit is within
the current ratings of the wiring and breakers.
• You might decide to use an uninterruptible power supply (UPS) to protect against power failures at your
site. Be aware when selecting a UPS that some UPS models that use ferroresonant technology can become
unstable when operating with the switch power supplies which use power factor correction (PFC). This
Catalyst 6840-X Switch Series Hardware Installation Guide
30
Preparing for Installation
Power Requirements
 Loading...