What to do next
Verify that you have installed the fan tray correctly. See Verifying Fan Tray Installation, on page 73.
Installing the Fan Tray from the Rear of the Chassis
Before you begin
• Read Guidelines for Removing and Installing a Fan Tray, on page 63.
• Enable the service mode on the chassis, if you are performing this task in a system that is powered on.
• Ensure that you have the following tools and accessories available:
• Phillips-head screwdriver
• Anti-static mat
Procedure
Step 1 On the replacement fan tray assembly, ensure that the two screws securing the fantray to the connector (on
the side with the fan STATUS LEDs) are tight. Be careful not to overtighten the screws.
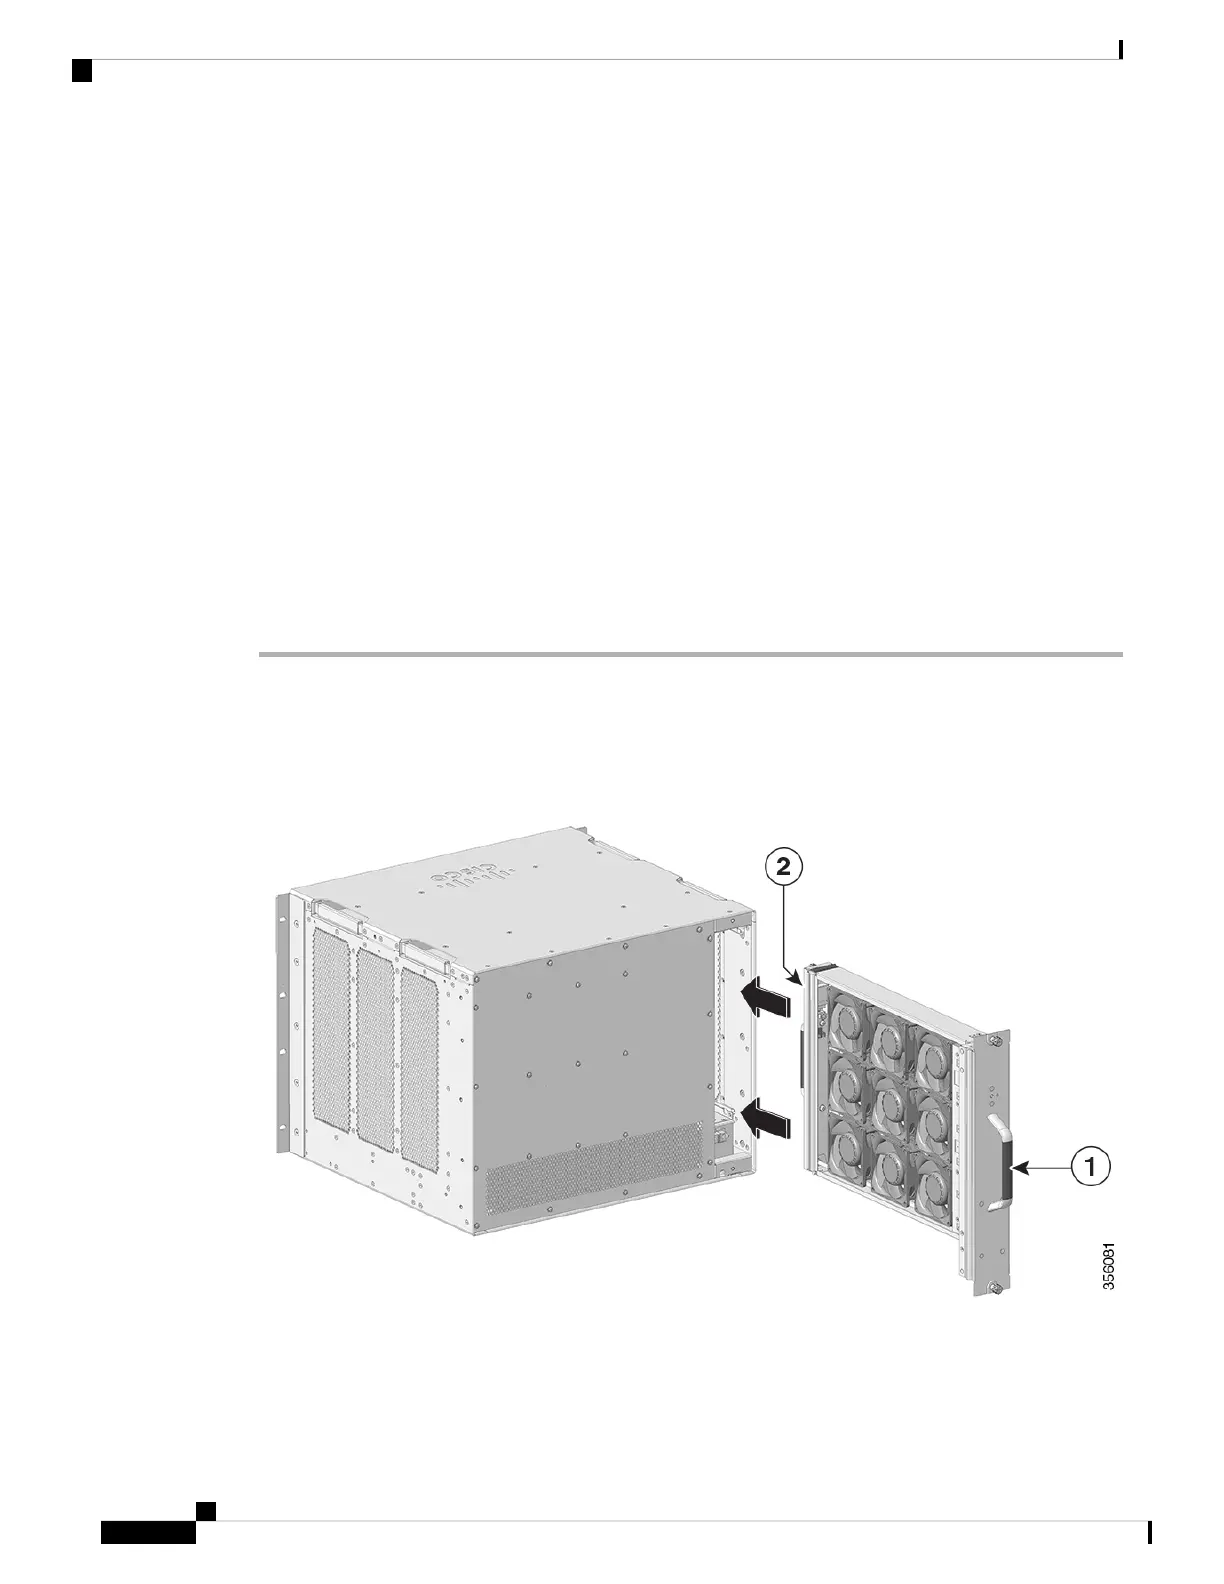
Step 2 Hold the fan tray assembly such that the side with the STATUS LED is inserted first.
Figure 38: Inserting the Fan Tray from the Rear of the Chassis
Cisco Catalyst 9600 Series Switches Hardware Installation Guide
72
Installing the Fan Tray
Installing the Fan Tray from the Rear of the Chassis
 Loading...