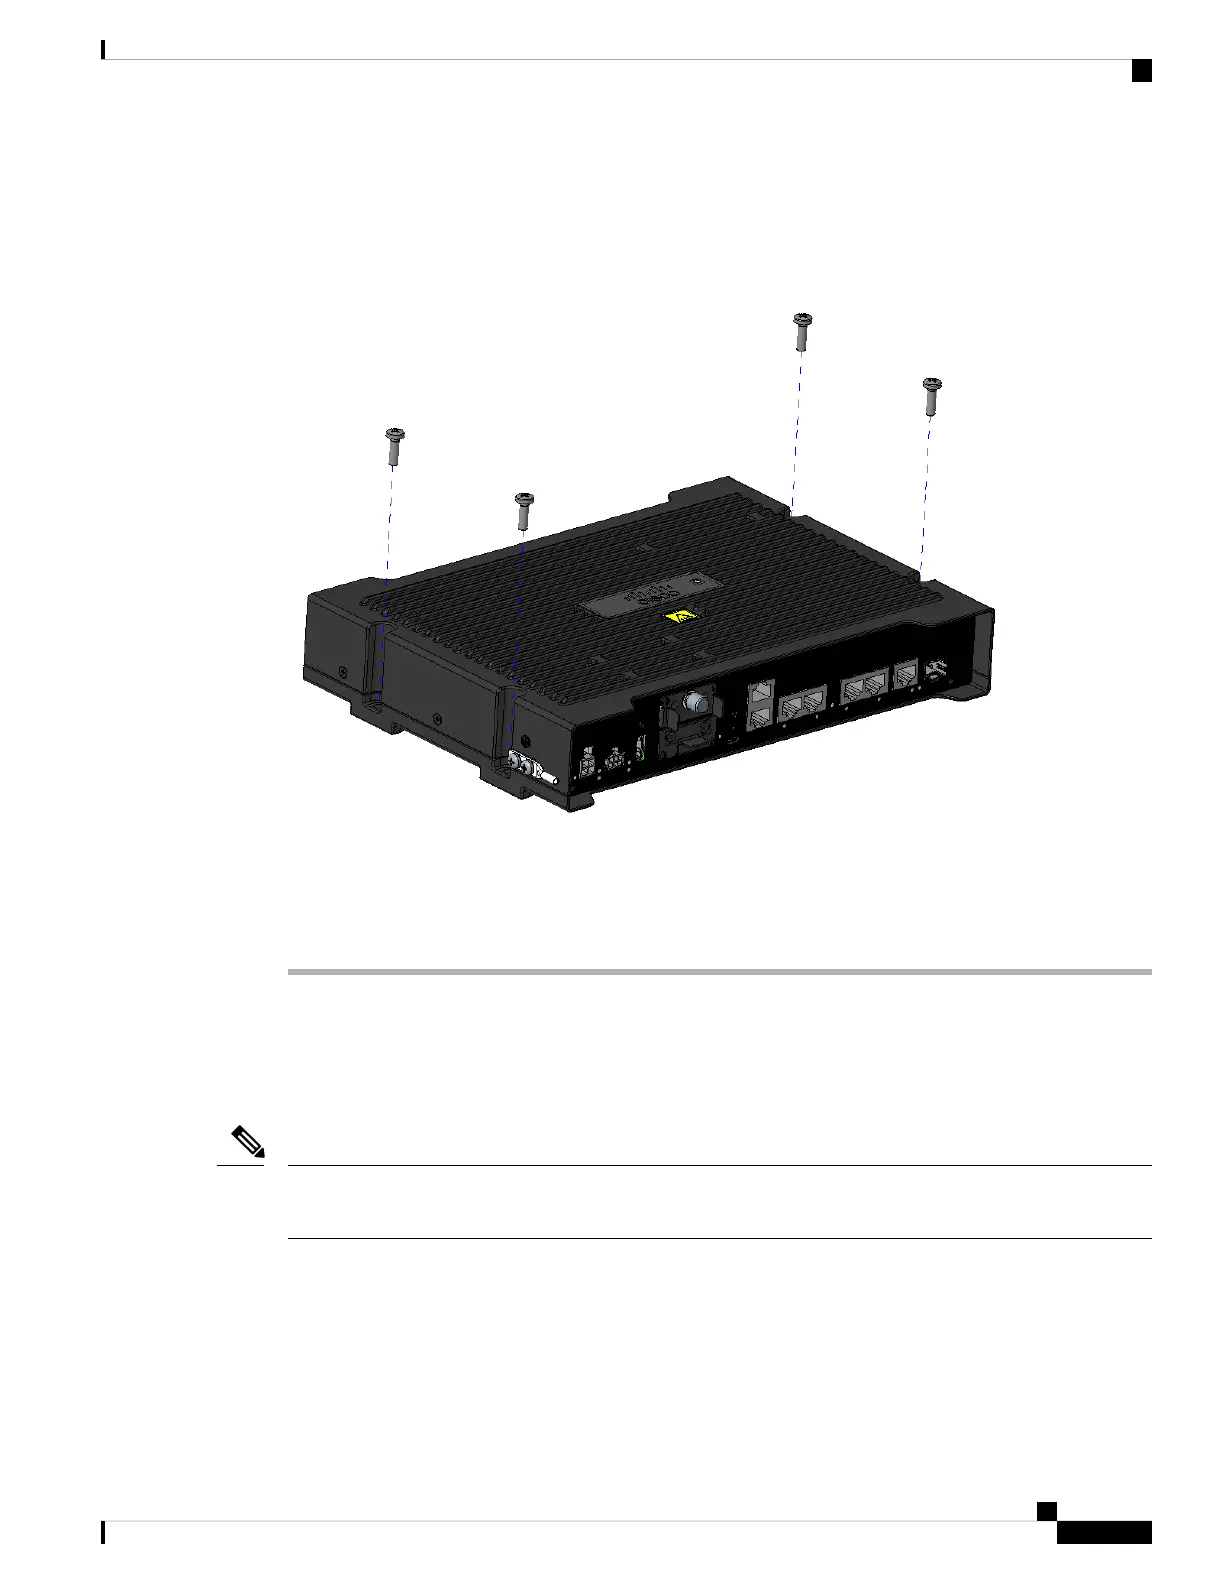
Step 2 Use four #10 screws when mounting the unit to the neighboring surface. The screws must be long enough to
penetrate at least 1.0 inch (25.4 mm) into the supporting wood or metal wall stud. See the following figure
for guidance.
Figure 7: Mounting Holes
Step 3 Route the cables so that they do not put a strain on the connectors or mounting hardware.
If you are mounting the device into a hollow wall, ensure that the wall material can support the
router's weight. Use appropriate wall anchor mounts.
Note
Installing a DIN Rail
The DIN rail kit must be ordered separately. The Cisco part number is IR1800-DINRAIL.
The DIN rail brackets come assembled in horizontal orientation. If your installation requires vertical orientation,
disassemble the components and reassemble them.
Note
Cisco Catalyst IR1800 Rugged Series Router Hardware Installation Guide
27
Installing the Router
Installing a DIN Rail
 Loading...