10
Cisco XR 12000 Series Router Ethernet Line Card Installation
OL-7861-01
Removing and Installing a Line Card
• Avoid contact between the Ethernet line cards and clothing. The wrist strap protects the board from
ESD voltages on the body only; ESD voltages on clothing can still cause damage.
Warning
For safety, periodically check the resistance value of the ESD strap. The measurement should be
between 1 and 10 megohms.
Required Tools and Equipment
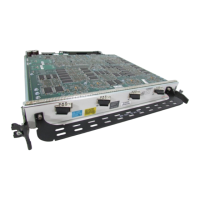
You need the following tools and parts to remove and install Ethernet line cards:
• Flat-blade or Phillips screwdriver
• ESD-preventive wrist or ankle strap and instructions
• Interface cables to connect the Ethernet line card with another router or switch
• Any EPAs, GBICs, SFP modules, or memory you need to install (and are not already installed)
Note If you need additional equipment, see Cisco.com or your service representative for ordering information.
Refer to the individual line card descriptions in the “Product Overviews” section on page 4 for more
information. Table 4 on page 4 summarized the hardware requirements for each Ethernet line card.
Removing and Installing a Line Card
The following sections provide procedures for removing or installing a line card:
• Guidelines for Line Card Removal and Installation, page 11
• Removing a Line Card, page 11
• Installing a Line Card, page 13
Note See the “Guidelines for Line Card Removal and Installation” section on page 11 before removing a line
card while power to the router is on.
Note The procedures in the following sections use illustrations of a Cisco 12012 Internet Router to support
the descriptions of removing and installing line cards. Although the card cages of the Cisco 12000 Series
Routers differ in the number of card slots, the designated use of slots and the process of removing and
installing a line card are basically the same. Therefore, separate procedures and illustrations for other
Cisco routers are not included in this publication.
 Loading...


