XI
!
179
PRACTICAL INFORMATION
Removing a wheel
) Park the vehicle on stable, fi rm
ground that is not slippery. apply
the parking brake.
) If your vehicle is equipped with
"Hydractive III+" suspension,
with the engine running at idle,
adjust the ground clearance to
its maximum height.
) Switch off the ignition and en-
gage fi rst gear or reverse gear
depending on any slope (for a
vehicle with automatic gearbox,
select position P ).
) If your vehicle is fi tted with
"Hydractive III+" suspension,
position the chock, whichever di-
rection the gradient may be in, in
front of the front wheel diametri-
cally opposite to the one to be
replaced.
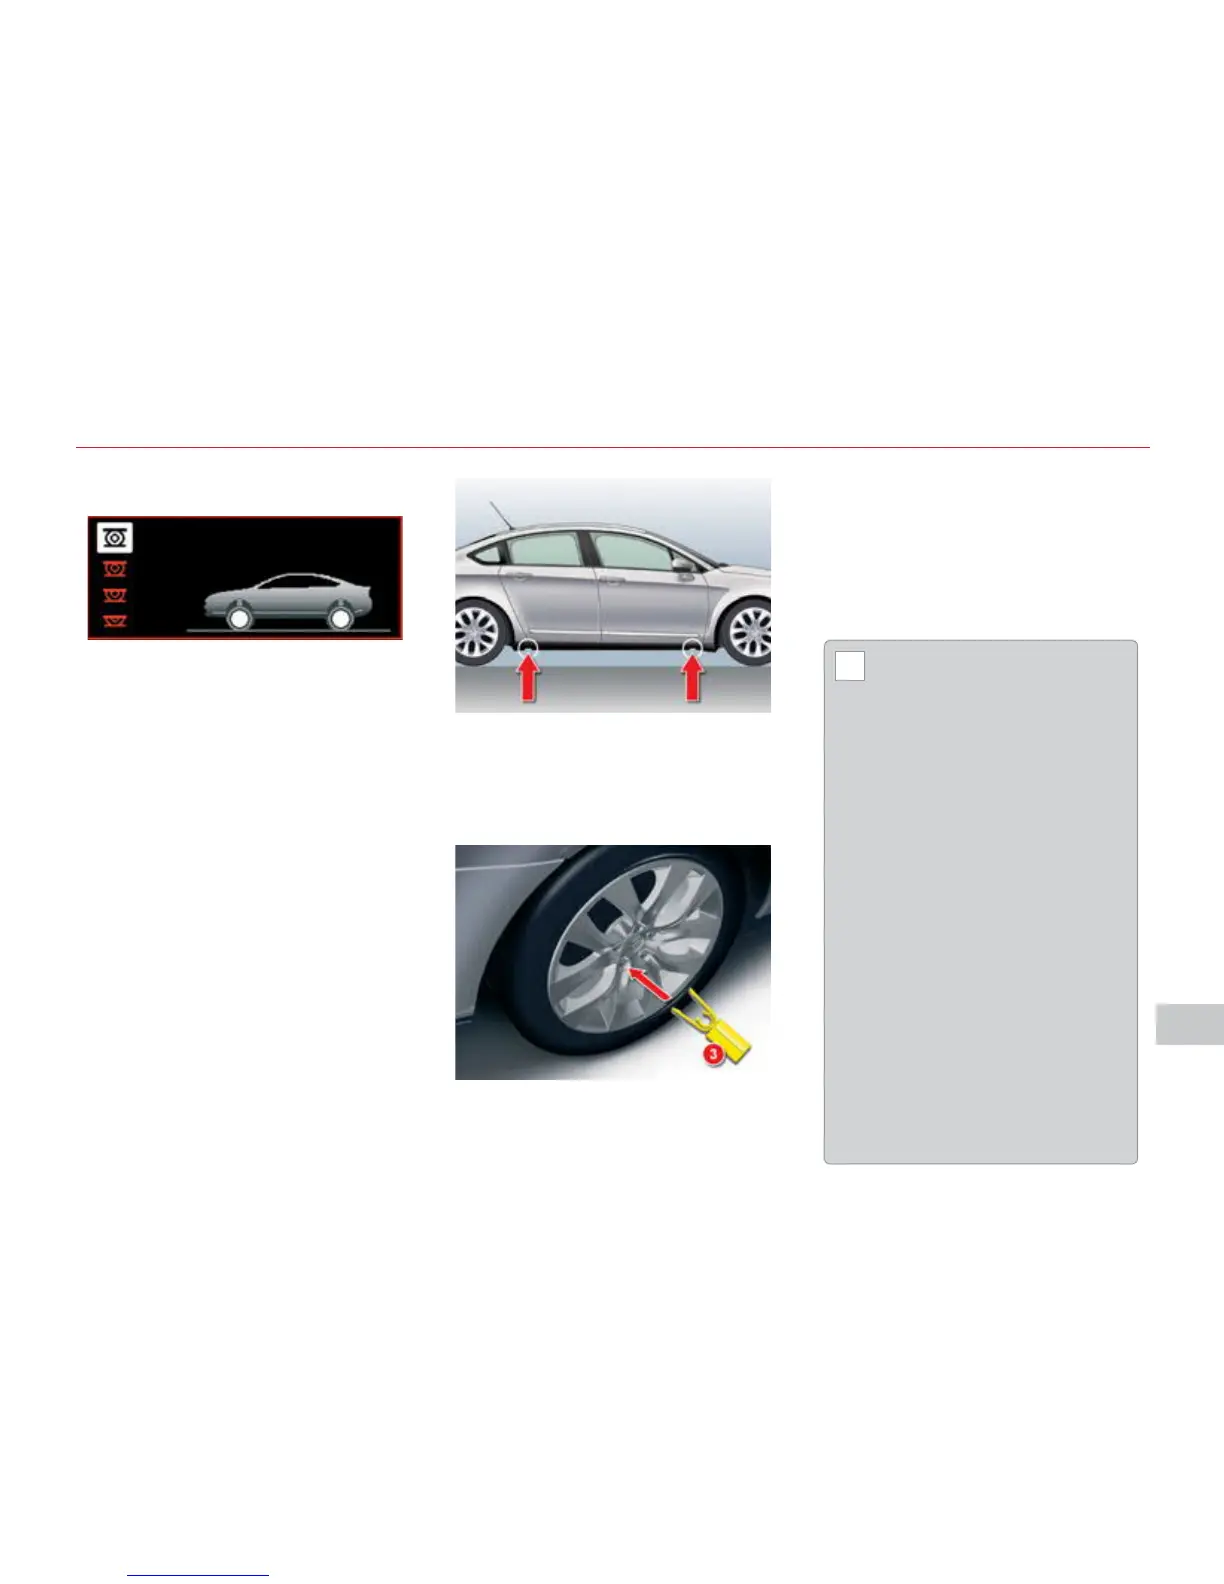
) Position the jack at one of the four
jacking-points provided on the un-
derbody close to the wheels, then
use the wheelbrace to unwind the
jack until it reaches the ground.
) Remove the protector from each
bolt using tool 3 .
) Slacken the wheel bolts.
Before positioning the
jack:
) Always adjust the vehicle’s
ground clearance to the "maxi-
mum height" position and re-
tain this adjustment for as long
as the jack is under the vehicle
(do not use the hydraulic ad-
justments),
) Immobilise your vehicle on hor-
izontal, stable and non-slippery
ground,
) Ensure that any passengers
have left the vehicle and are in
a safe place .
Never get underneath the vehicle if
it is supported only by the jack.
The jack and all of the tools are
specifi c to your vehicle. Do not use
them for any other applications.
Have the original wheel repaired
and refi tted as soon as possible.
) Continue to extend the jack until
the wheel is a few centimetres
off the ground.
) Undo the bolts, remove the wheel.

 Loading...